ARKNIGHTS ENDFIELD CONTINGENCY CONTRACT: RISK 52 GUIDE, TEAM COMPS & SHARING CODES
This guide combines community-submitted Contingency Contract clears, player-tested rotations, and multiple full video walkthroughs. Clears and sharing codes are sourced from the Arknights Endfield community; rotations are player-tested rather than official, so adapt them to your own gear levels.
Contingency Contract is Endfield's endgame mode with optional risk modifiers. Browse community sharing codes to import full teams, or jump to the Risk 40+ guide for a strategy that clears the hardest bracket. If you are starting the mode fresh, the Contingency Contract Re-Ignition launch-day strategy walks through your first session, the Sanctuary Rating, and reward priorities. Not sure who to bring? The Contingency Contract operator tier list ranks all 30 operators for the risk board. This page is the main Contingency Contract hub. It collects community clears from the Re-Ignition Experimental Operation season (June 19 to July 23, 2026) and is updated as new clears arrive; the team comps and risk strategies below carry over to future seasons.
What Is Contingency Contract in Arknights Endfield?
Contingency Contract is Endfield's endgame challenge mode, where you stack optional Test Criteria that buff enemies or weaken your squad in exchange for a higher total risk score. Your combined Total Test Criteria is the difficulty you clear, and Risk 20 already unlocks every reward in the shop. Unlike the original Arknights, the Endfield version is a real-time third-person action mode rather than tower defense, so positioning, kiting, and skill timing matter more than lane placement.
- Test Criteria
- Optional modifiers that buff enemies or weaken your squad in exchange for a higher risk score. Browse all 46 selectable criteria in the Modifier Dashboard.
- Total Test Criteria (Risk)
- The summed point value of all active criteria. Risk 20 unlocks all rewards; the ceiling sits near Risk 45+.
- Sanctuary Rating
- The performance grade for a clear, tied to the first-clear reward tiers.
- Sharing Code
- An importable team string that loads another player's full operator lineup for a given risk bracket.
Re-Ignition Event Recap (Official Stats)
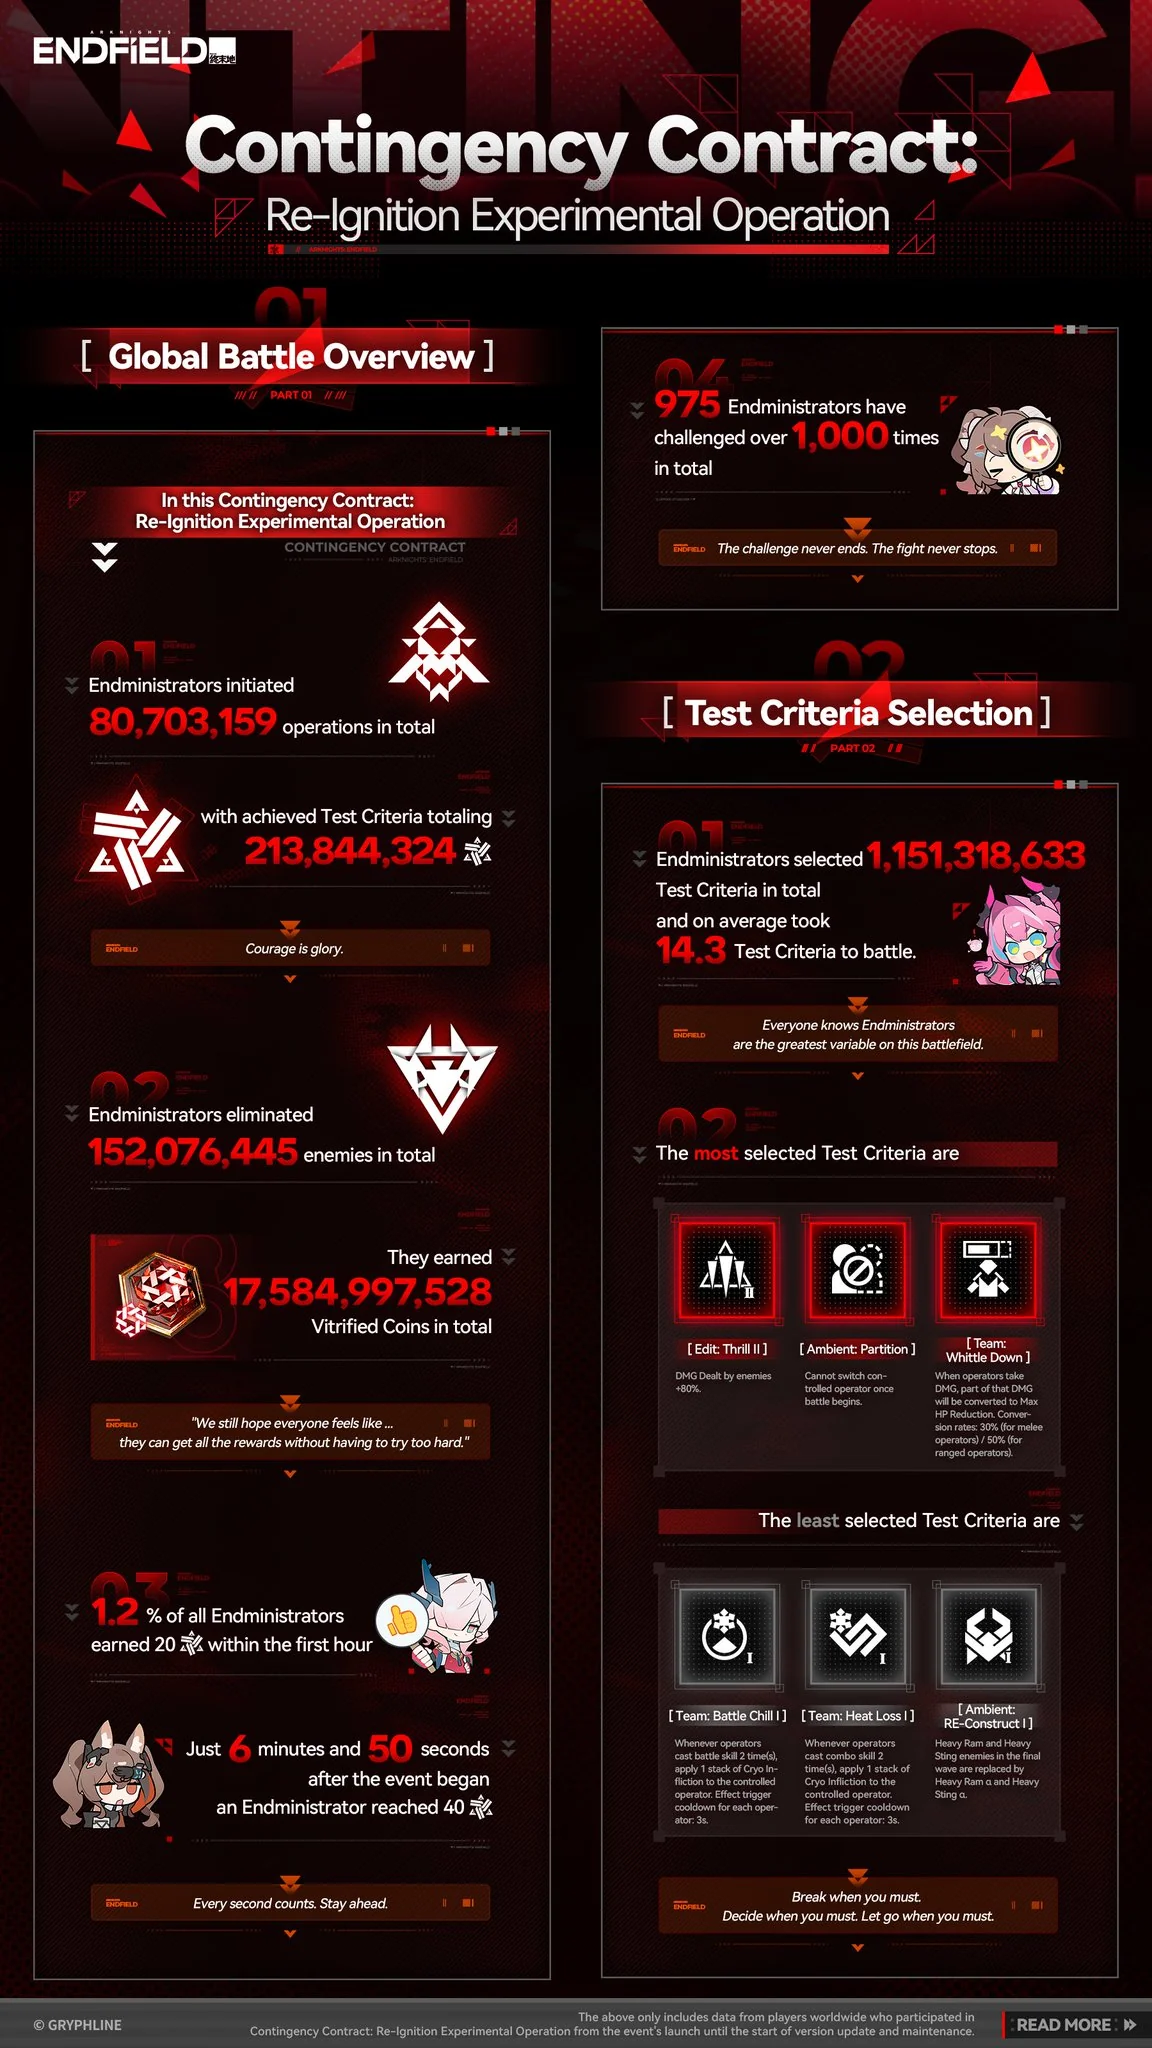
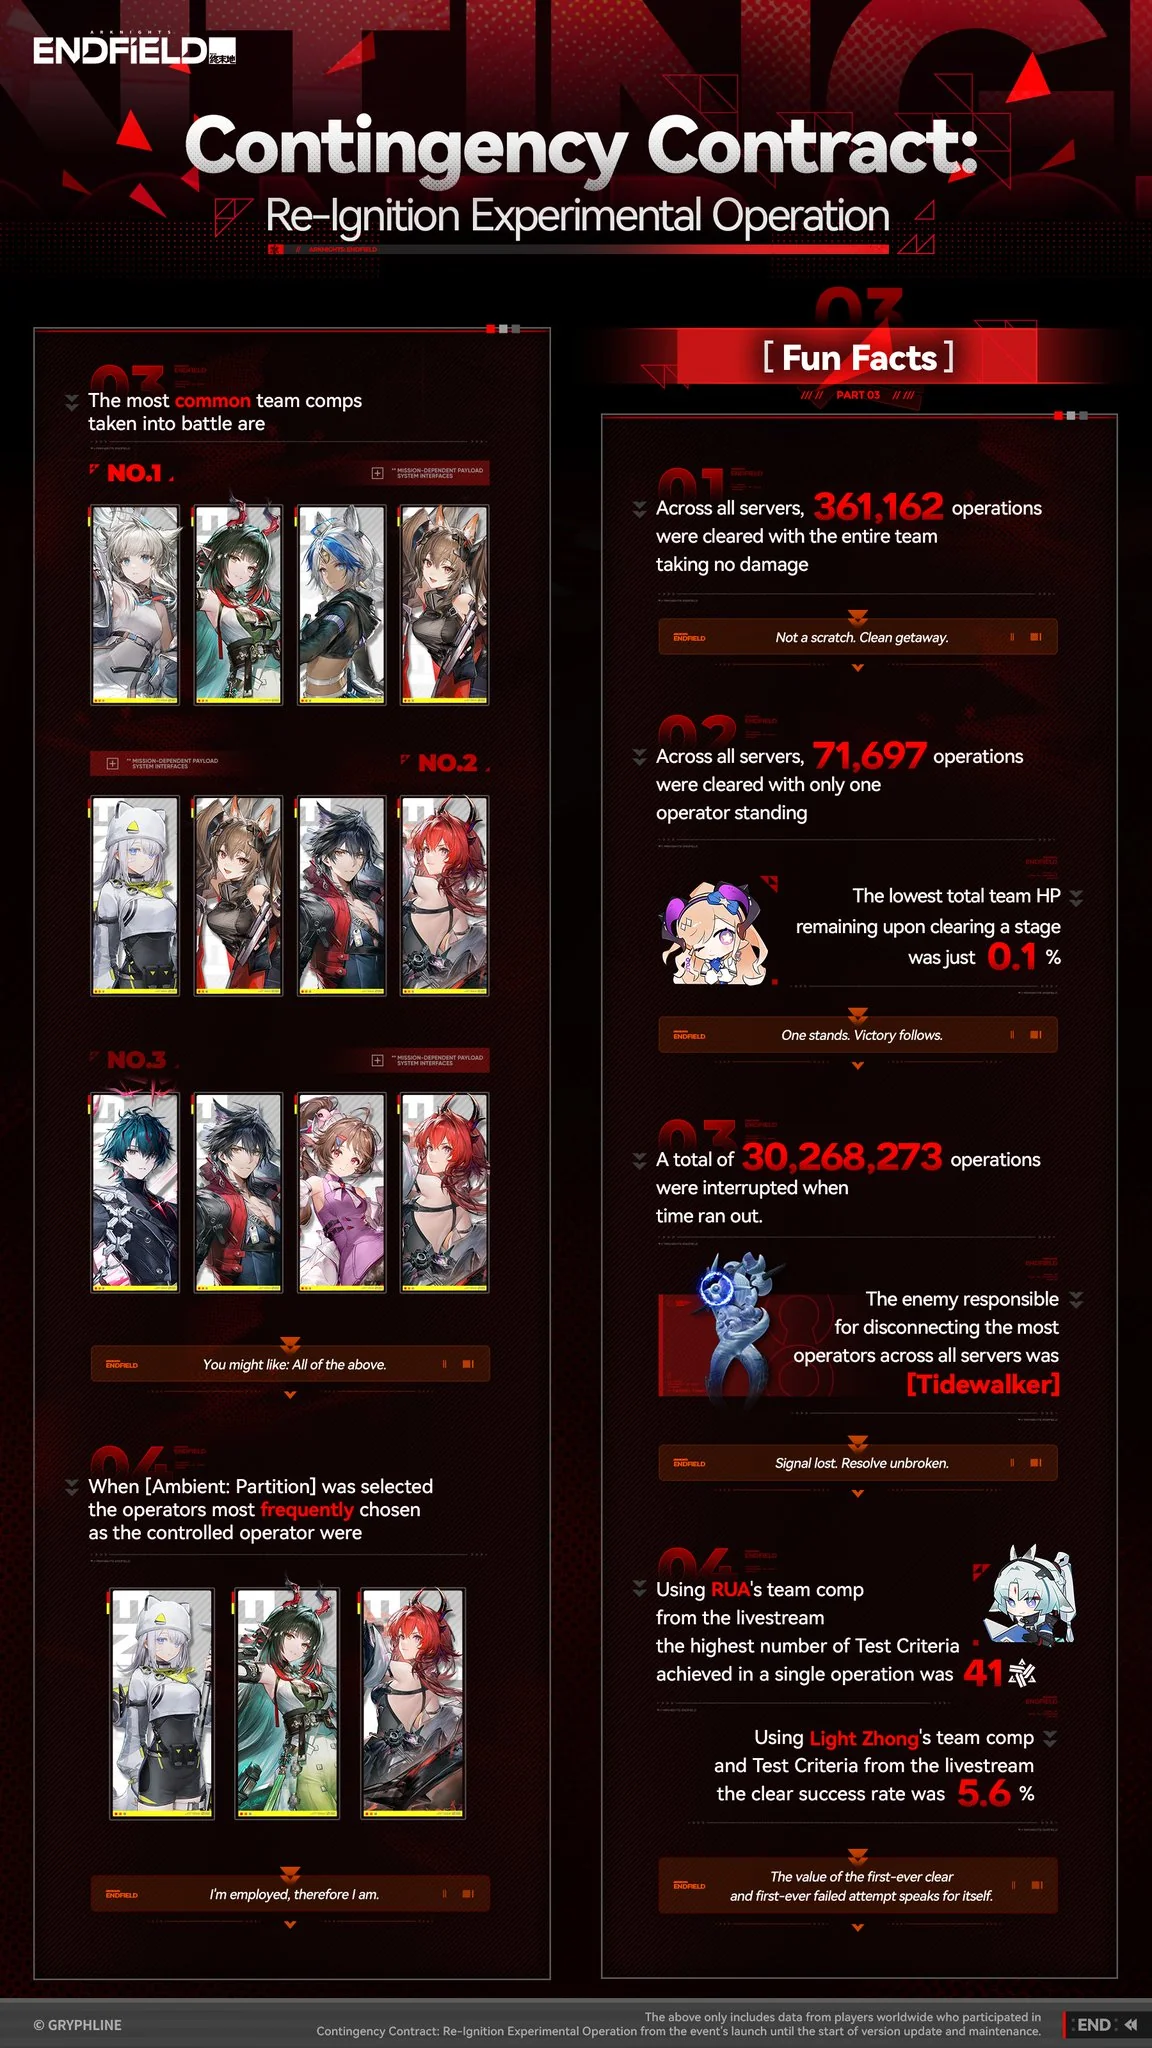
When the Re-Ignition Experimental Operation season closed on July 23, 2026, Gryphline published a set of official recap infographics with server-wide numbers. Across all servers, players ran 80,703,159 operations, eliminated 152,076,445 enemies, and selected 1,151,318,633 Test Criteria (an average of 14.3 per battle). The three most-picked criteria were Thrill II, Partition, and Whittle Down, the cheap-risk nodes that barely change how a run plays. On the flex side, 361,162 operations were cleared with the whole team taking zero damage, 30,268,273 ran out the clock, and Tidewalker disconnected more operators than any other enemy.
How to Unlock Contingency Contract
Contingency Contract is gated behind two requirements: finish the Paving the Way main story mission in Chapter I, and reach Authority Level 30. Once both are done, the mode opens for the duration of the current season and you can jump straight to a Risk 20 clear for the full reward set.
Each run lets you stack Test Criteria until you hit the ceiling of Total Test Criteria 54, though you never need anywhere near that for rewards. The first time you clear certain thresholds you also earn a Sanctuary Rating that shows off the run:
- Orange rating unlocks on your first clear at 20+ Total Test Criteria, which is also the point where every shop reward is secured.
- Red rating unlocks on your first clear at 35+ Total Test Criteria, a genuine high-risk push that most players treat as a bragging-rights milestone rather than a reward gate.
Because higher-tier criteria auto-clear the lower tiers of the same risk, hitting Risk 20 (and the orange rating) is far easier than the number suggests. New players should unlock the upper row of modifiers first, then build toward 20 at their own pace across the event window.
Contingency Contract Rewards and Vitrified Coin Shop
All Contingency Contract rewards run through Vitrified Coins, the event currency you spend at the Secret Sanctuary shop. The important thing to know up front: reaching Risk 20 secures every meaningful reward. You do not need to push high risk to clear the shop, so treat anything above Risk 20 as a leaderboard chase, not a loot gate.
Earning Vitrified Coins
Coins come from three mission tracks:
- Cycle missions (7 total, refreshing every few days): 500 coins each. These are your steady drip across the event.
- Test Criteria missions: 1,250 coins each for clearing at 5+, 10+, 15+, and 20+ Total Test Criteria, so 5,000 coins total on the way to the Risk 20 cap.
- Phase goals: earn 8,500 coins total to claim the Contingent Inscription portrait frame, and complete 12 contract missions for the Ancient Contract portrait.
Secret Sanctuary Shop
The shop stocks progression materials, gear-crafting resources, and two cosmetics. Prioritize the high-value progression items (T-Creds, Protohedron, the Advanced Progression Selection Crate, and the Advanced Cognitive Carrier) before spending on crafting materials. Prices and stock for the Re-Ignition season:
| Item | Cost (Vitrified Coins) | Stock |
|---|---|---|
| T-Creds (10K) | 21 / 30 | 15 / 60 |
| T-Creds (500) | 5 | Unlimited |
| Protohedron (3) | 14 / 20 | 15 / 60 |
| Advanced Progression Selection Crate I | 21 | 10 |
| Advanced Cognitive Carrier | 15 | 30 |
| Mark of Perseverance | 60 | 10 |
| Oroberyl | 50 | 20 |
| Protoset (2) | 15 | 10 |
| Arms INSP Set (3) | 20 | 20 |
| Heavy Cast Die (2) | 15 | 10 |
| Coolant Gel | 10 / 15 | 30 / 30 |
| Gear-crafting materials (Metadiastima Photoemission Tube, D96 Steel Sample 4, Tachyon Screening Lattice, Quadrant Fitting Fluid, Triphasic Nanoflake) | 15 each | 15 each |
| Sticker: Contingency Contract (cosmetic) | 200 | 1 |
Where an item has two entries (for example T-Creds or Protohedron), the shop lists a cheaper limited batch and a second, slightly pricier batch. Reward, mission, and shop figures are sourced from the community Endfield wiki for the Re-Ignition season and can shift with future seasons.
Stage, Waves and Enemies
Every Re-Ignition operation is a single stage of four waves against enemies at Level 60. Knowing the wave order helps you plan burst windows and save your strongest cooldowns for the Effigy in wave 3 and the Tidalklast that anchors the final wave. The final boss is weak to Heat, which is a big part of why Combustion carries feel made for this season.
| Wave | Enemies |
|---|---|
| 1 | Ram ×3, Falsewings ×3, Heavy Sting ×1 |
| 2 | Mudflow ×3, Hedron ×3, Prism ×1, Tidewalker ×1 |
| 3 | Heavy Ram ×2, Effigy ×1 |
| 4 | Heavy Ram ×1, Heavy Sting ×1, Tidalklast ×1 |
If you select an Ambient: RE-Construct criterion, the Heavy Ram and Heavy Sting in the later waves are swapped for stronger α variants. These were among the five Test Criteria added in the Phase 2 update and are cheap risk points, which is a big reason the documented ceiling climbed past Risk 47.
Contingency Contract Sharing Codes by Risk Level
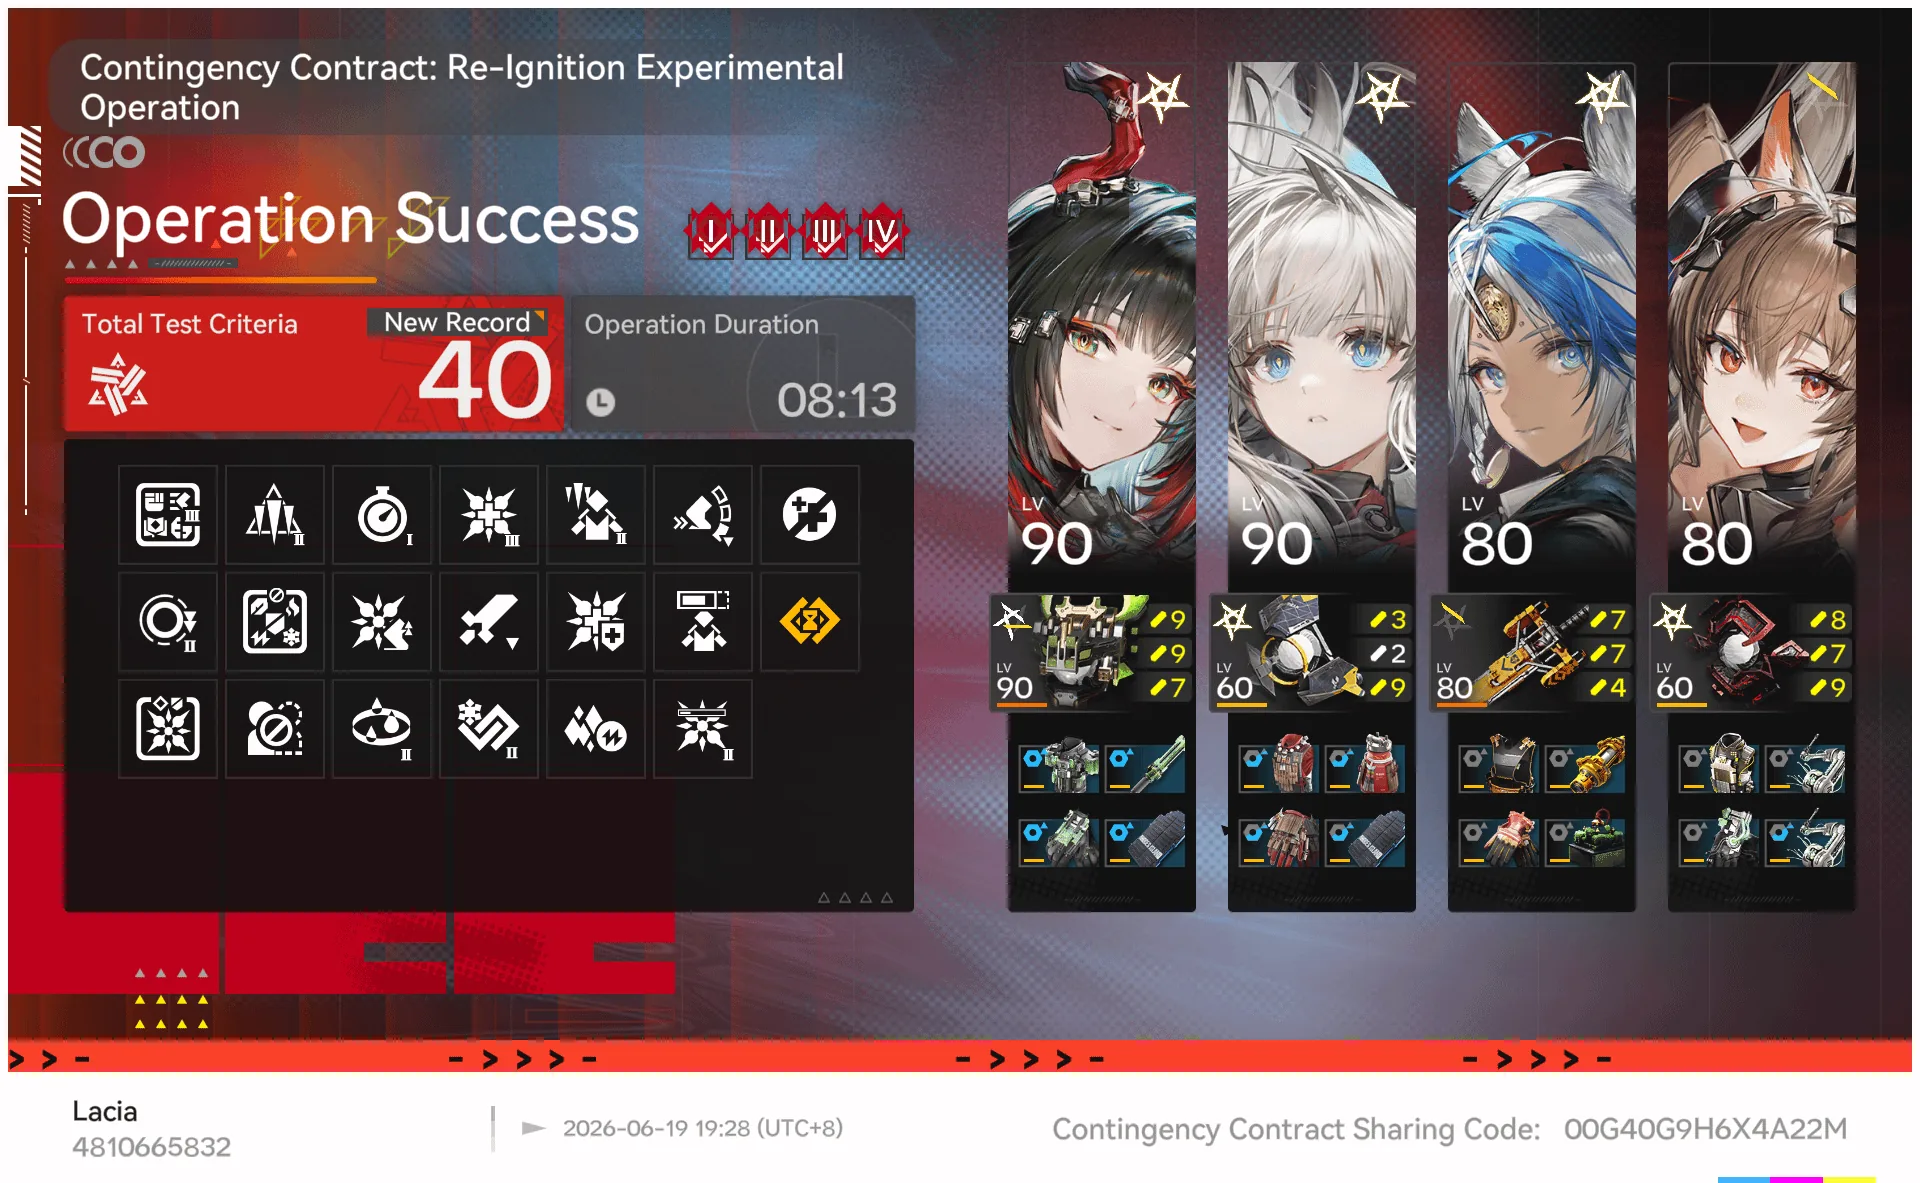
Below are 79 community clears captured from clear screenshots, sorted by risk bracket from Risk 20 up to the Risk 52 ceiling. Use the filters to jump to a bracket, then import the lineup that matches the risk you are pushing.
Risk 20-30 - Advanced
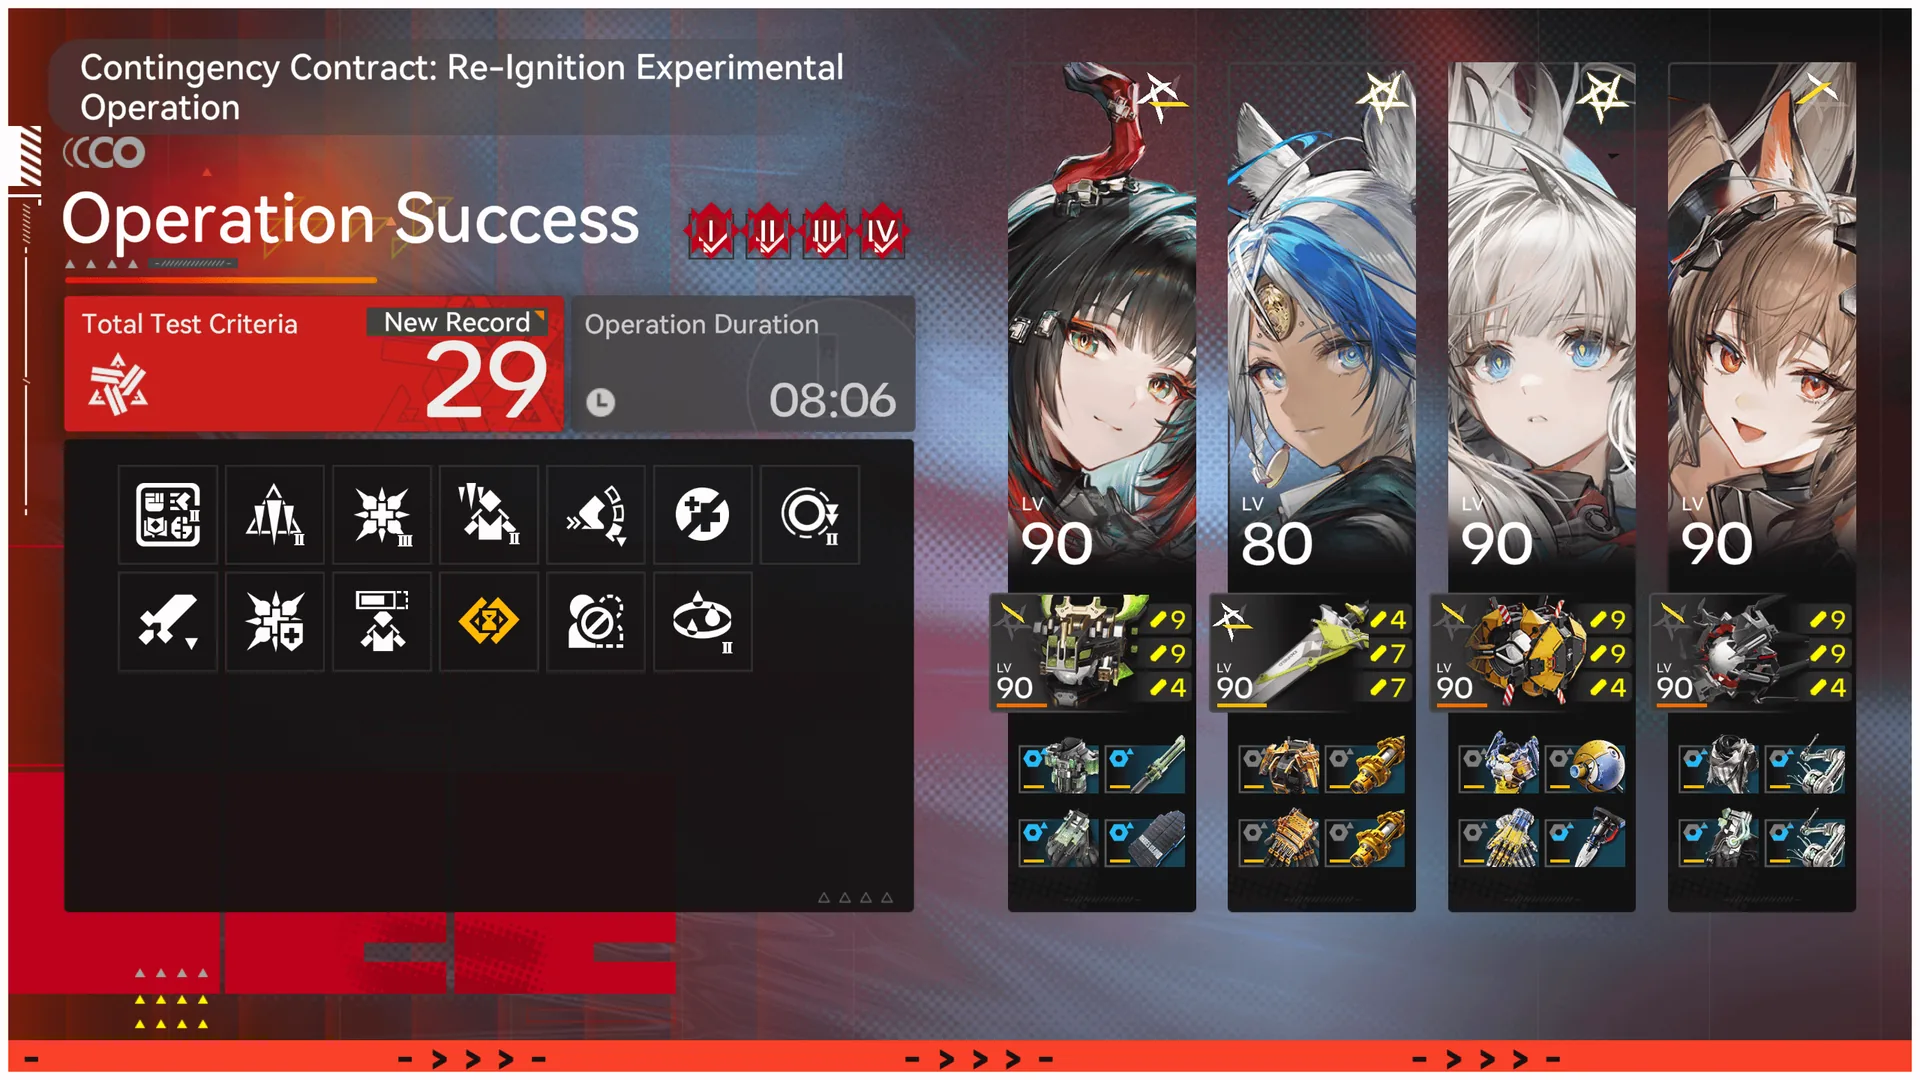 Lv 29
Lv 29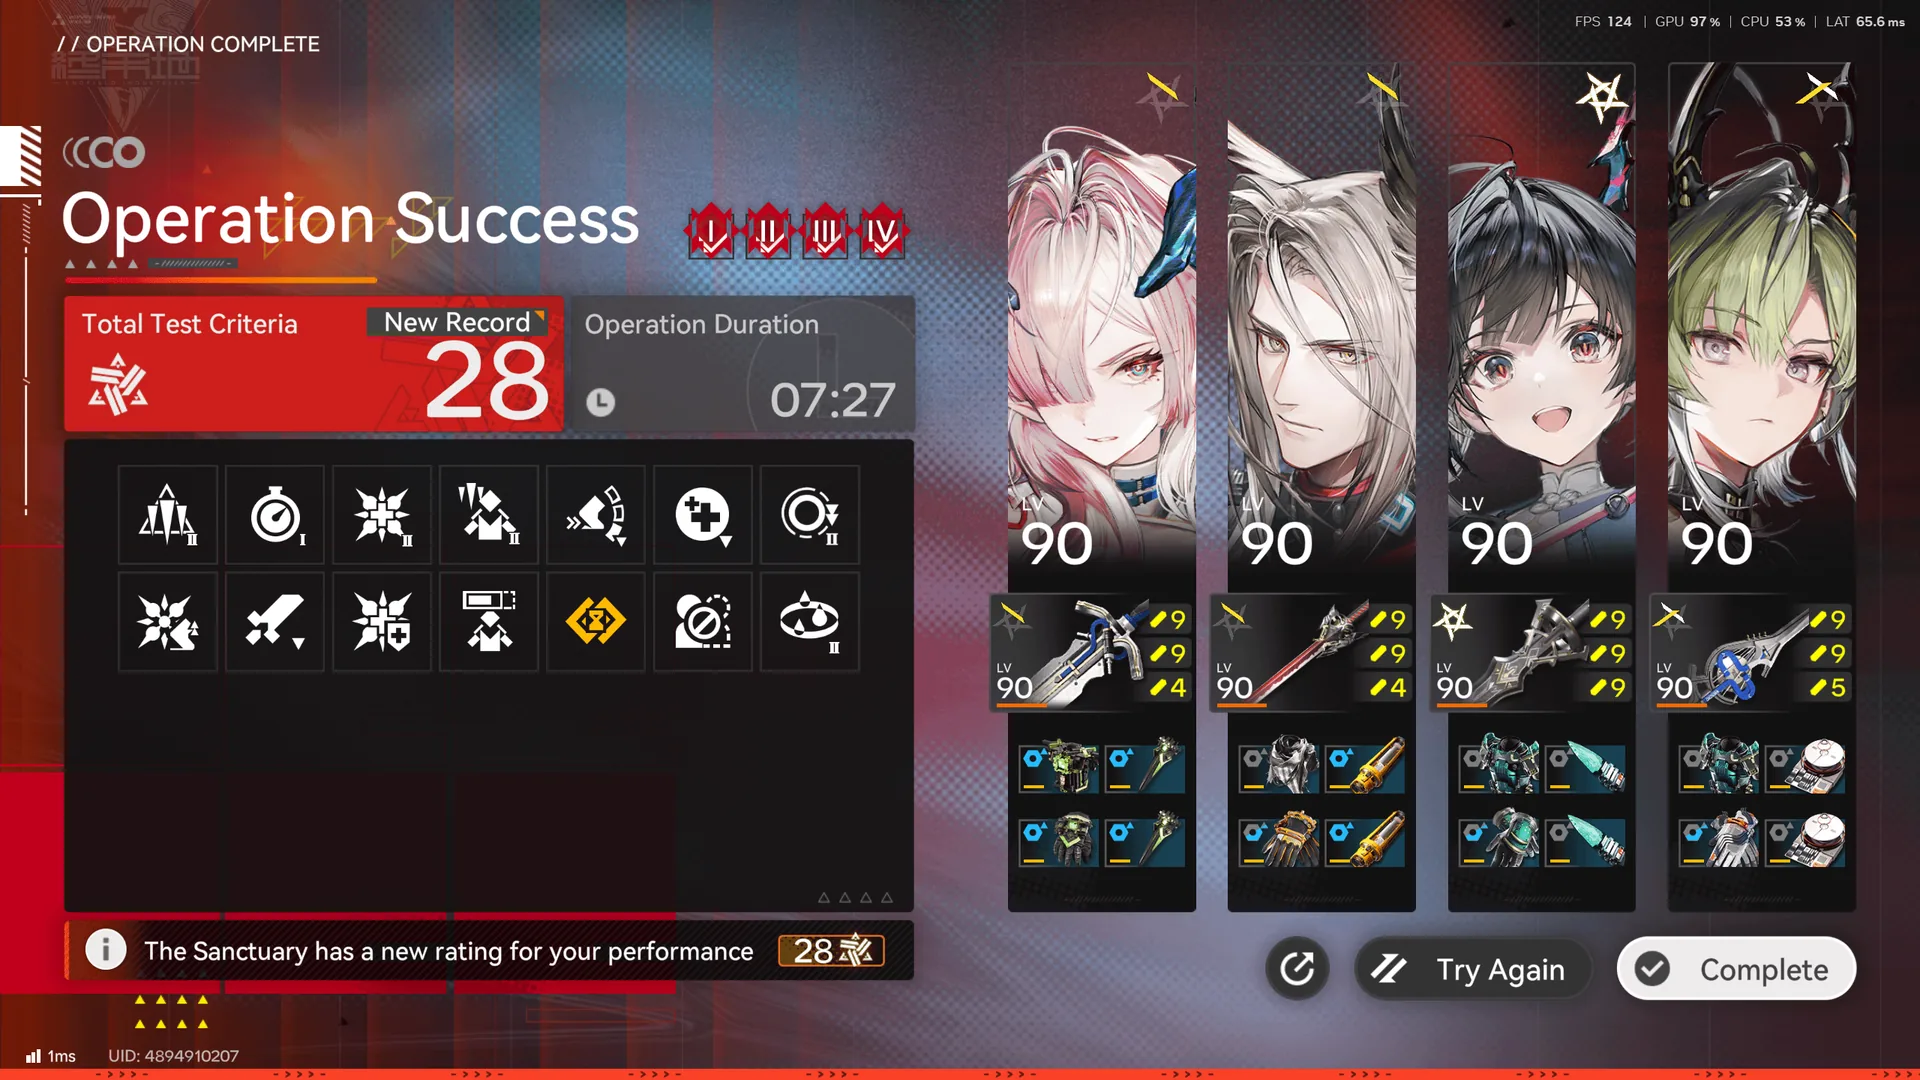 Lv 28
Lv 28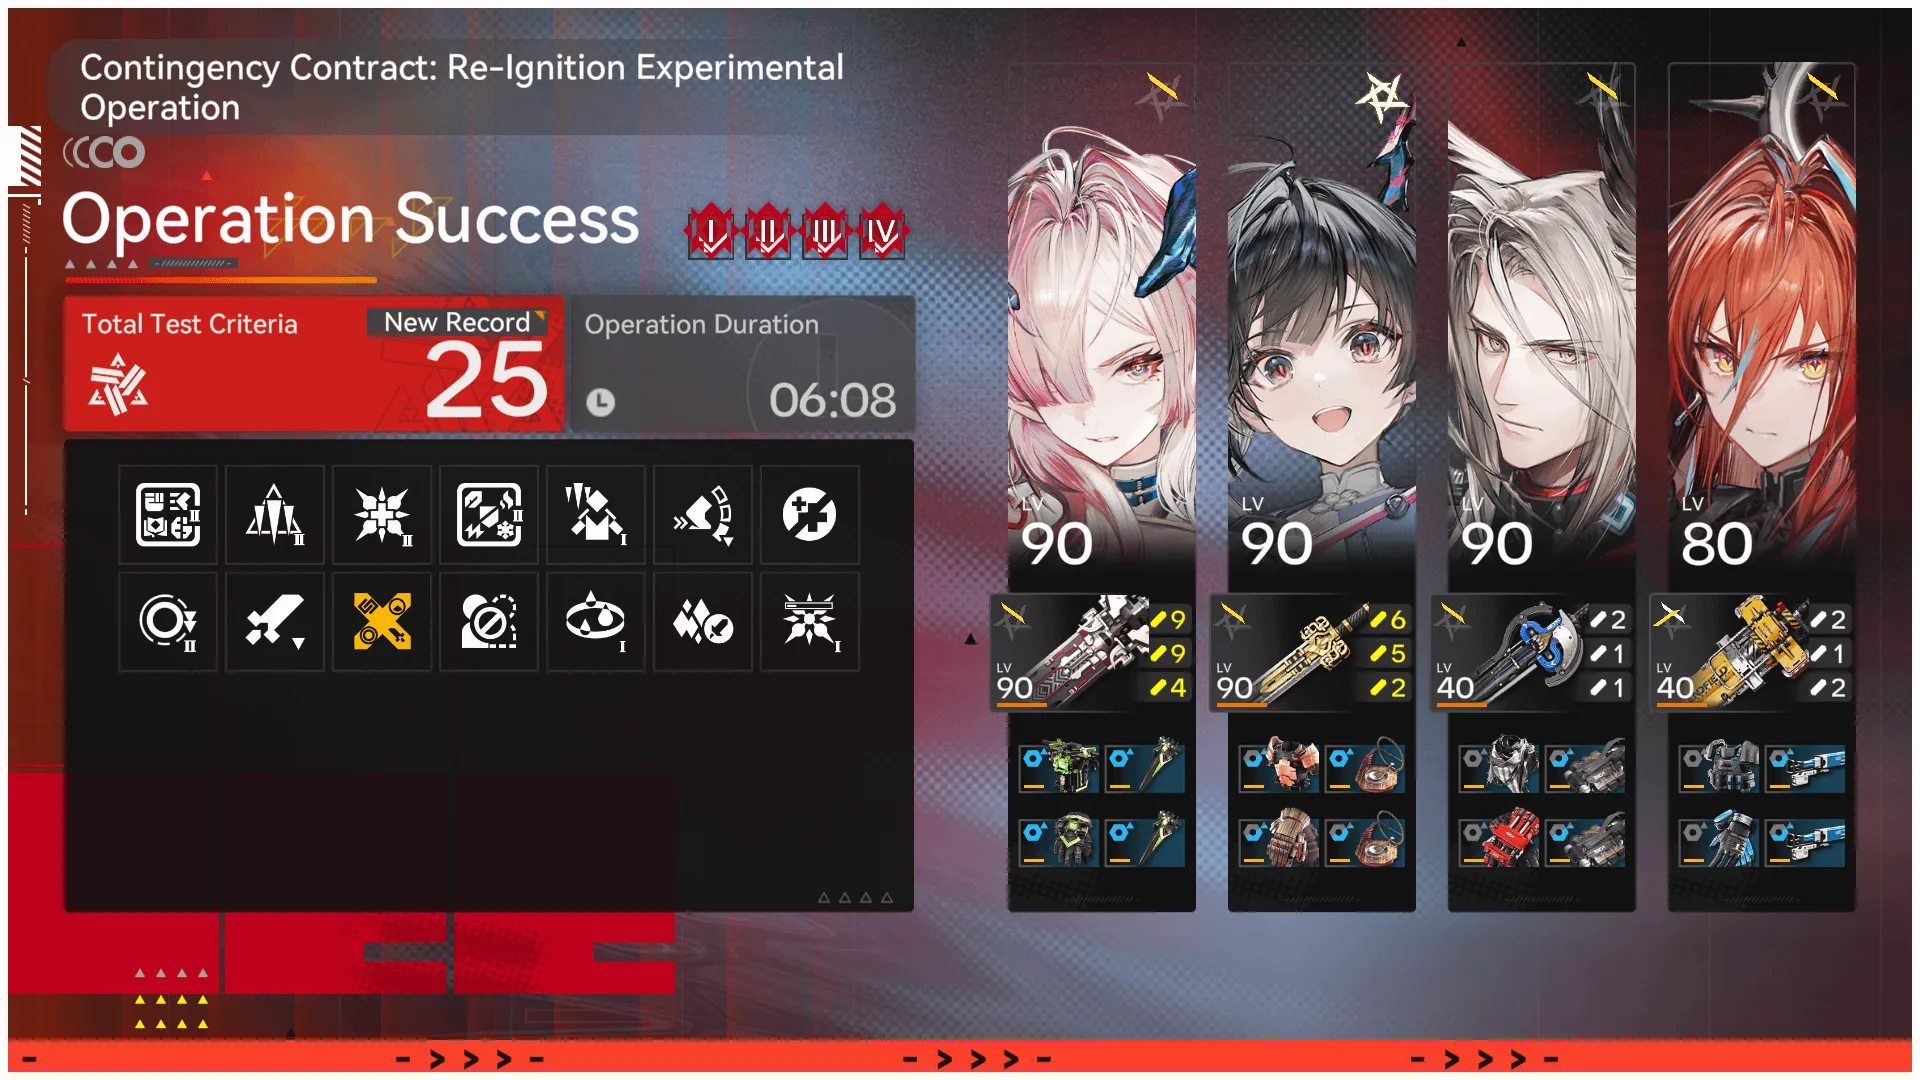 Lv 25
Lv 25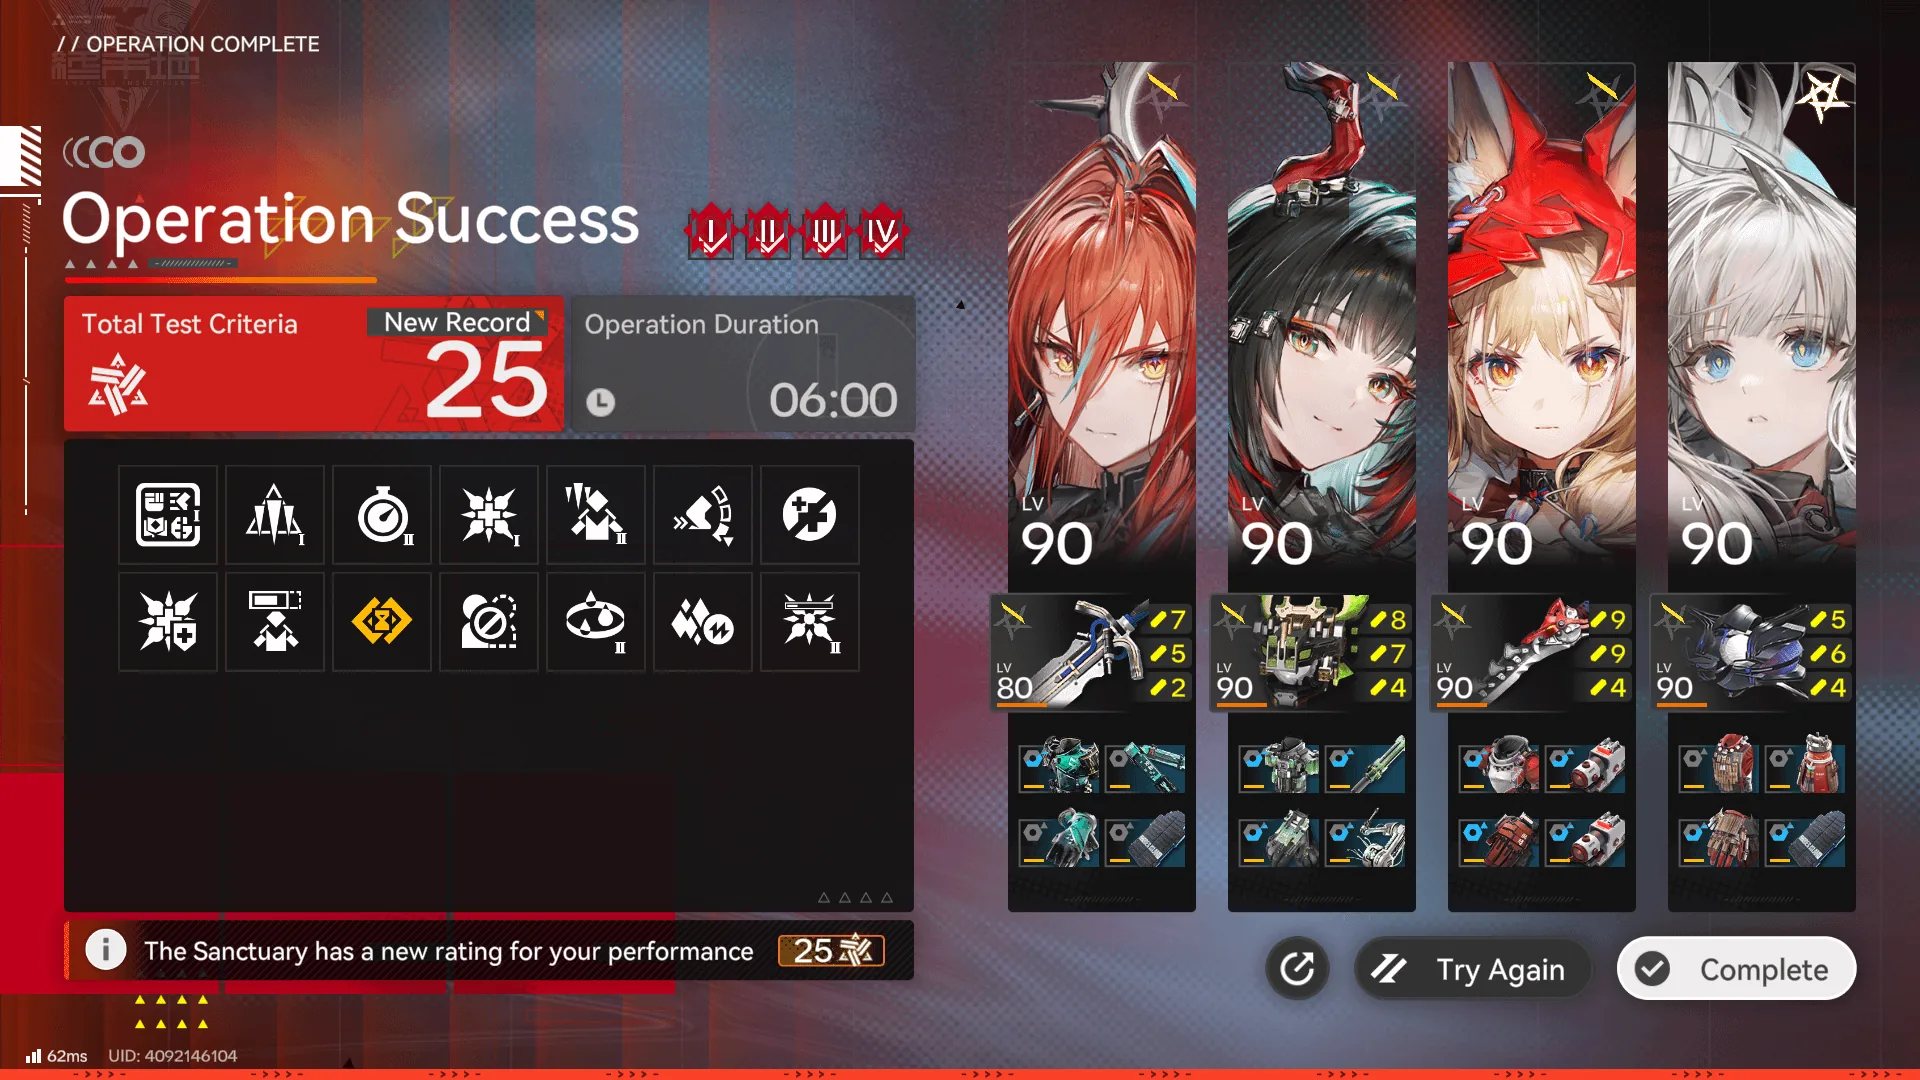 Lv 25
Lv 25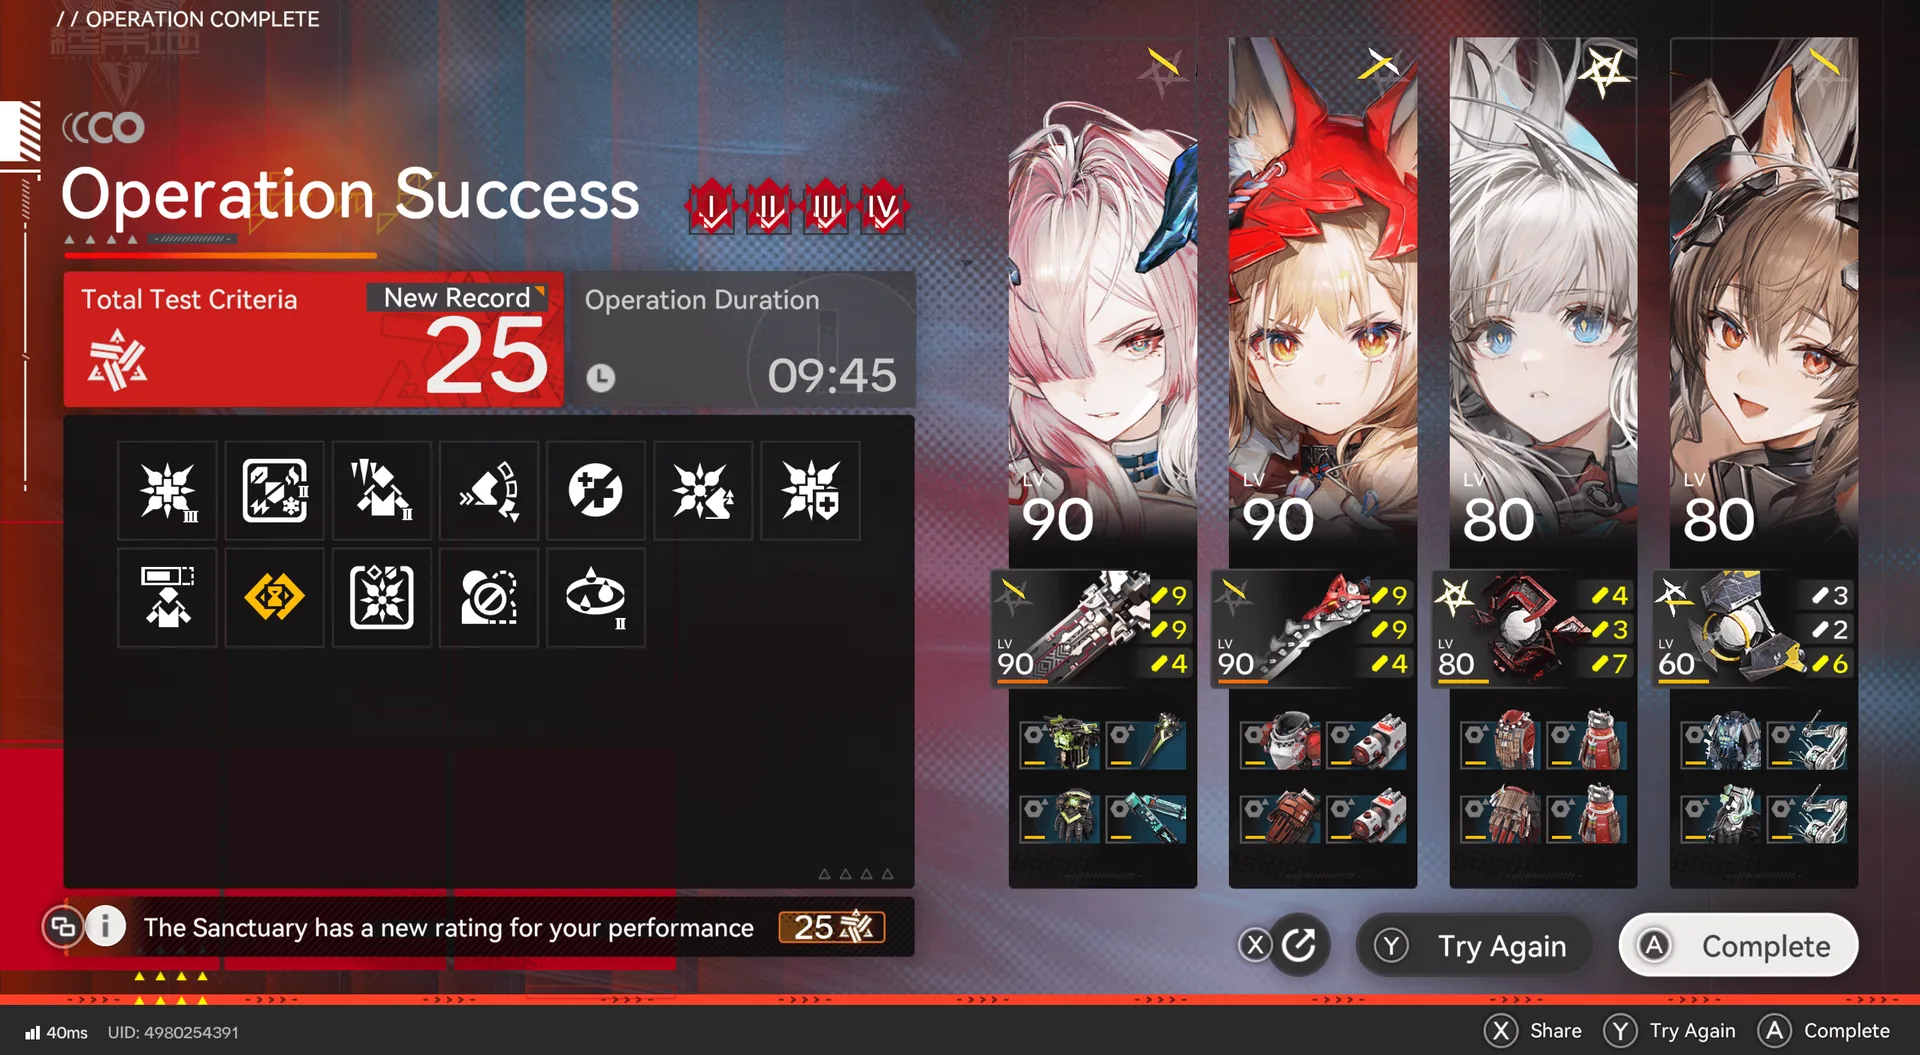 Lv 25
Lv 25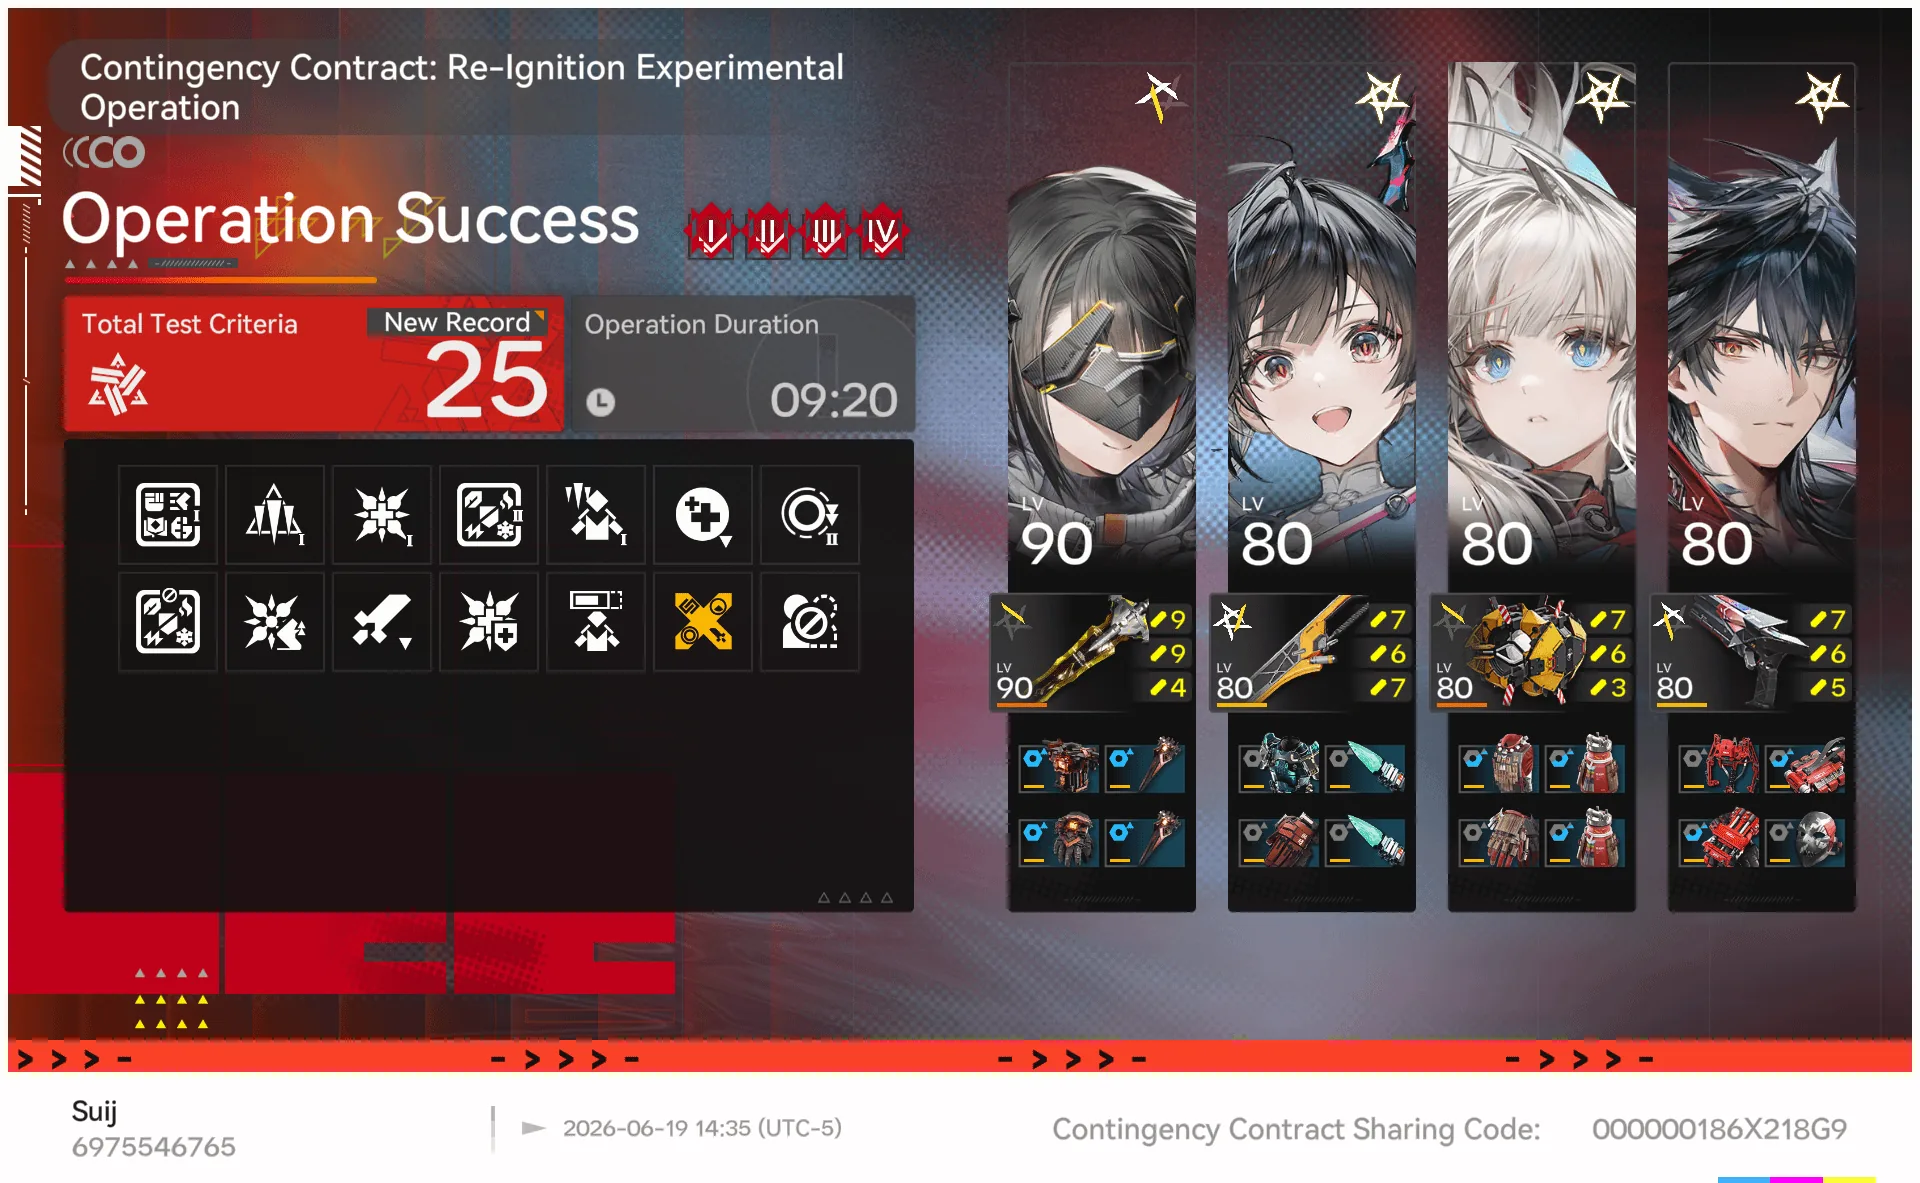 Lv 25
Lv 25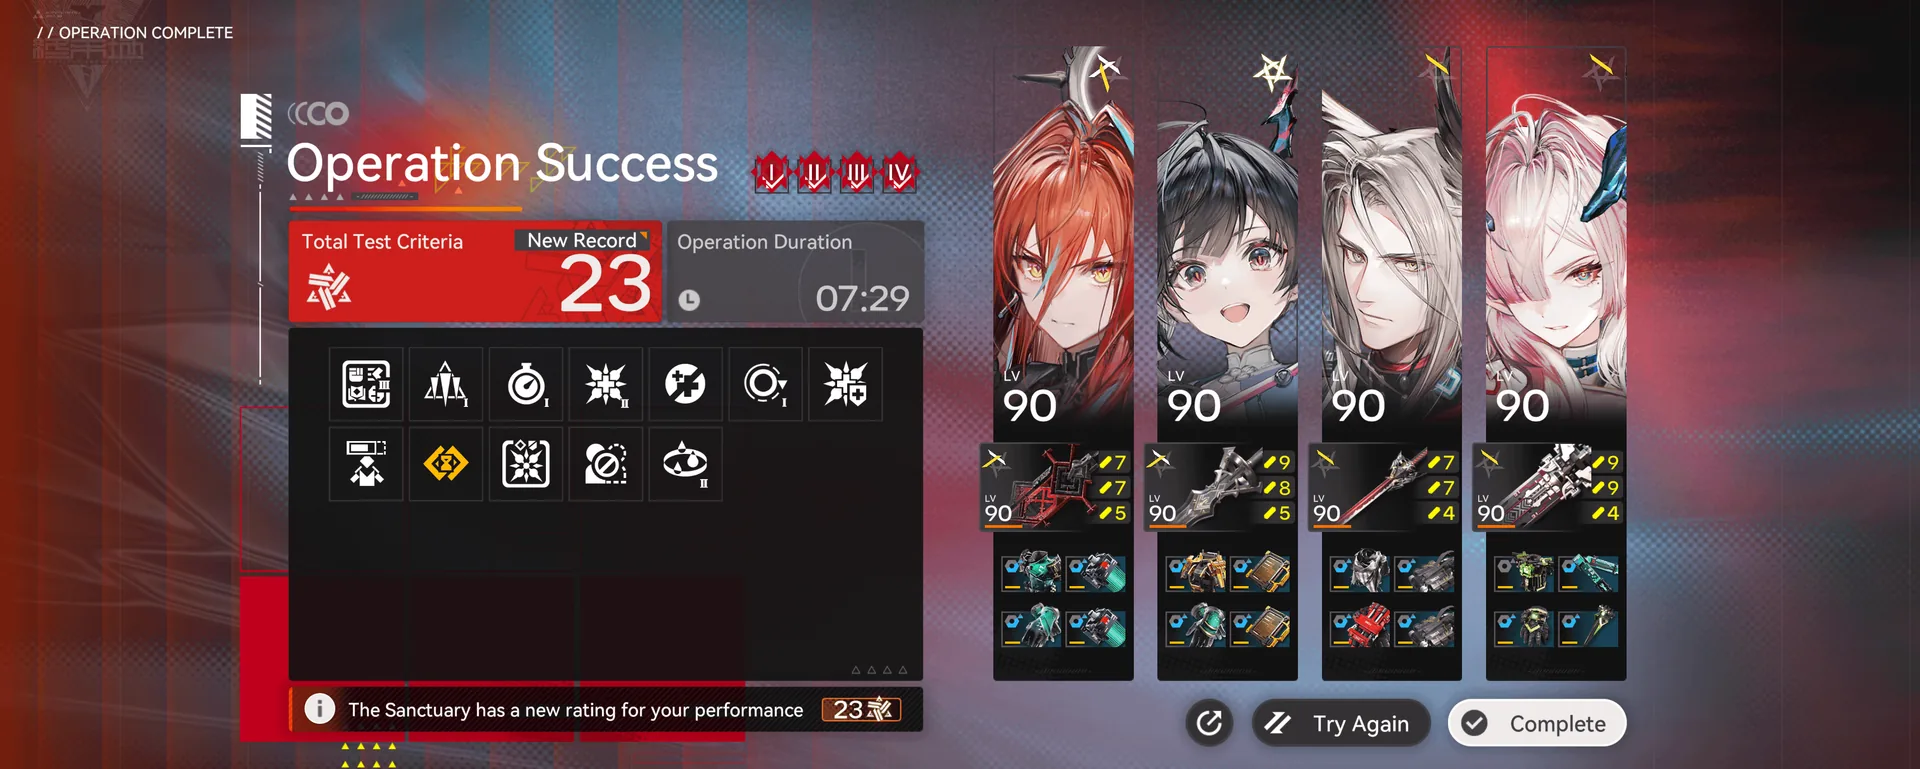 Lv 23
Lv 23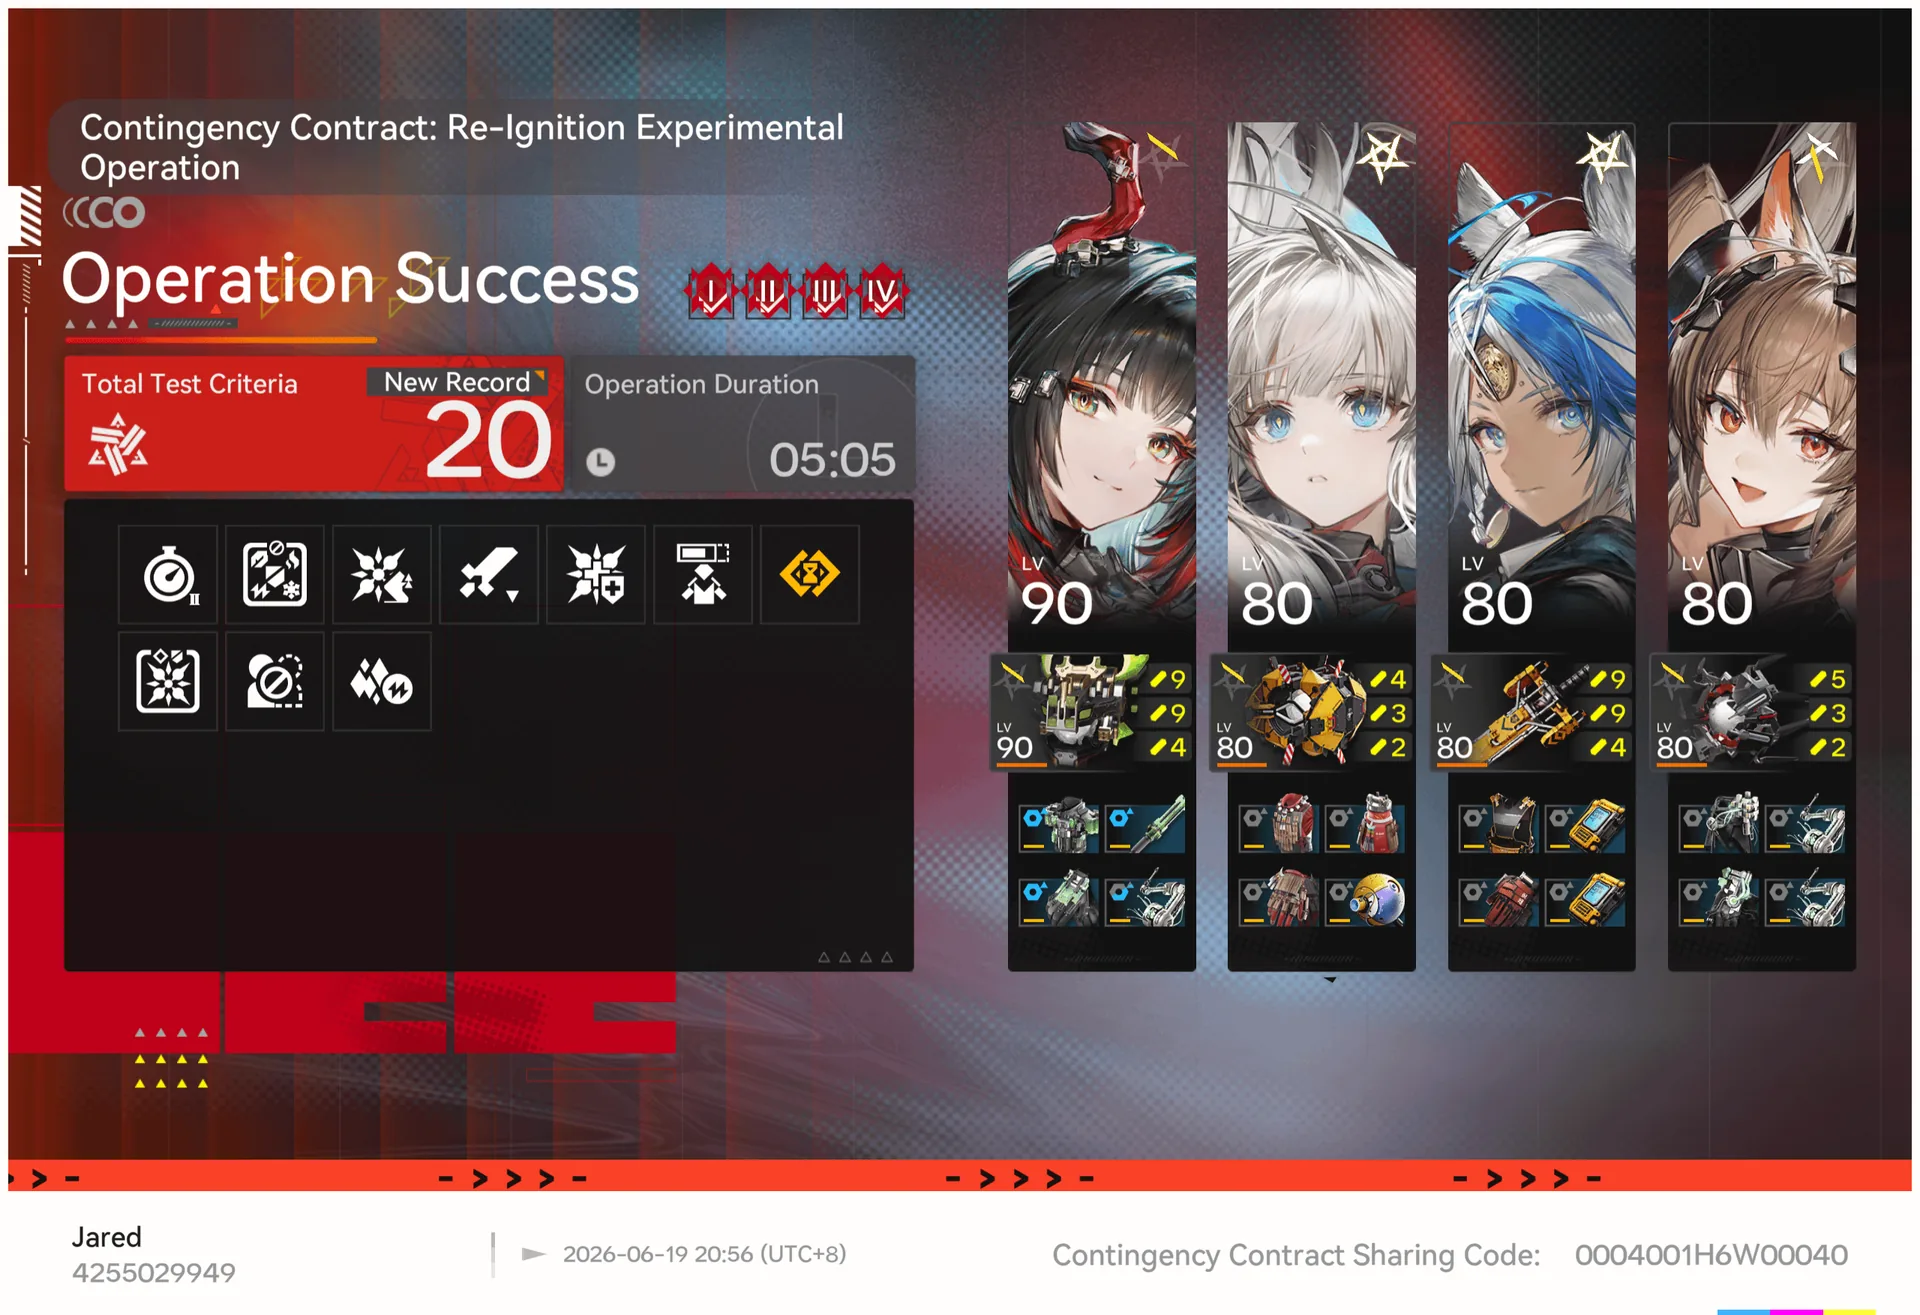 Lv 20
Lv 20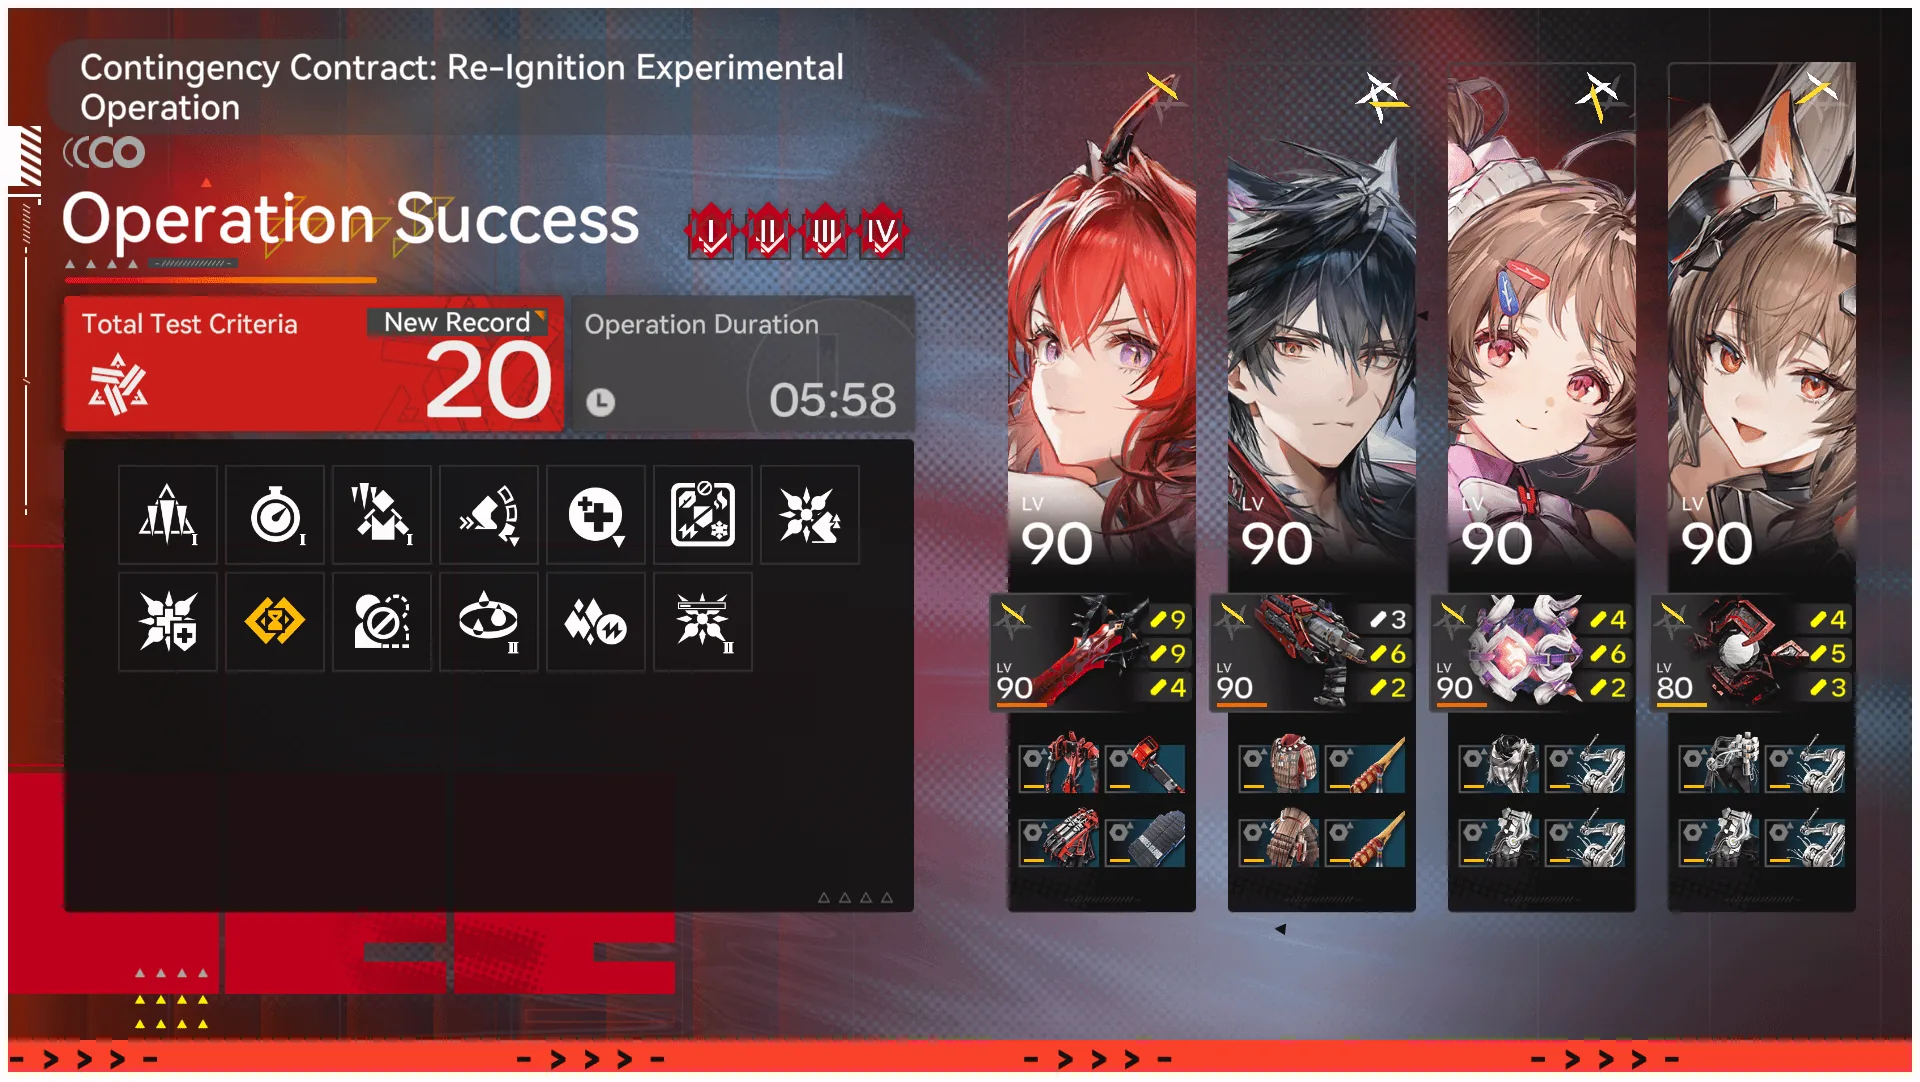 Lv 20
Lv 20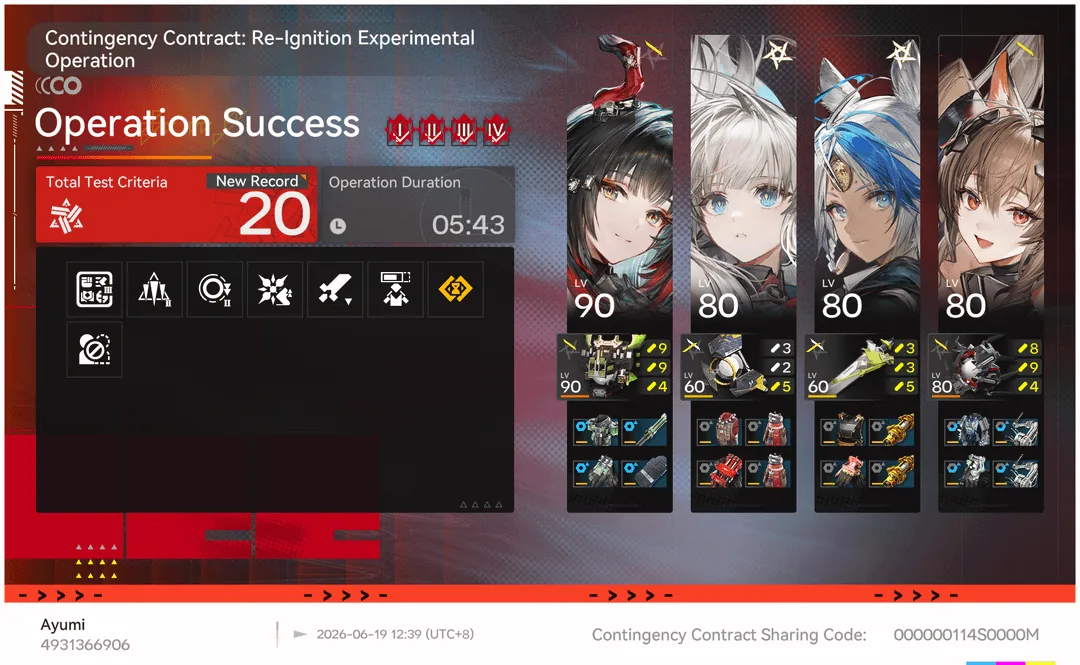 Lv 20
Lv 20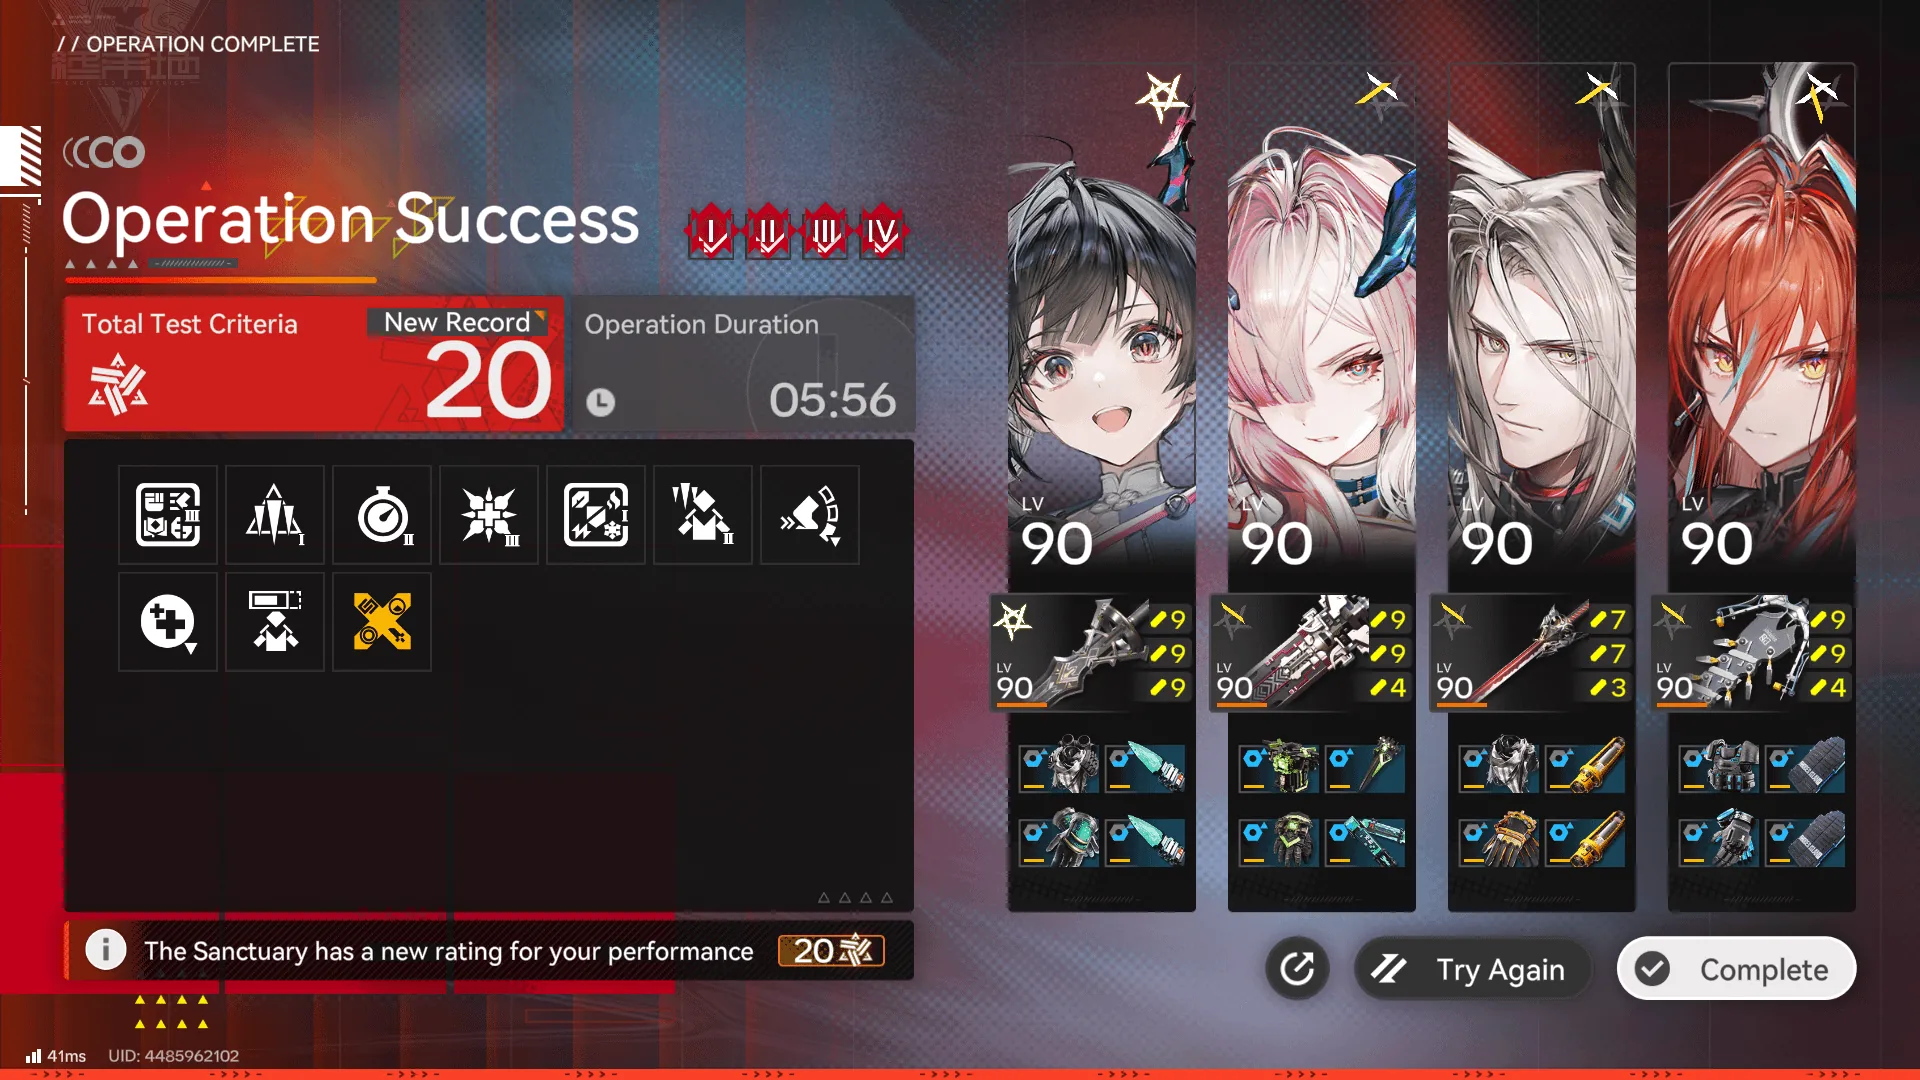 Lv 20
Lv 20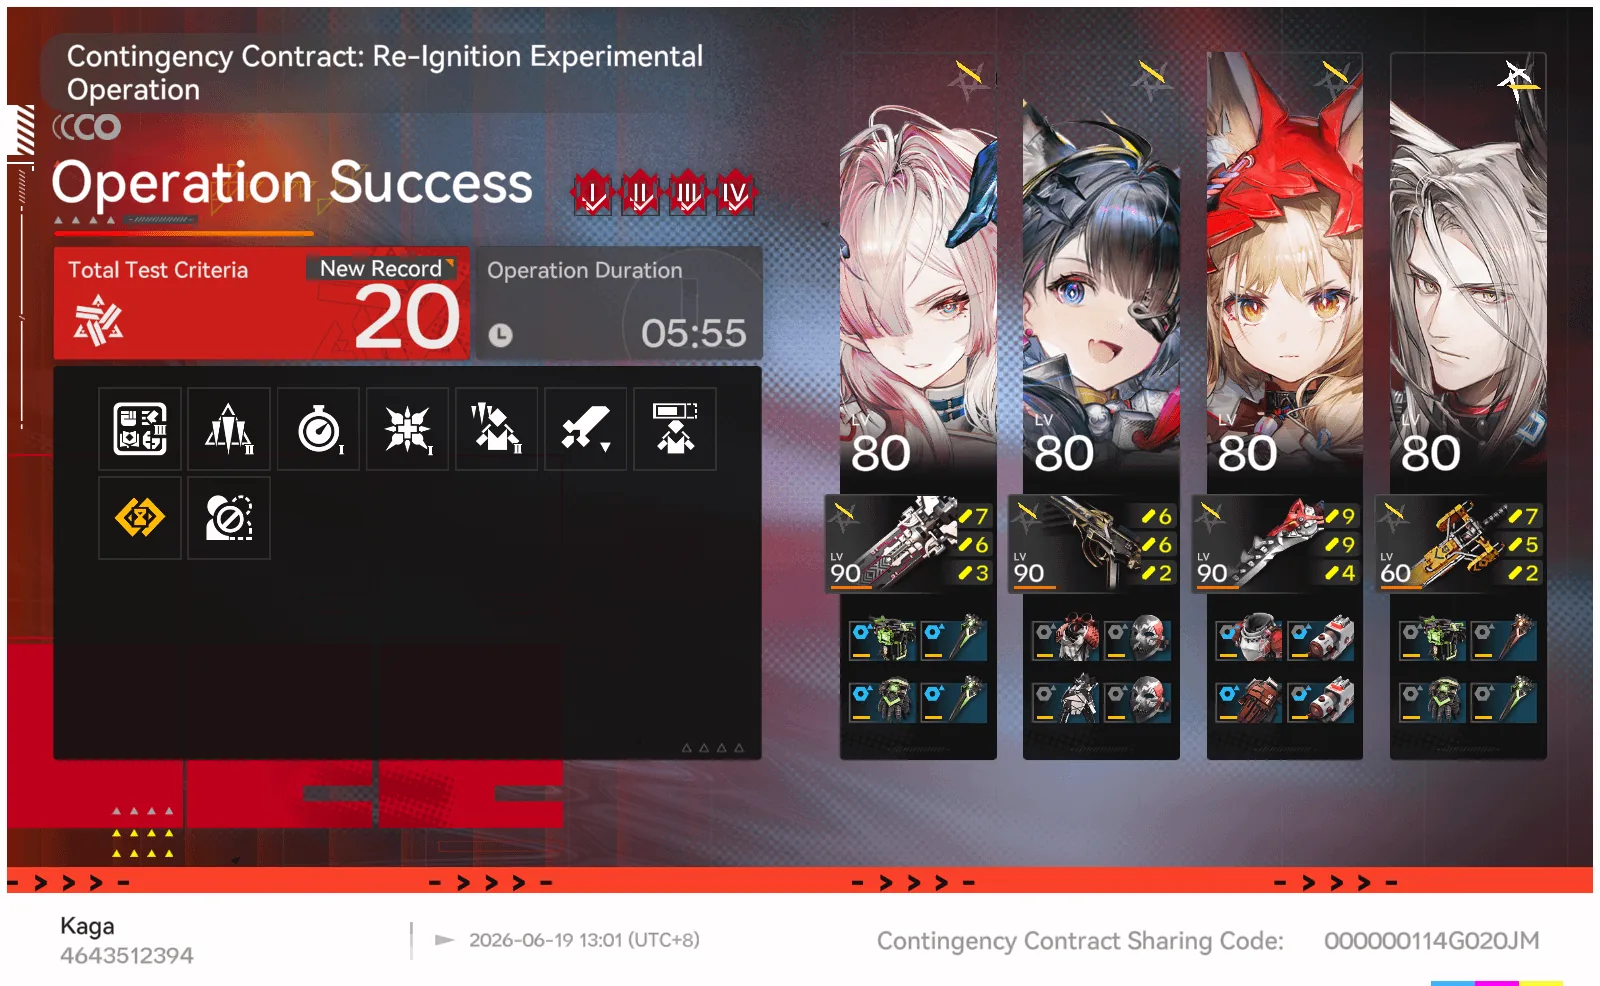 Lv 20
Lv 20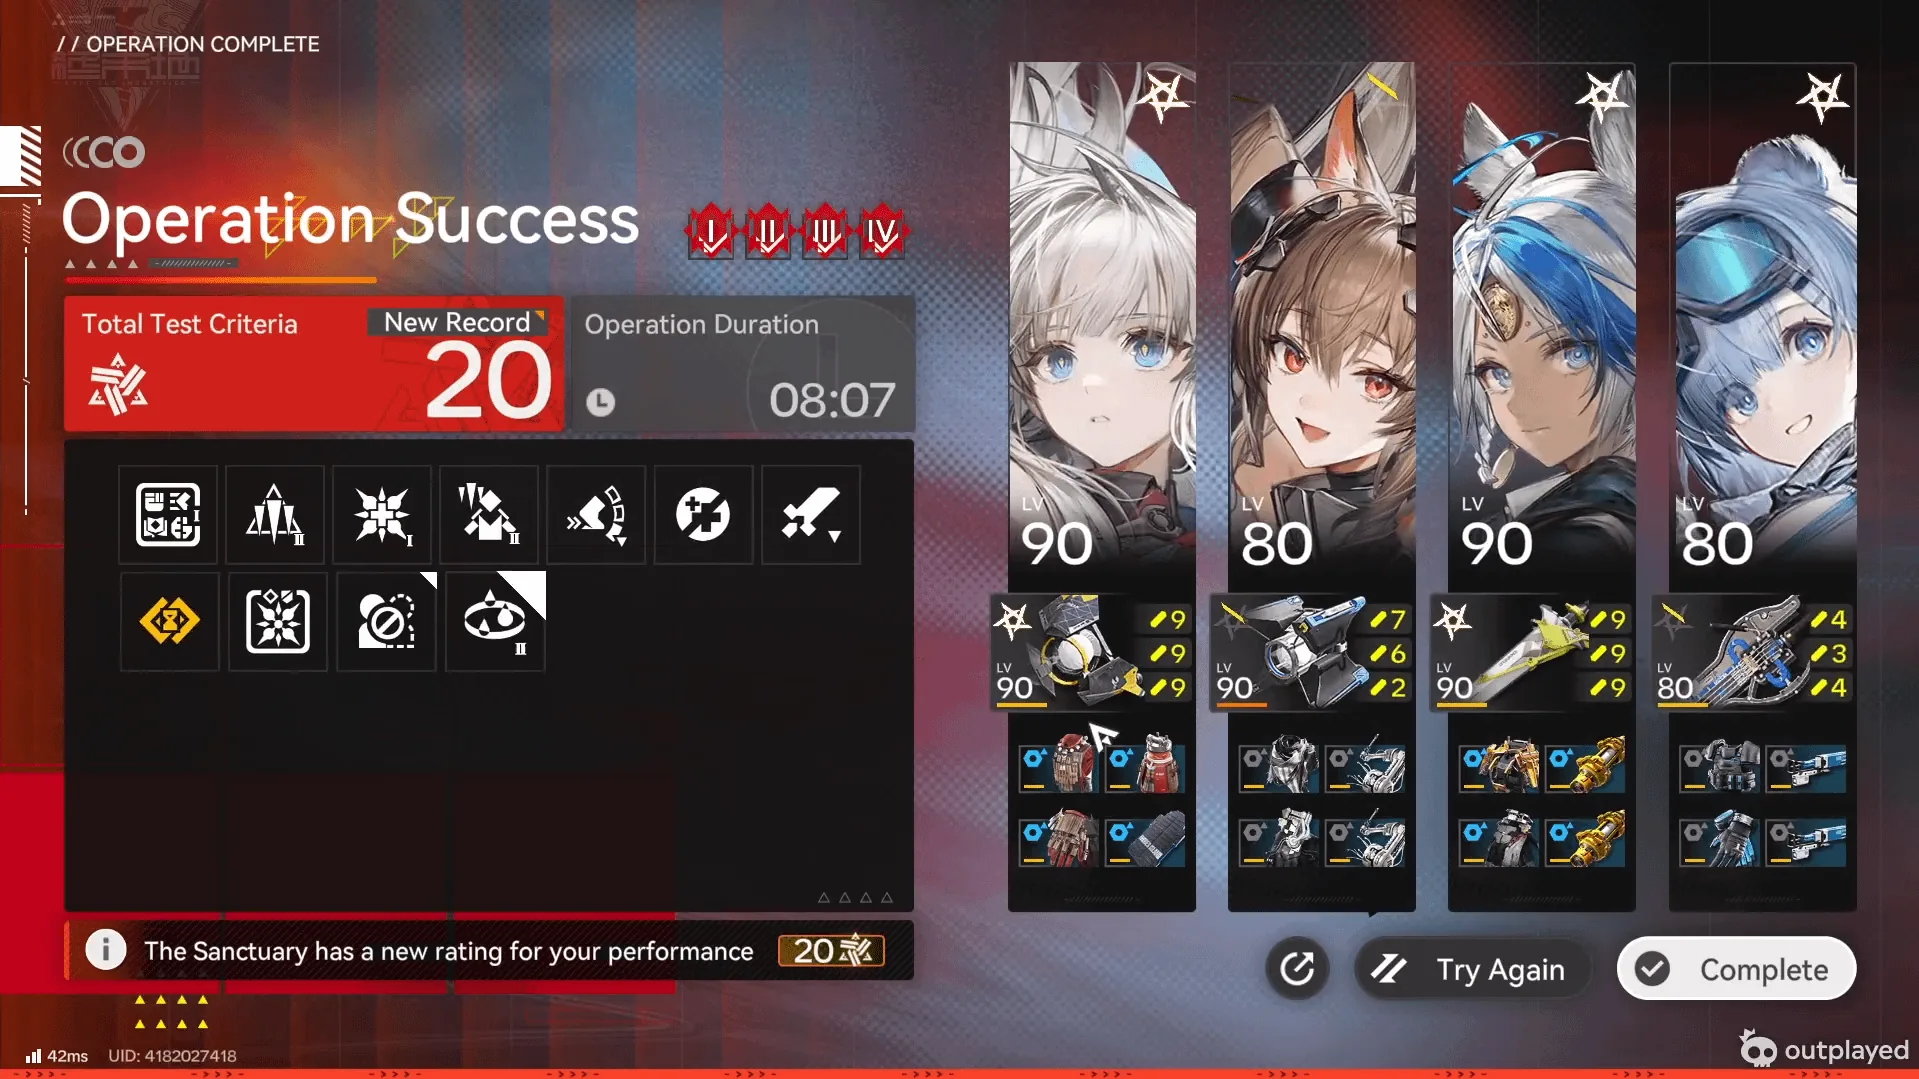 Lv 20
Lv 20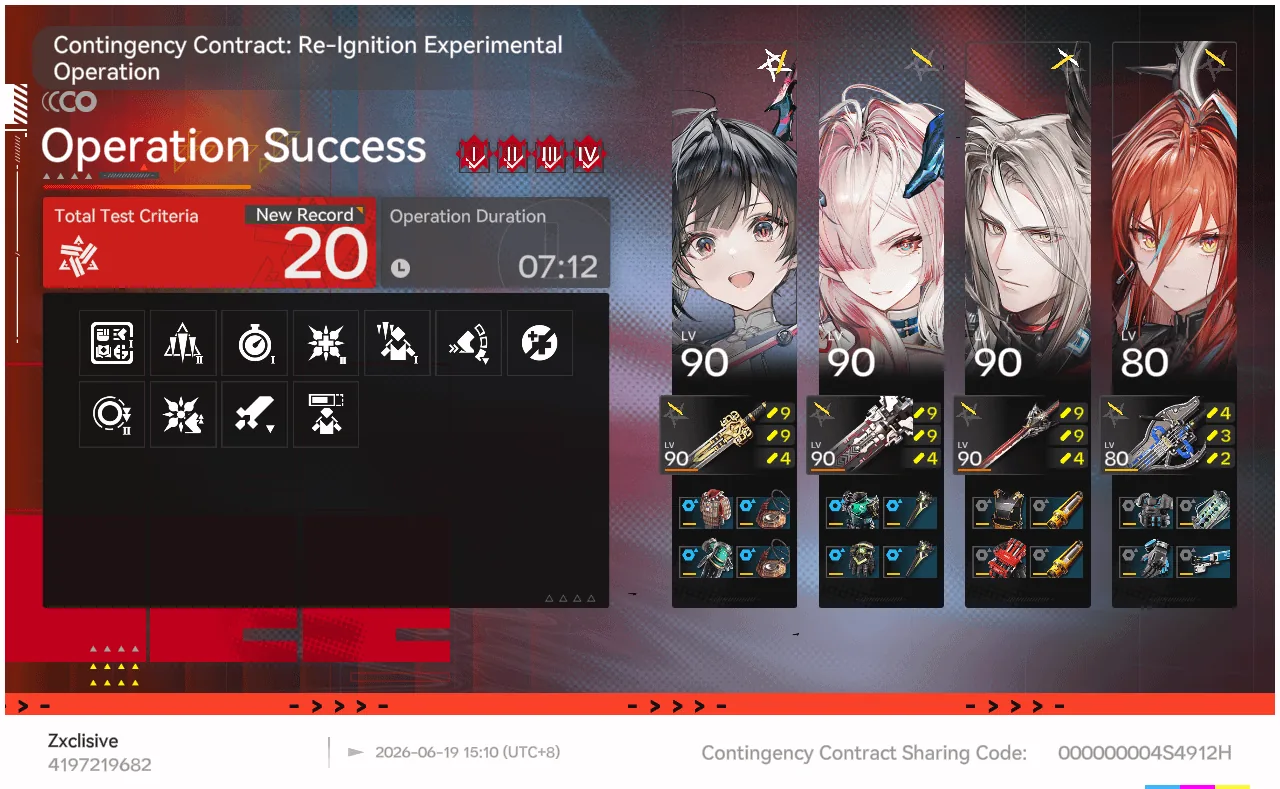 Lv 20
Lv 20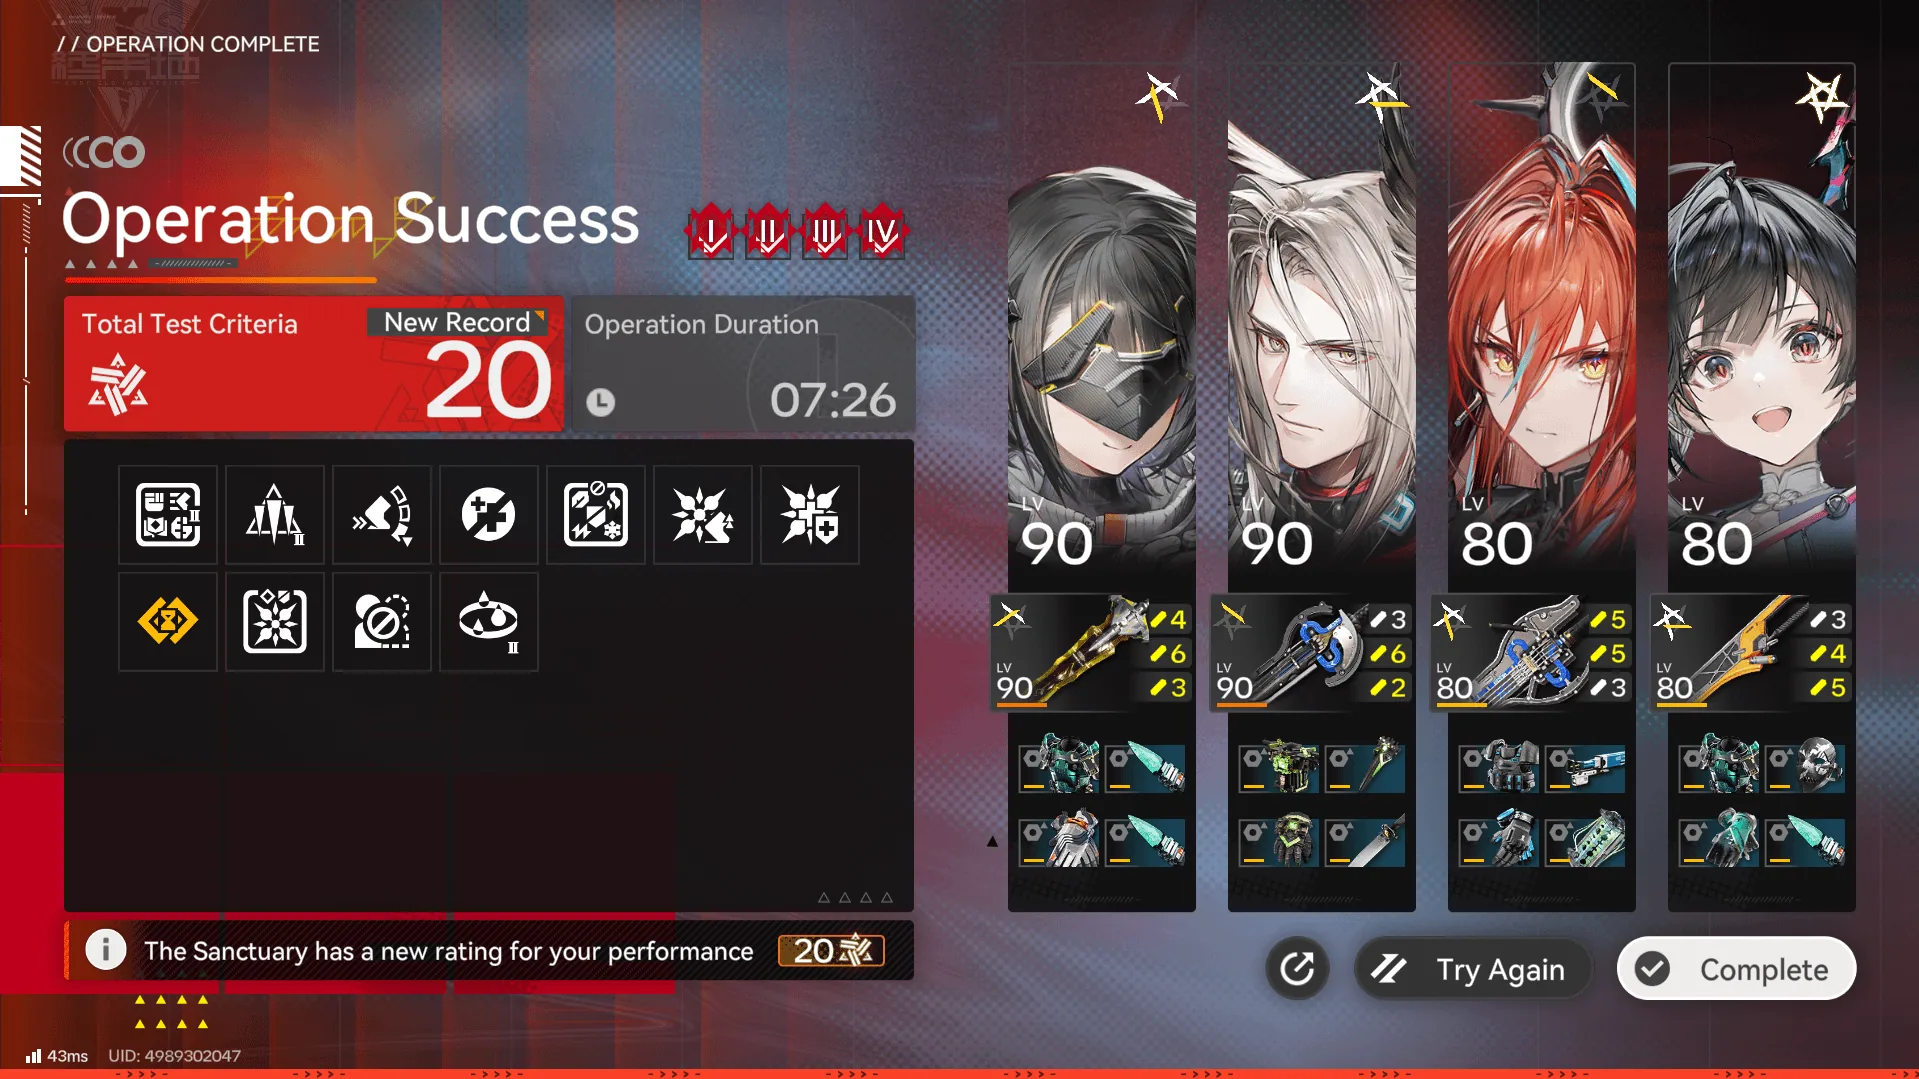 Lv 20
Lv 20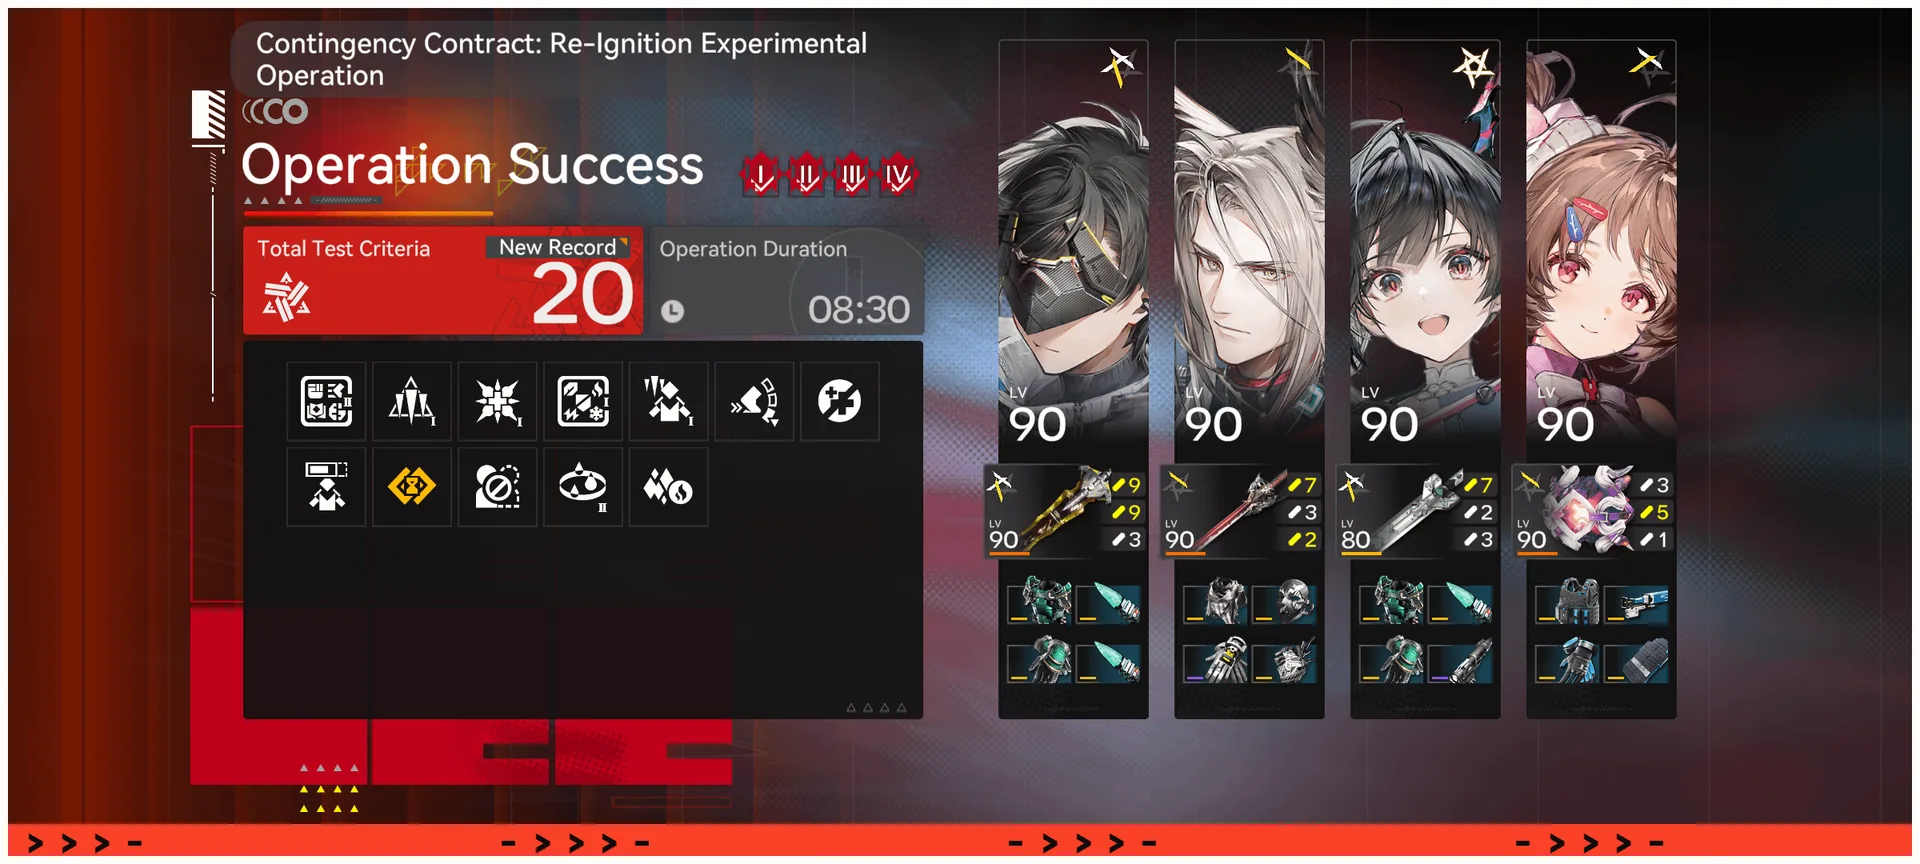 Lv 20
Lv 20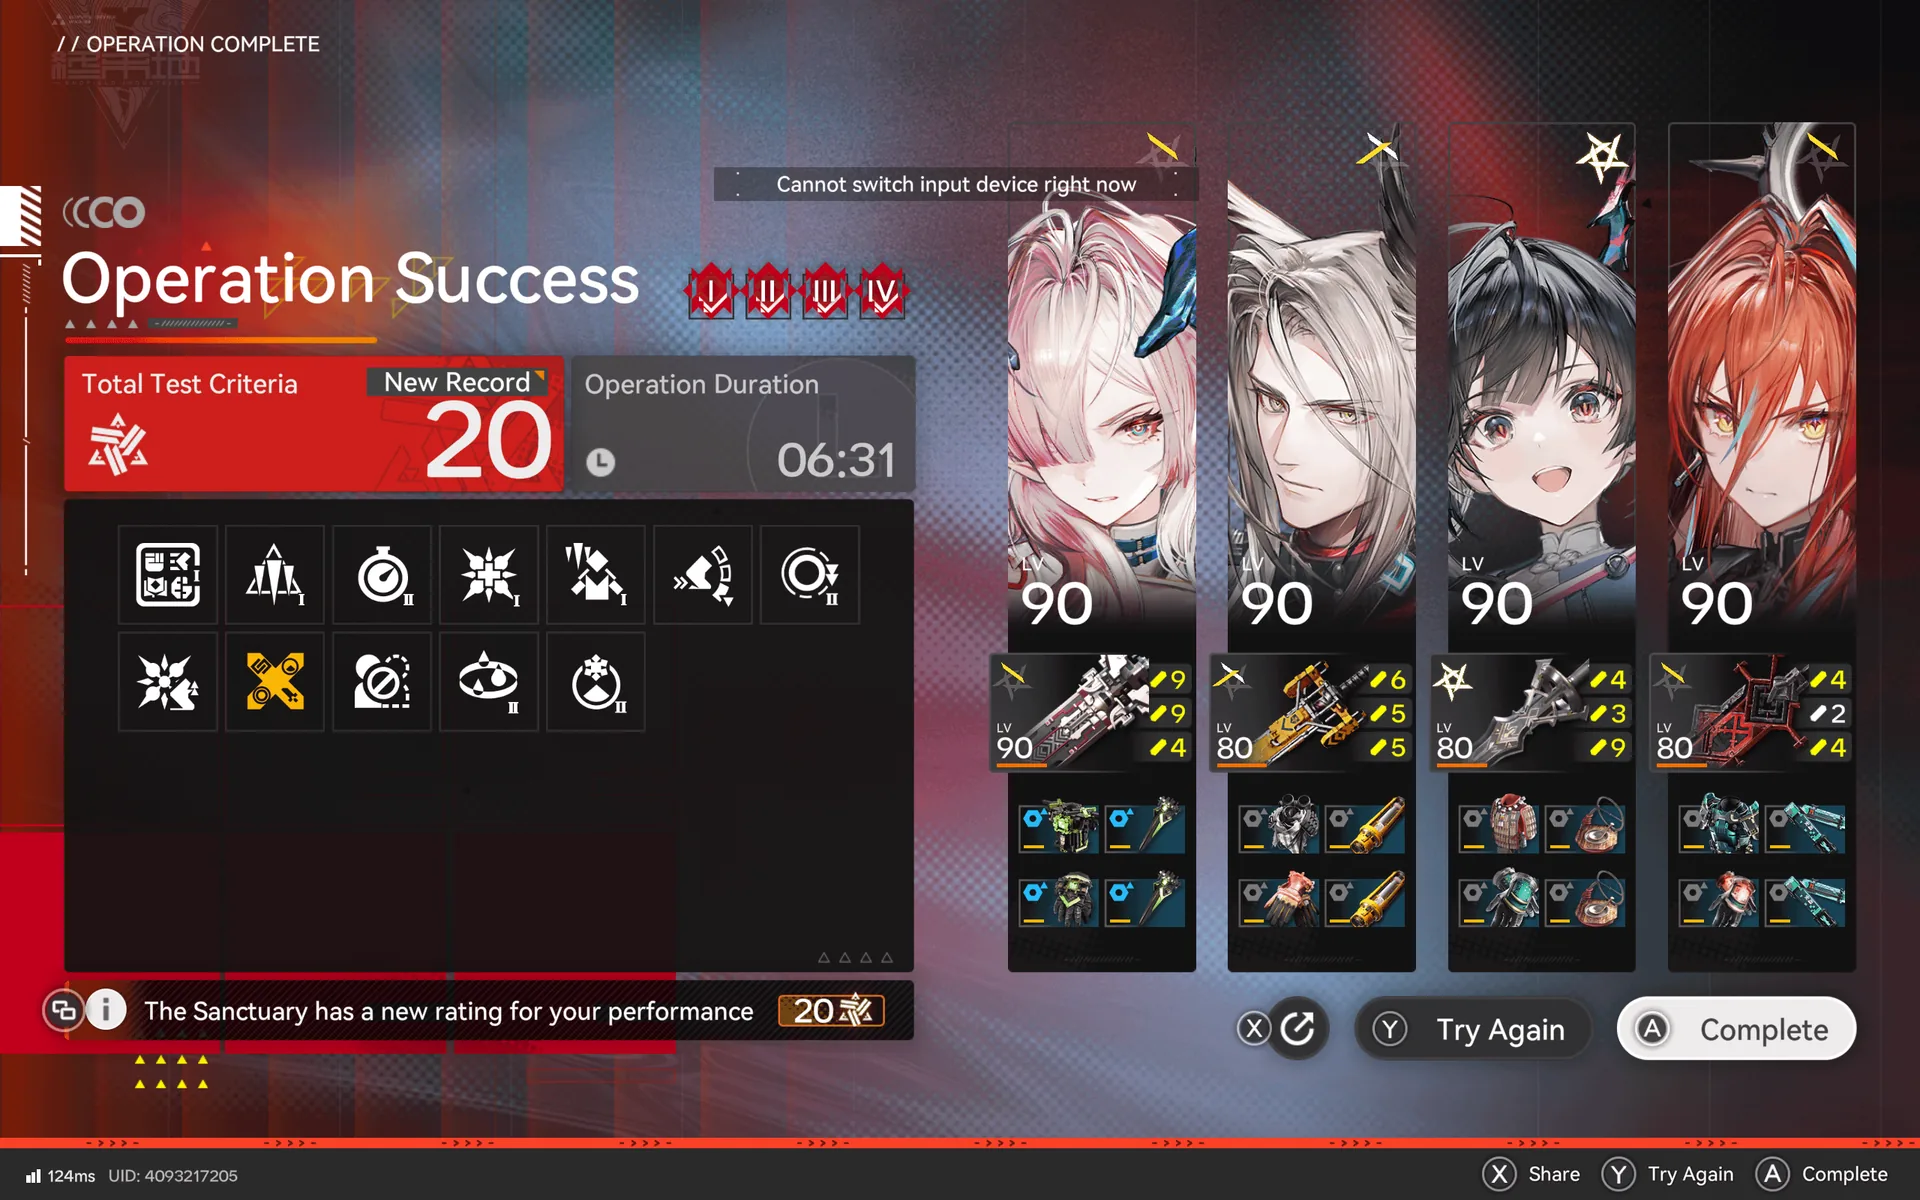 Lv 20
Lv 20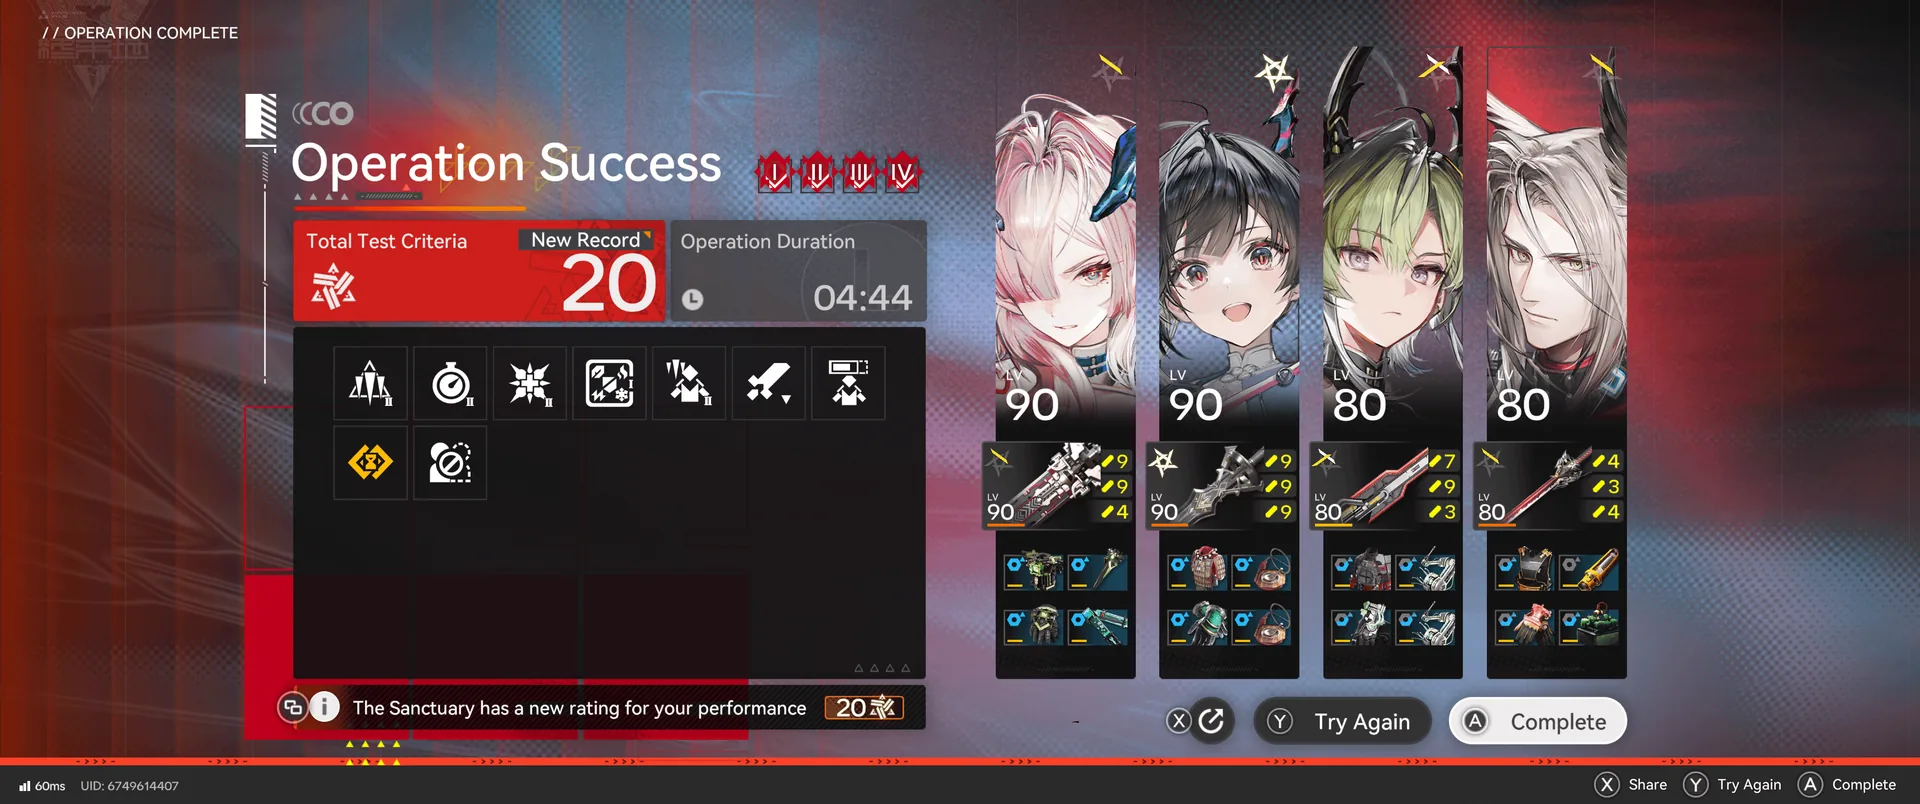 Lv 20
Lv 20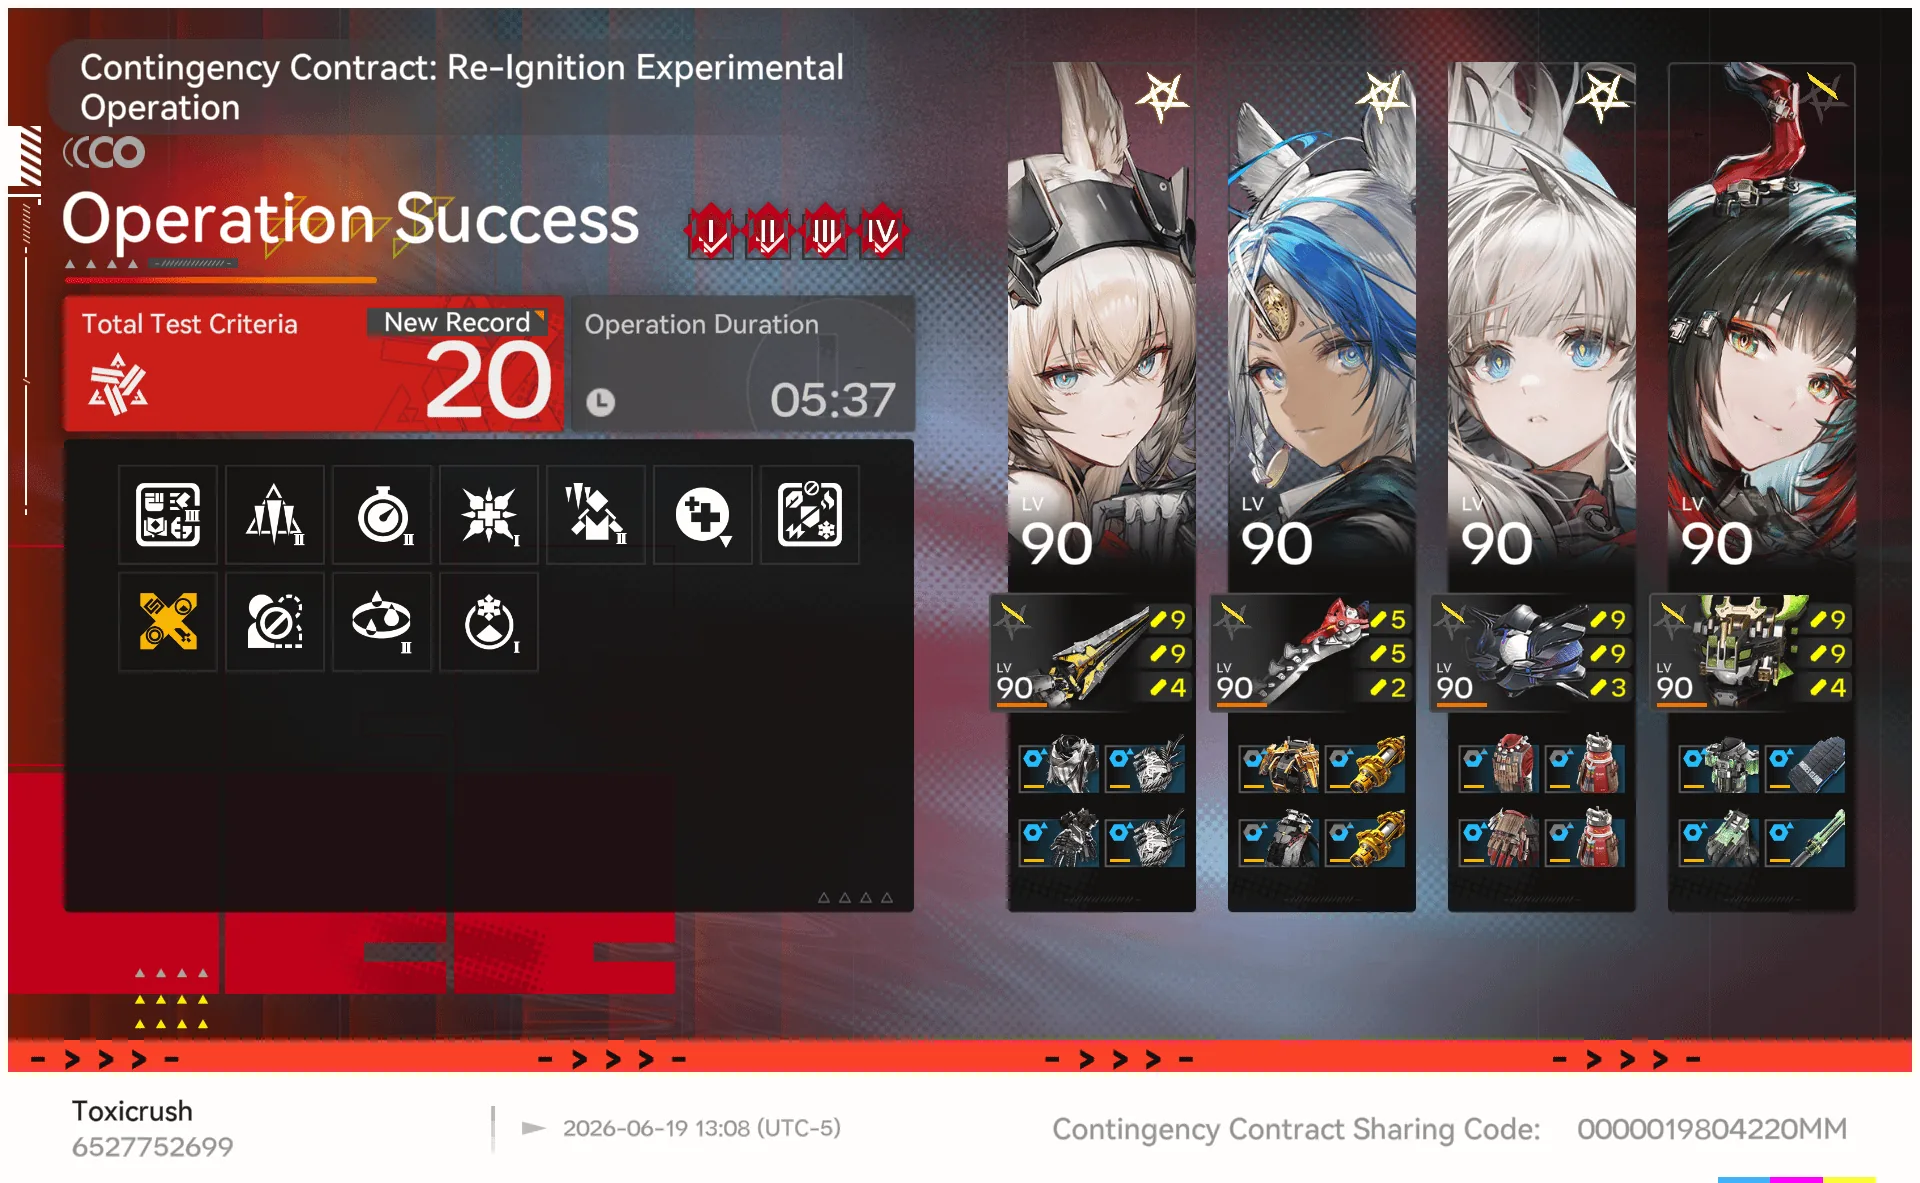 Lv 20
Lv 20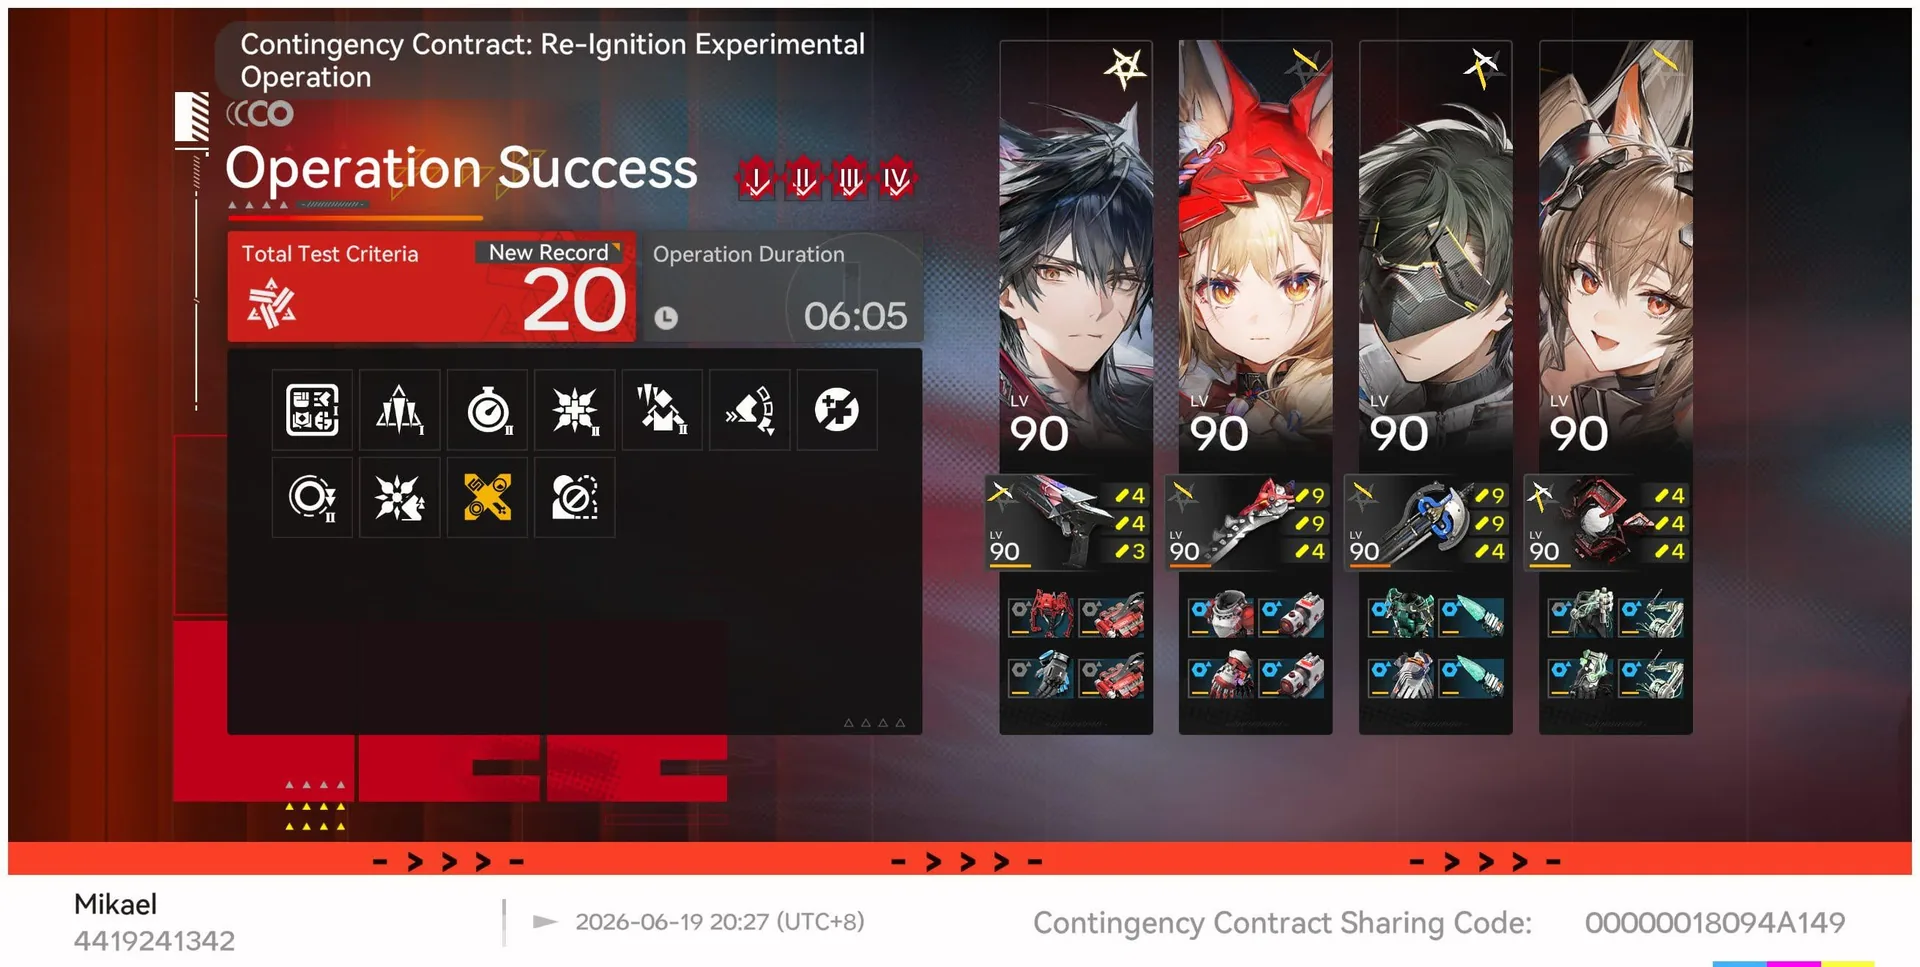 Lv 20
Lv 20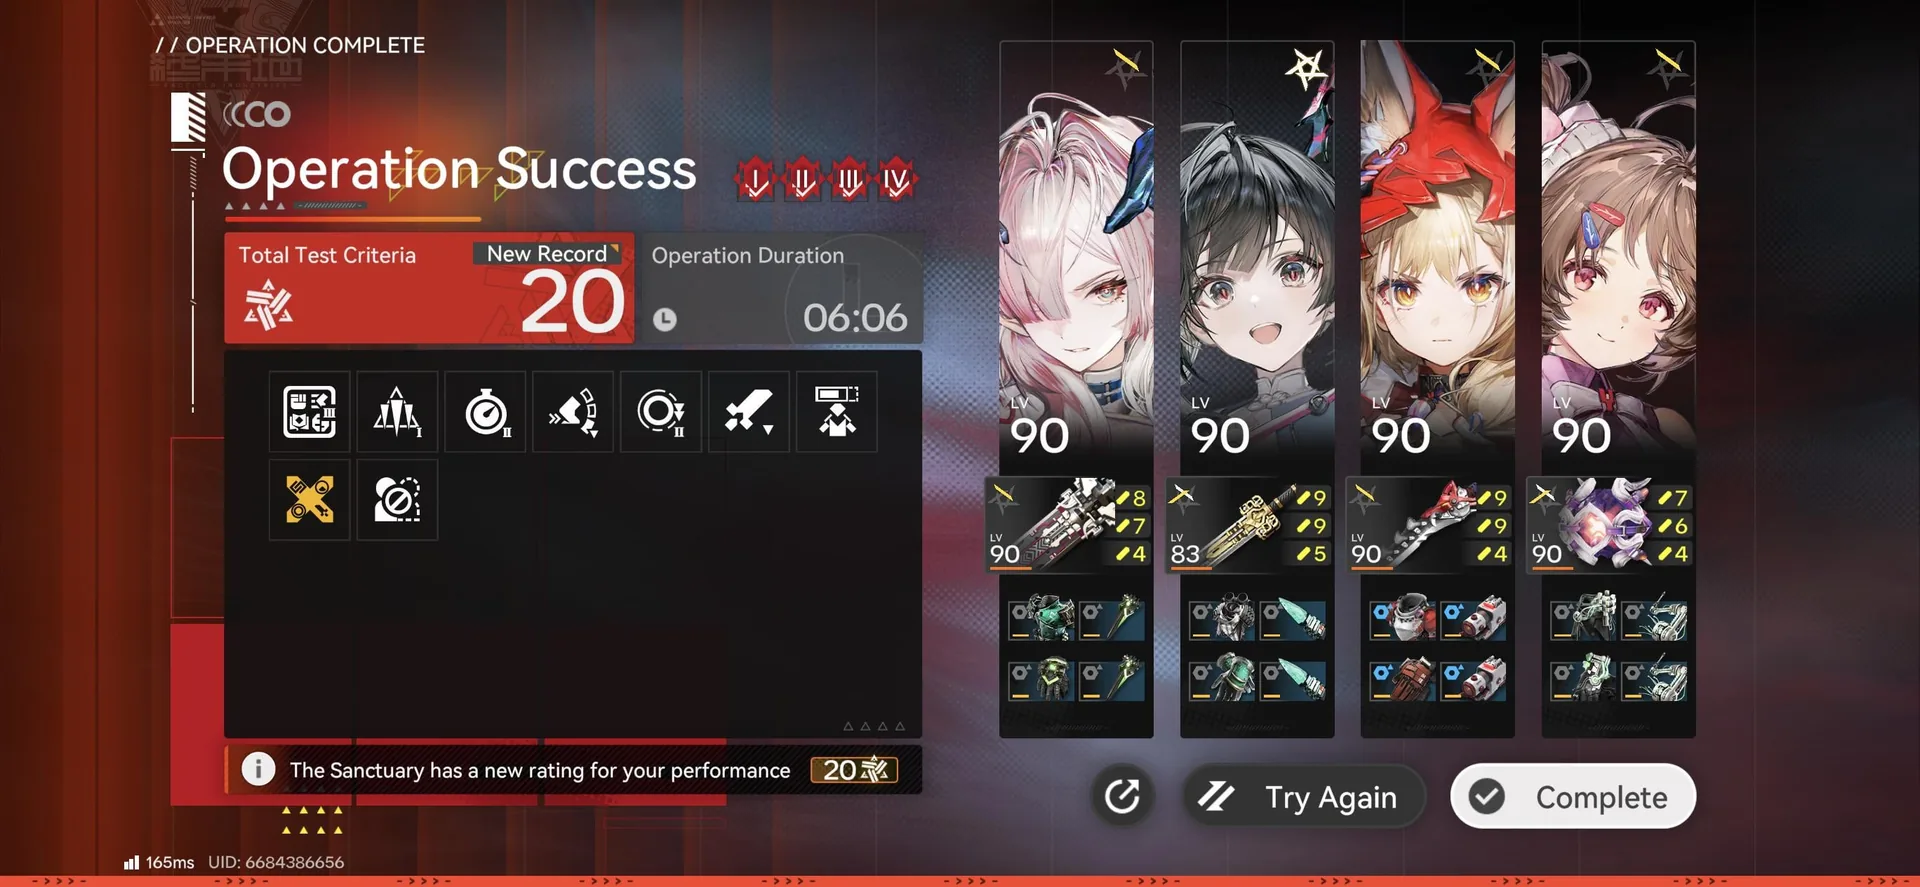 Lv 20
Lv 20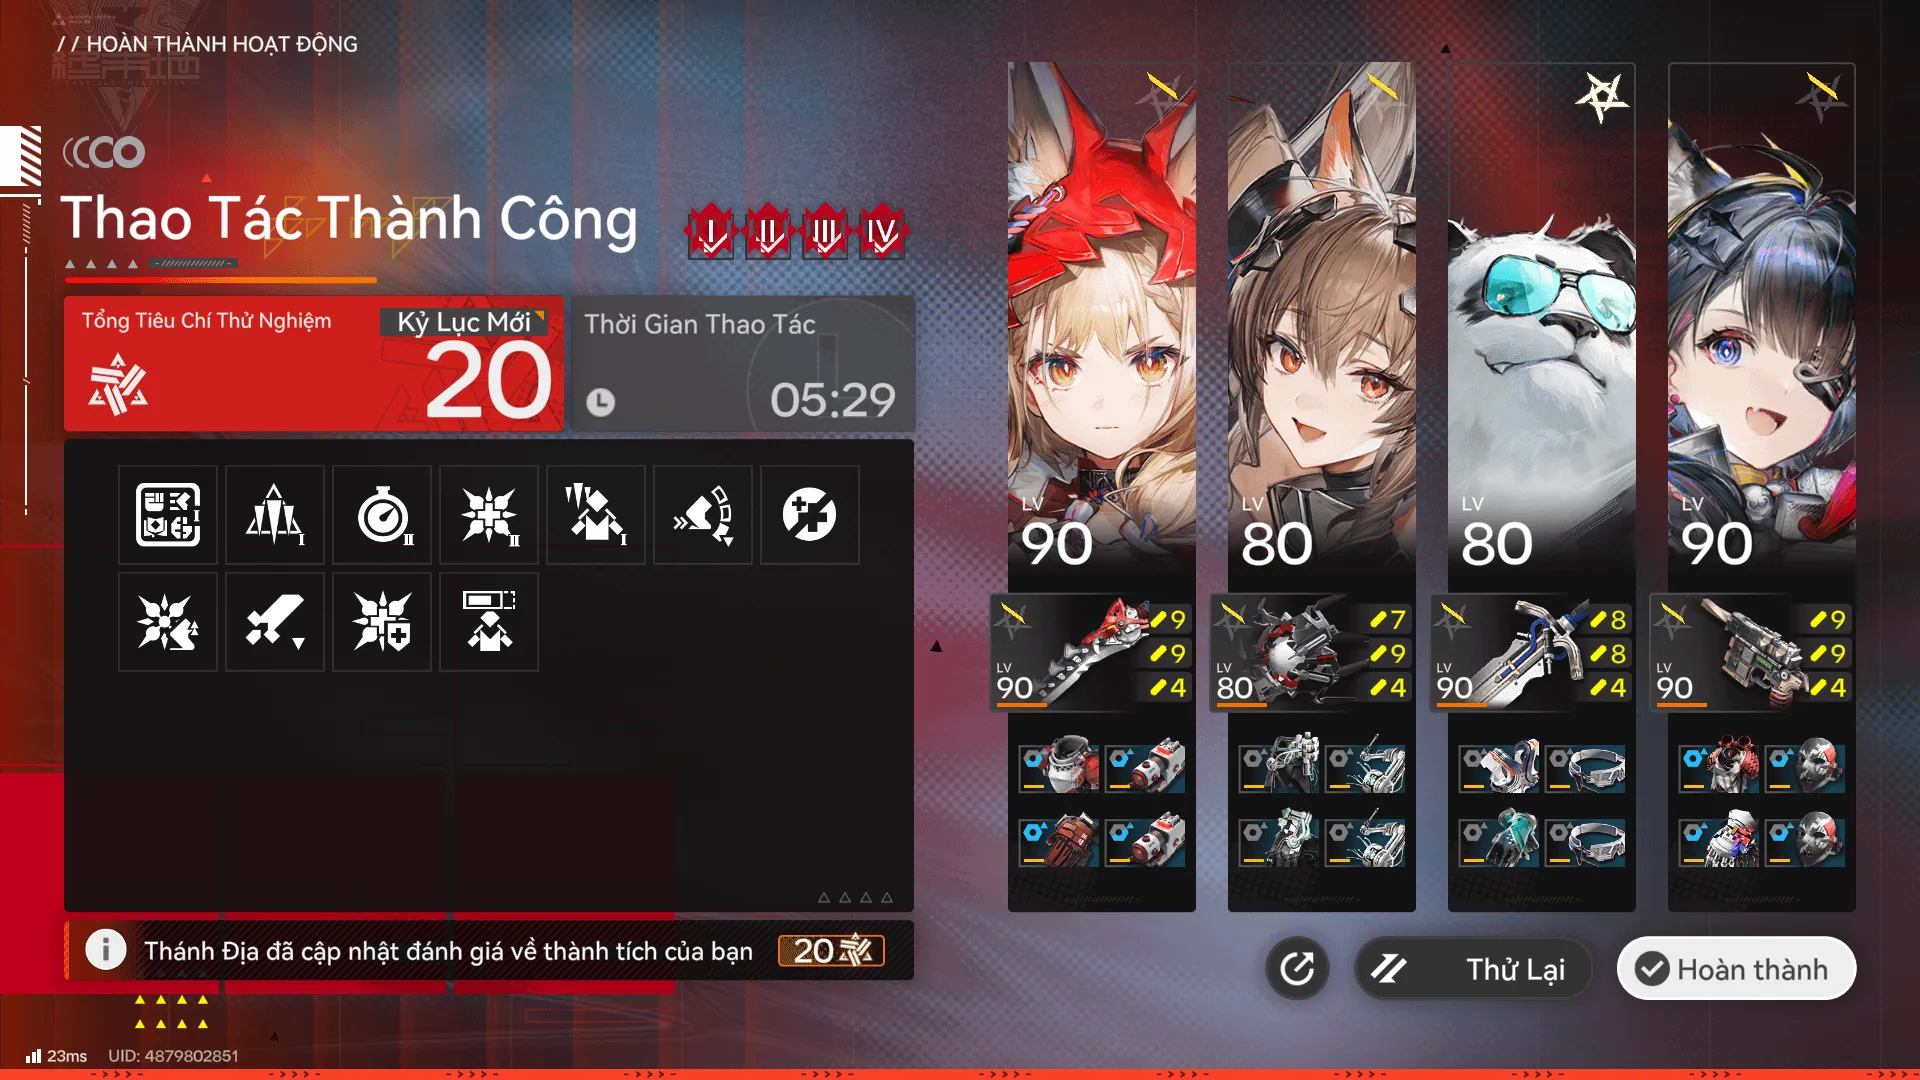 Lv 20
Lv 20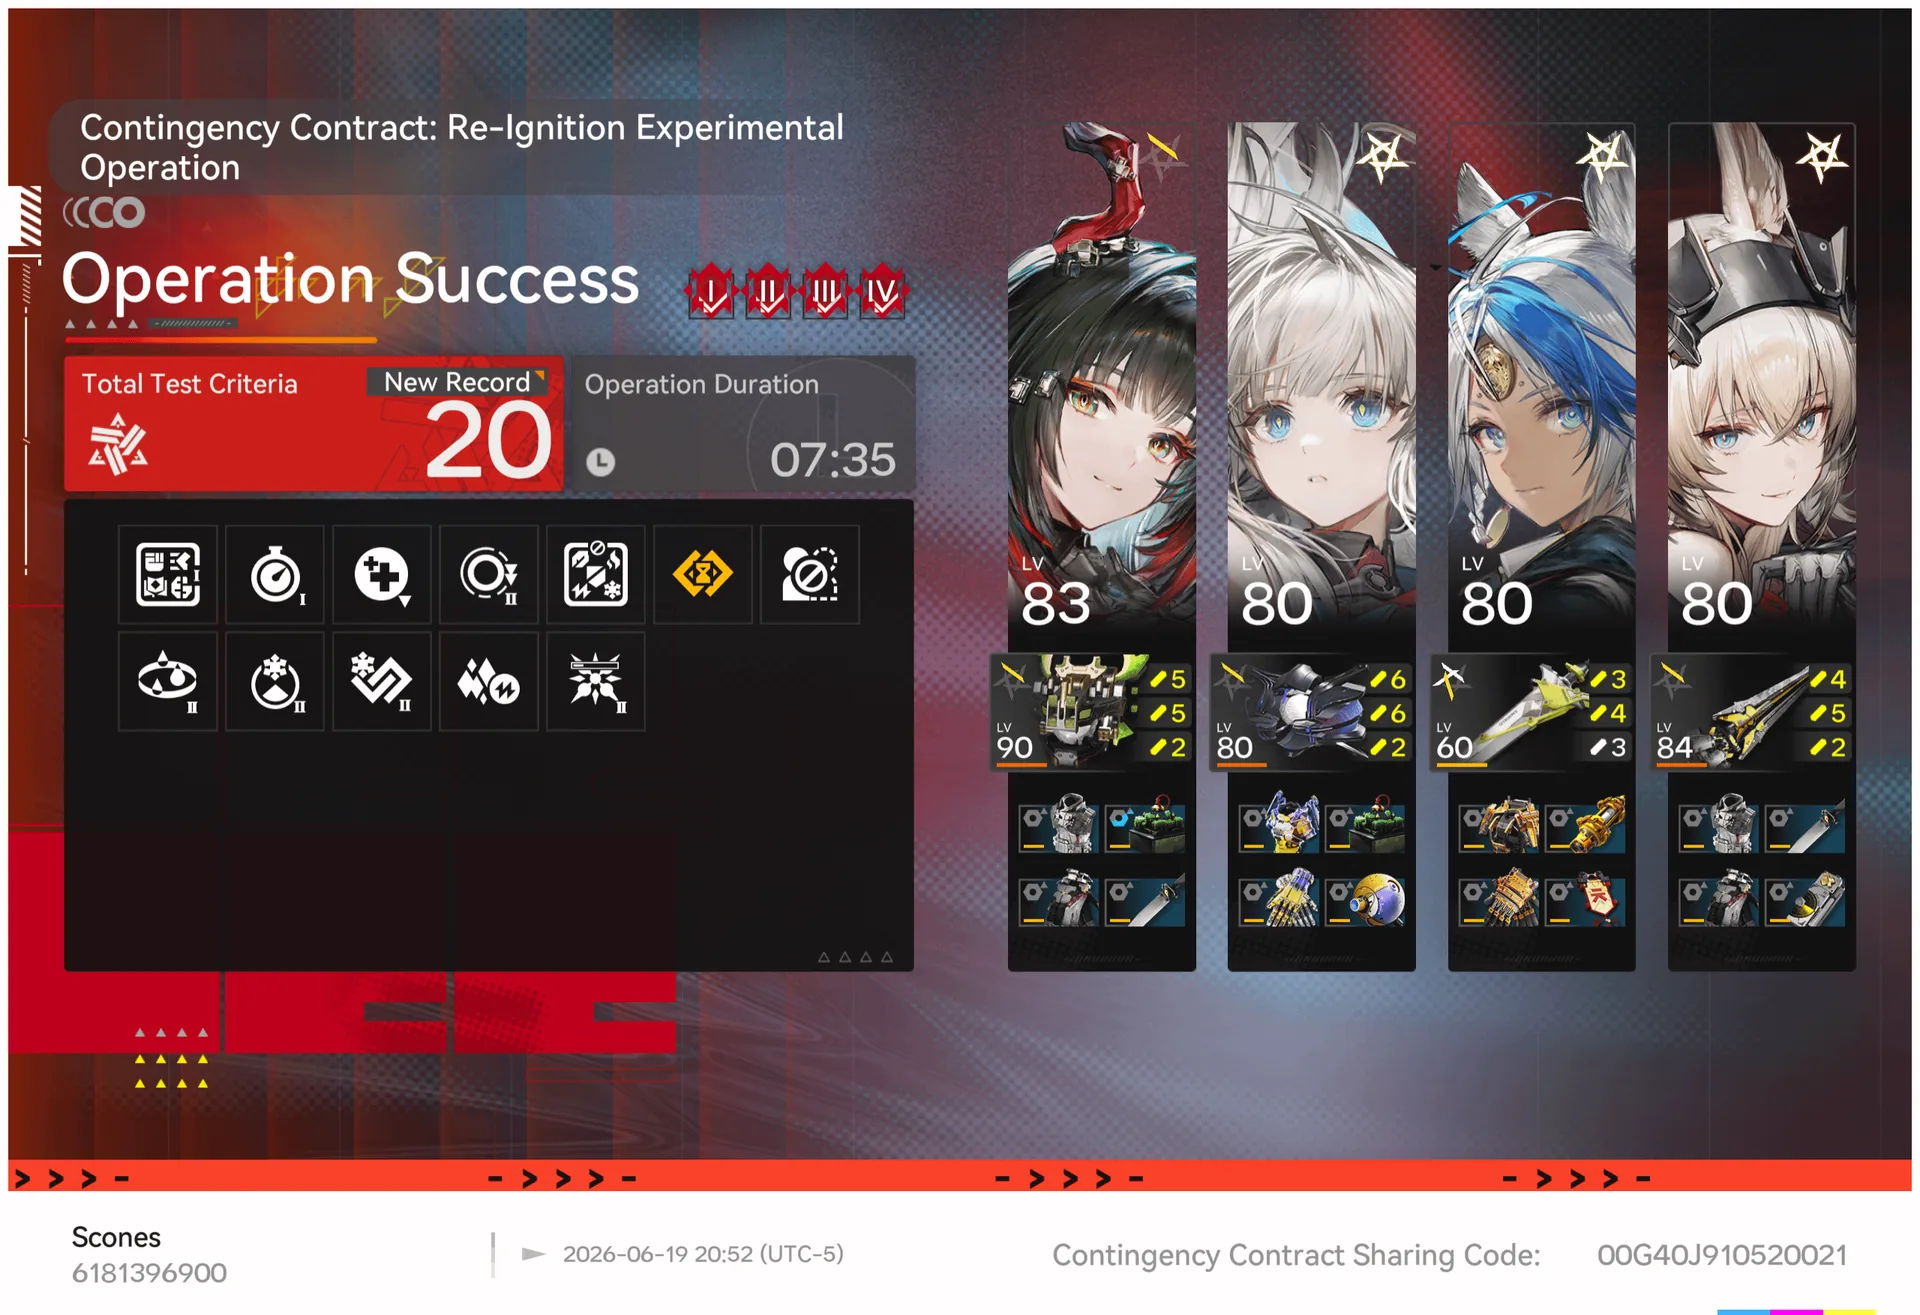 Lv 20
Lv 20Risk 30-40 - Endgame
 Lv 40
Lv 40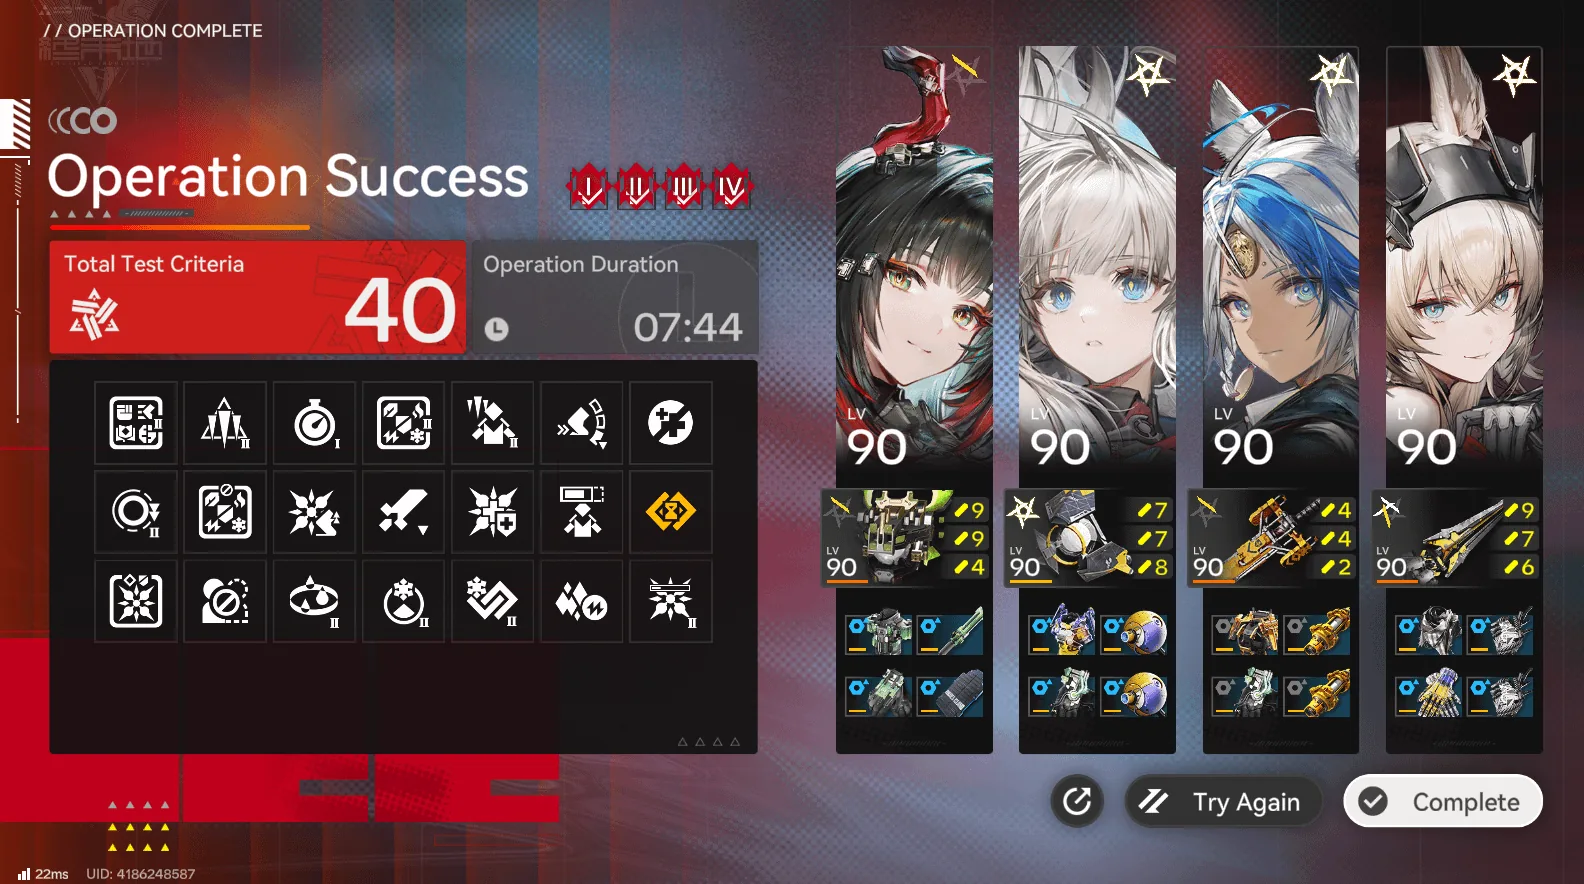 Lv 40
Lv 40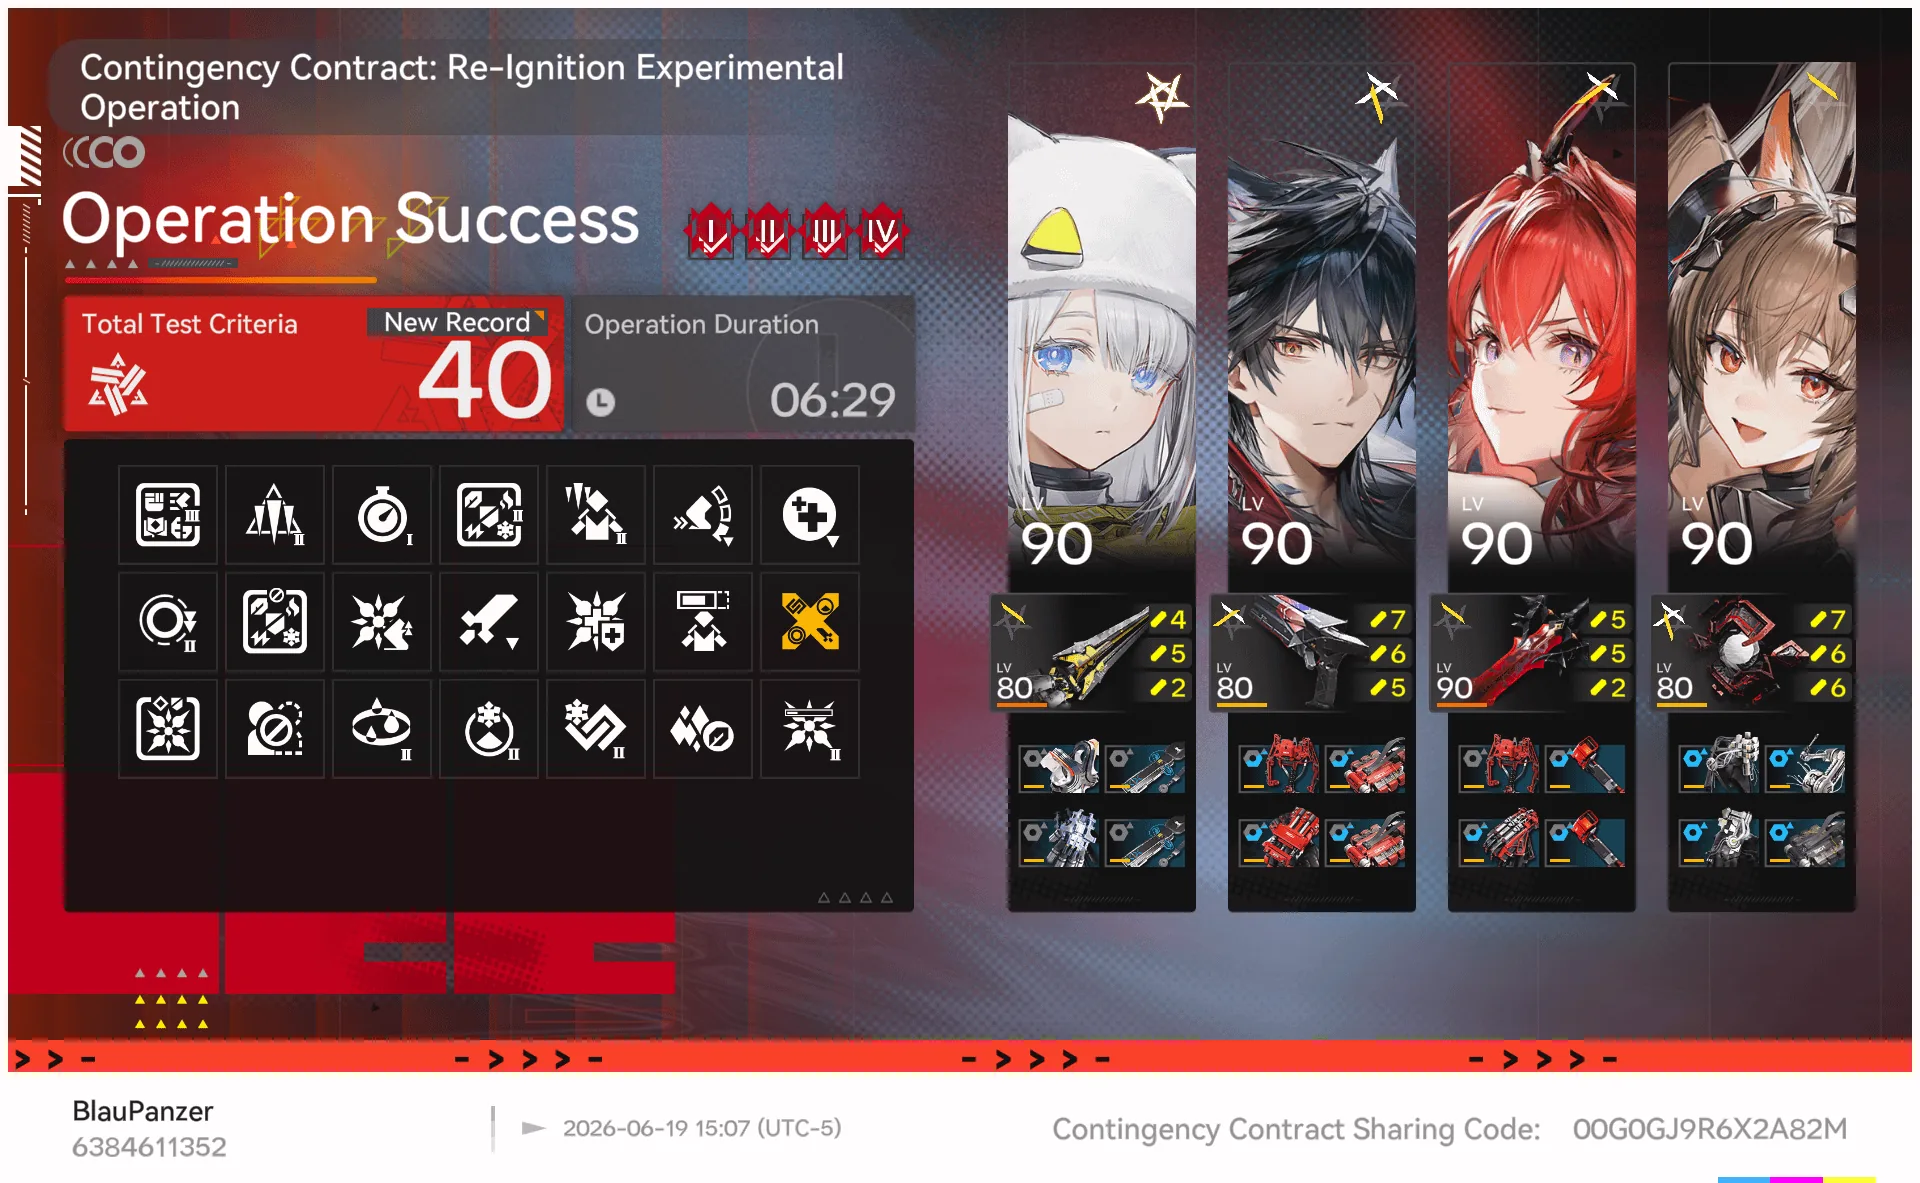 Lv 40
Lv 40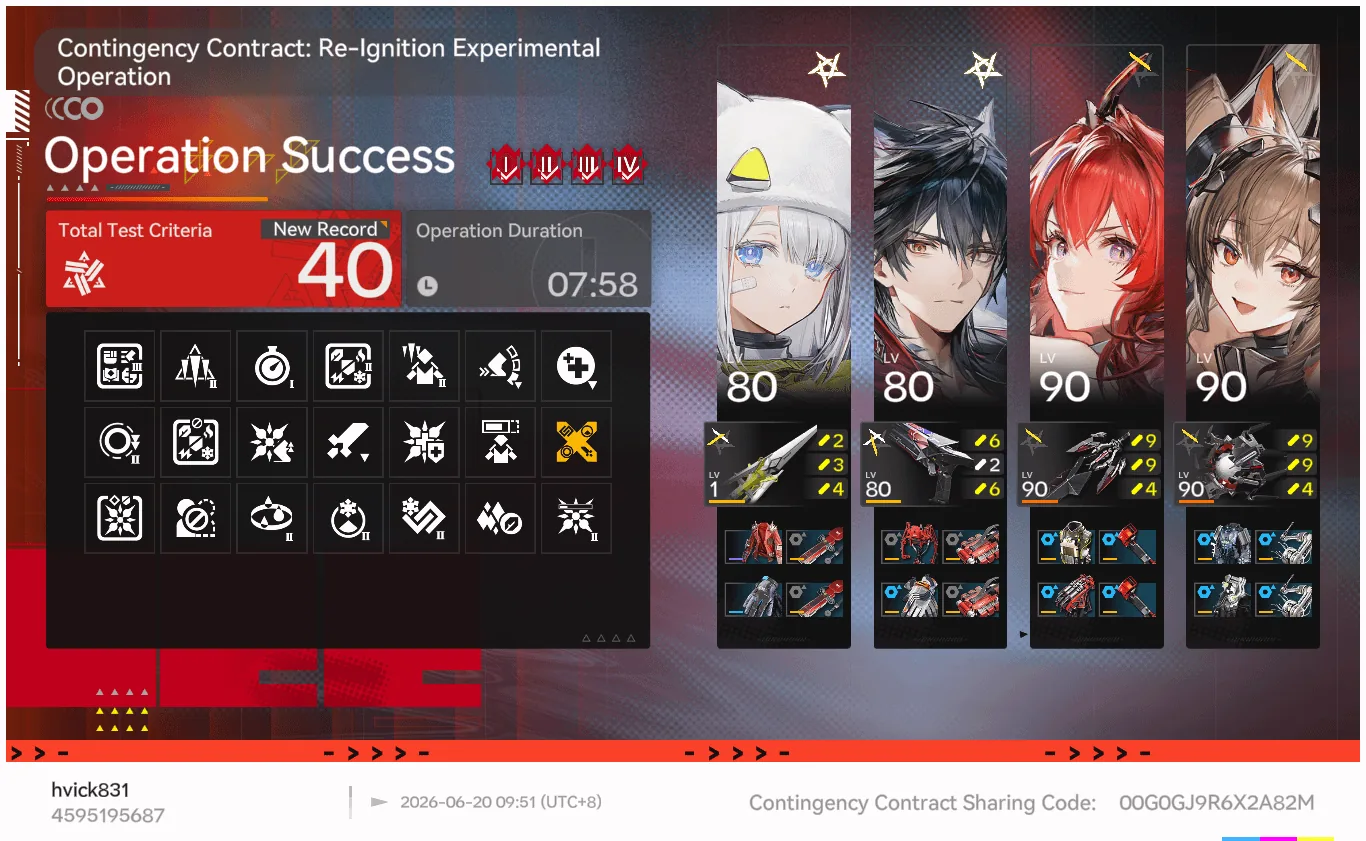 Lv 40
Lv 40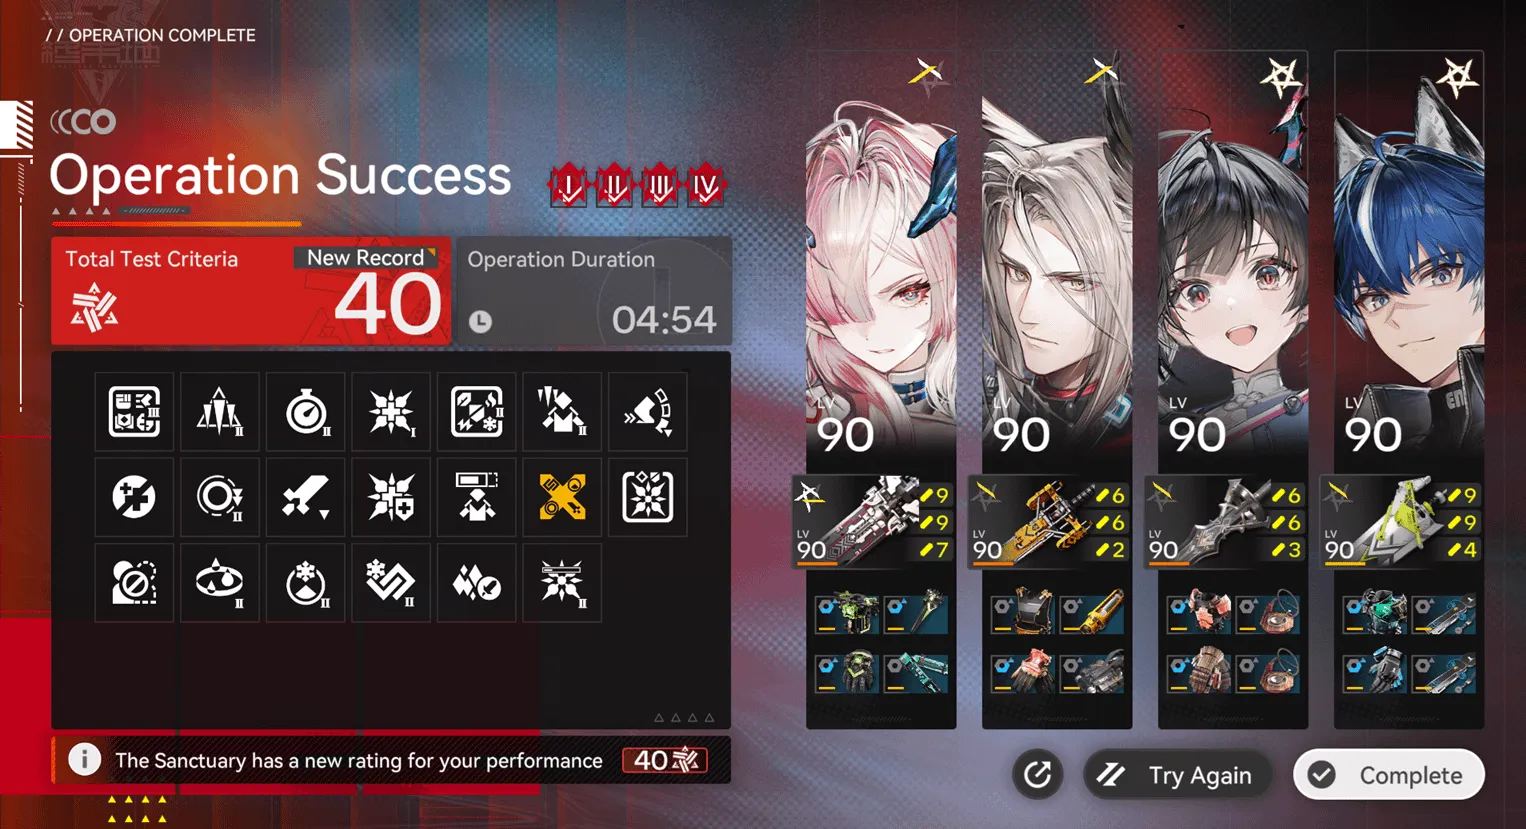 Lv 40
Lv 40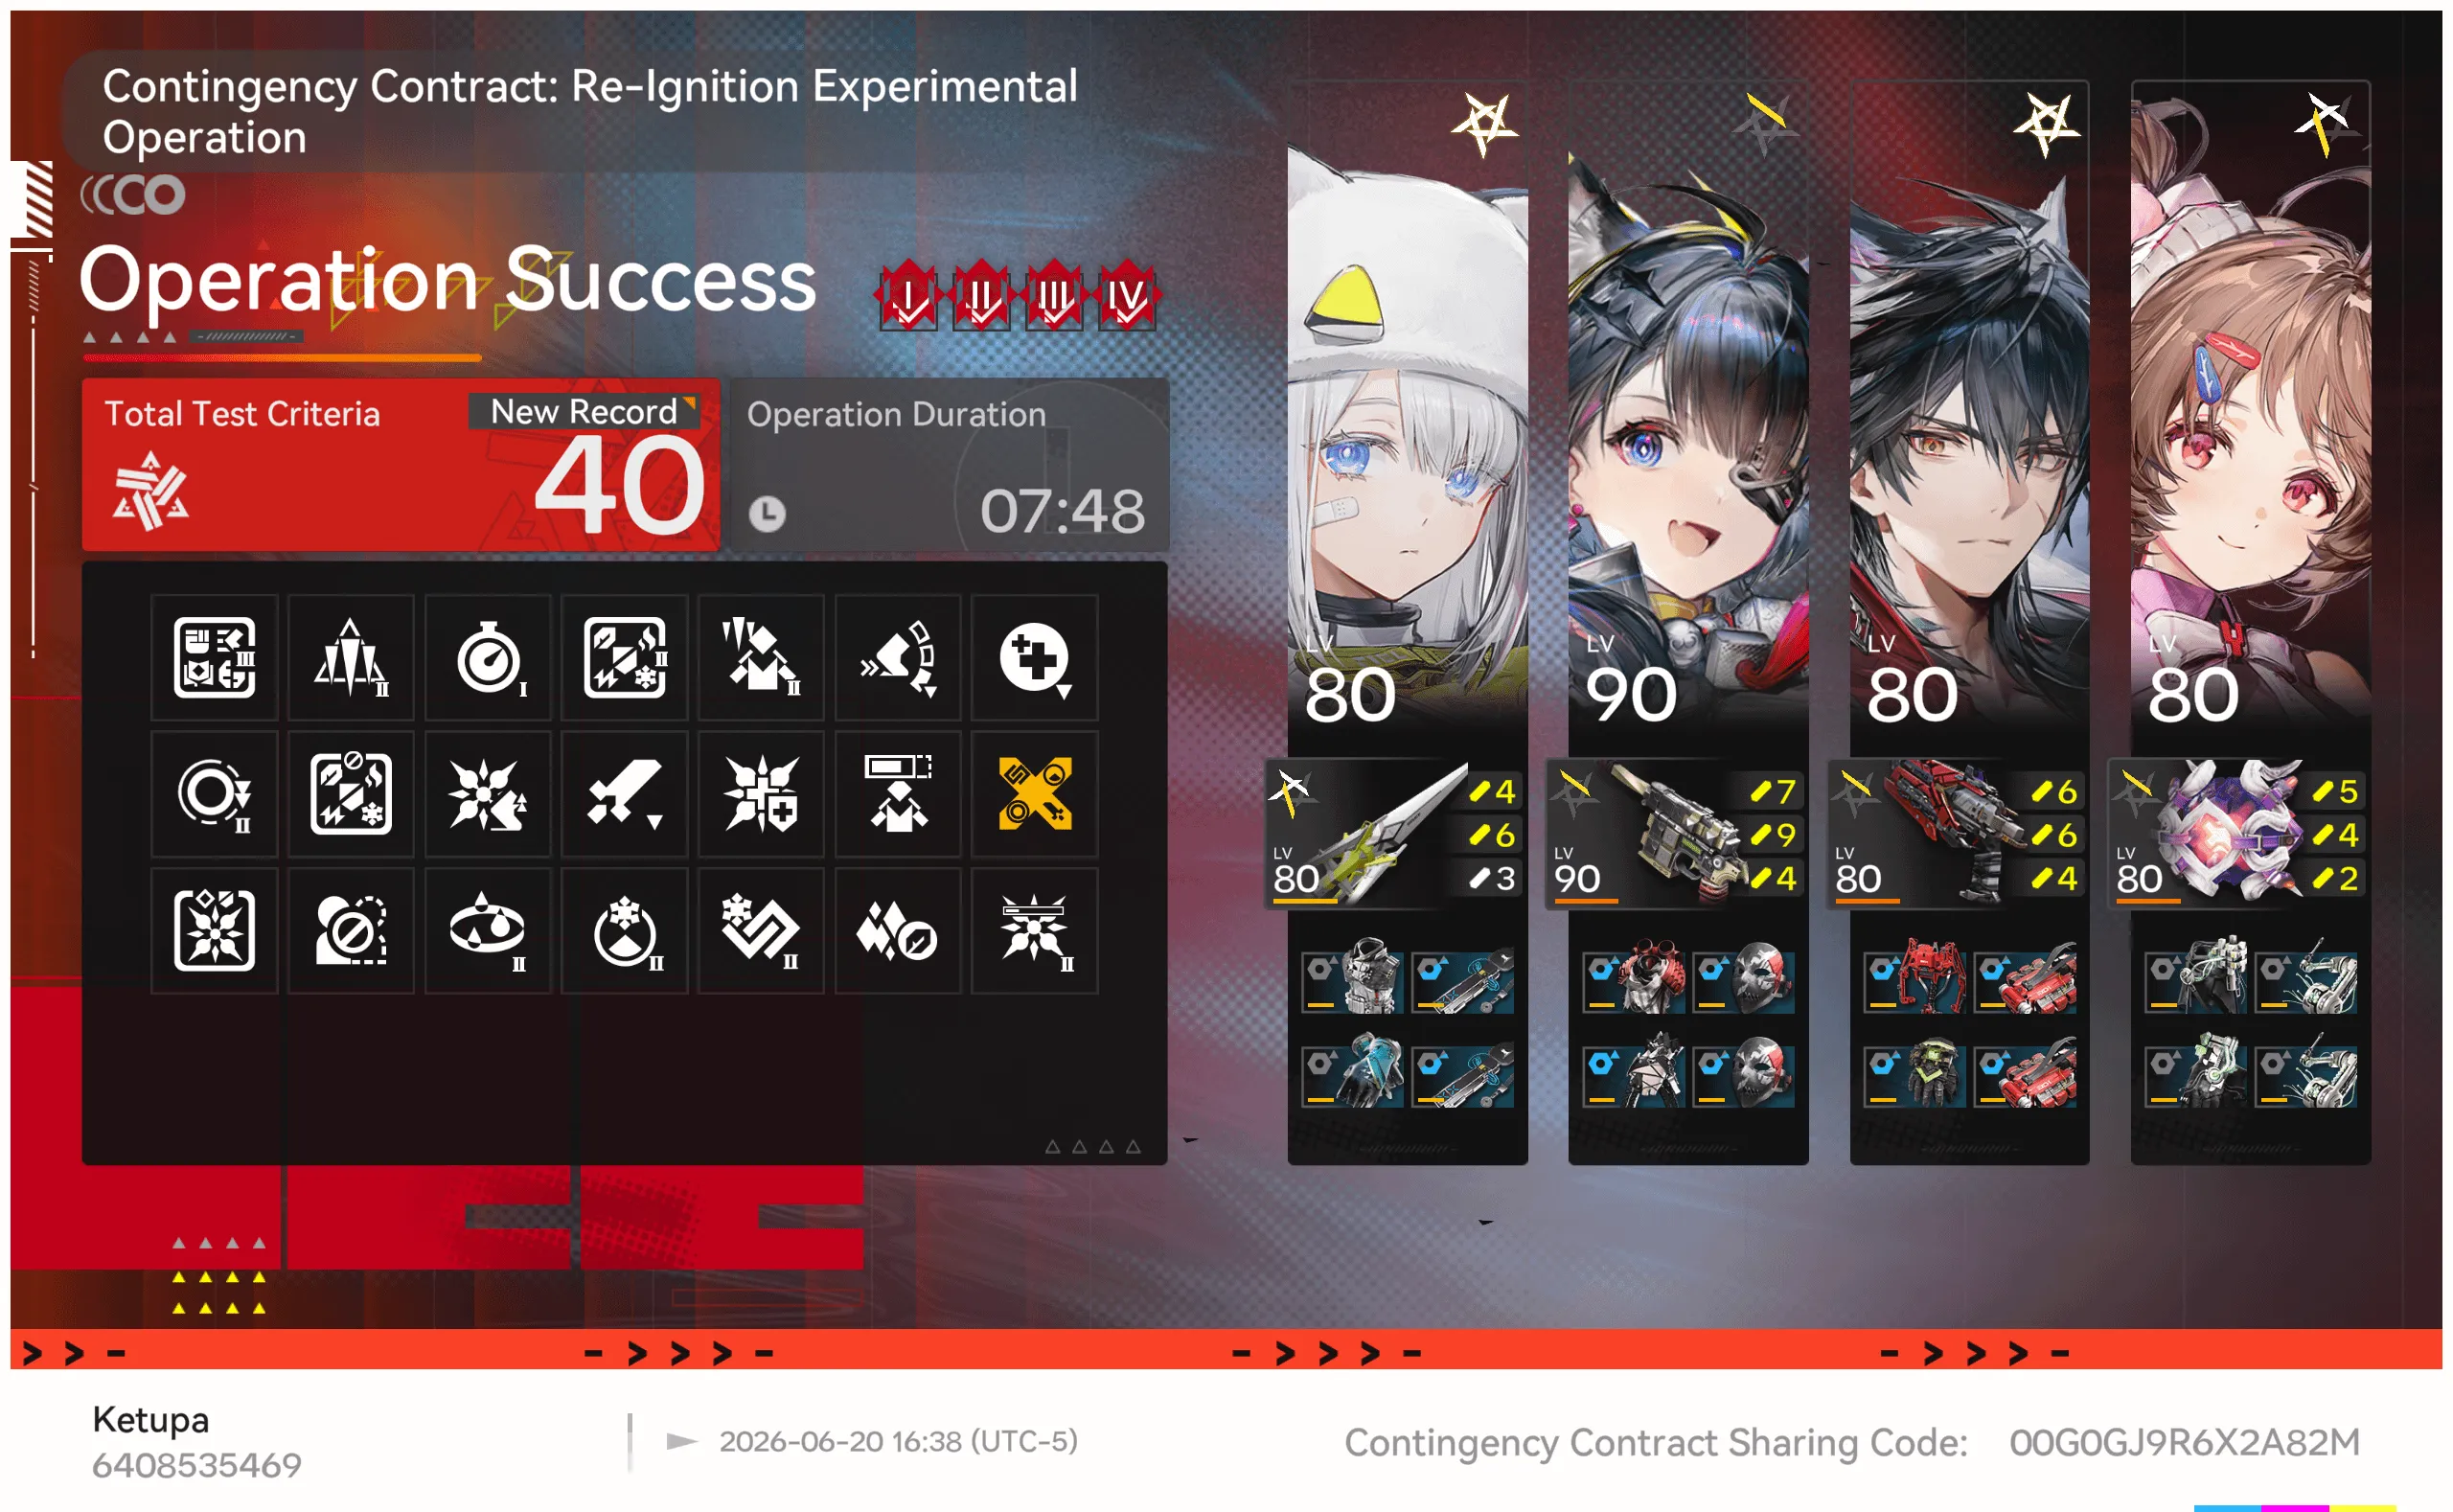 Lv 40
Lv 40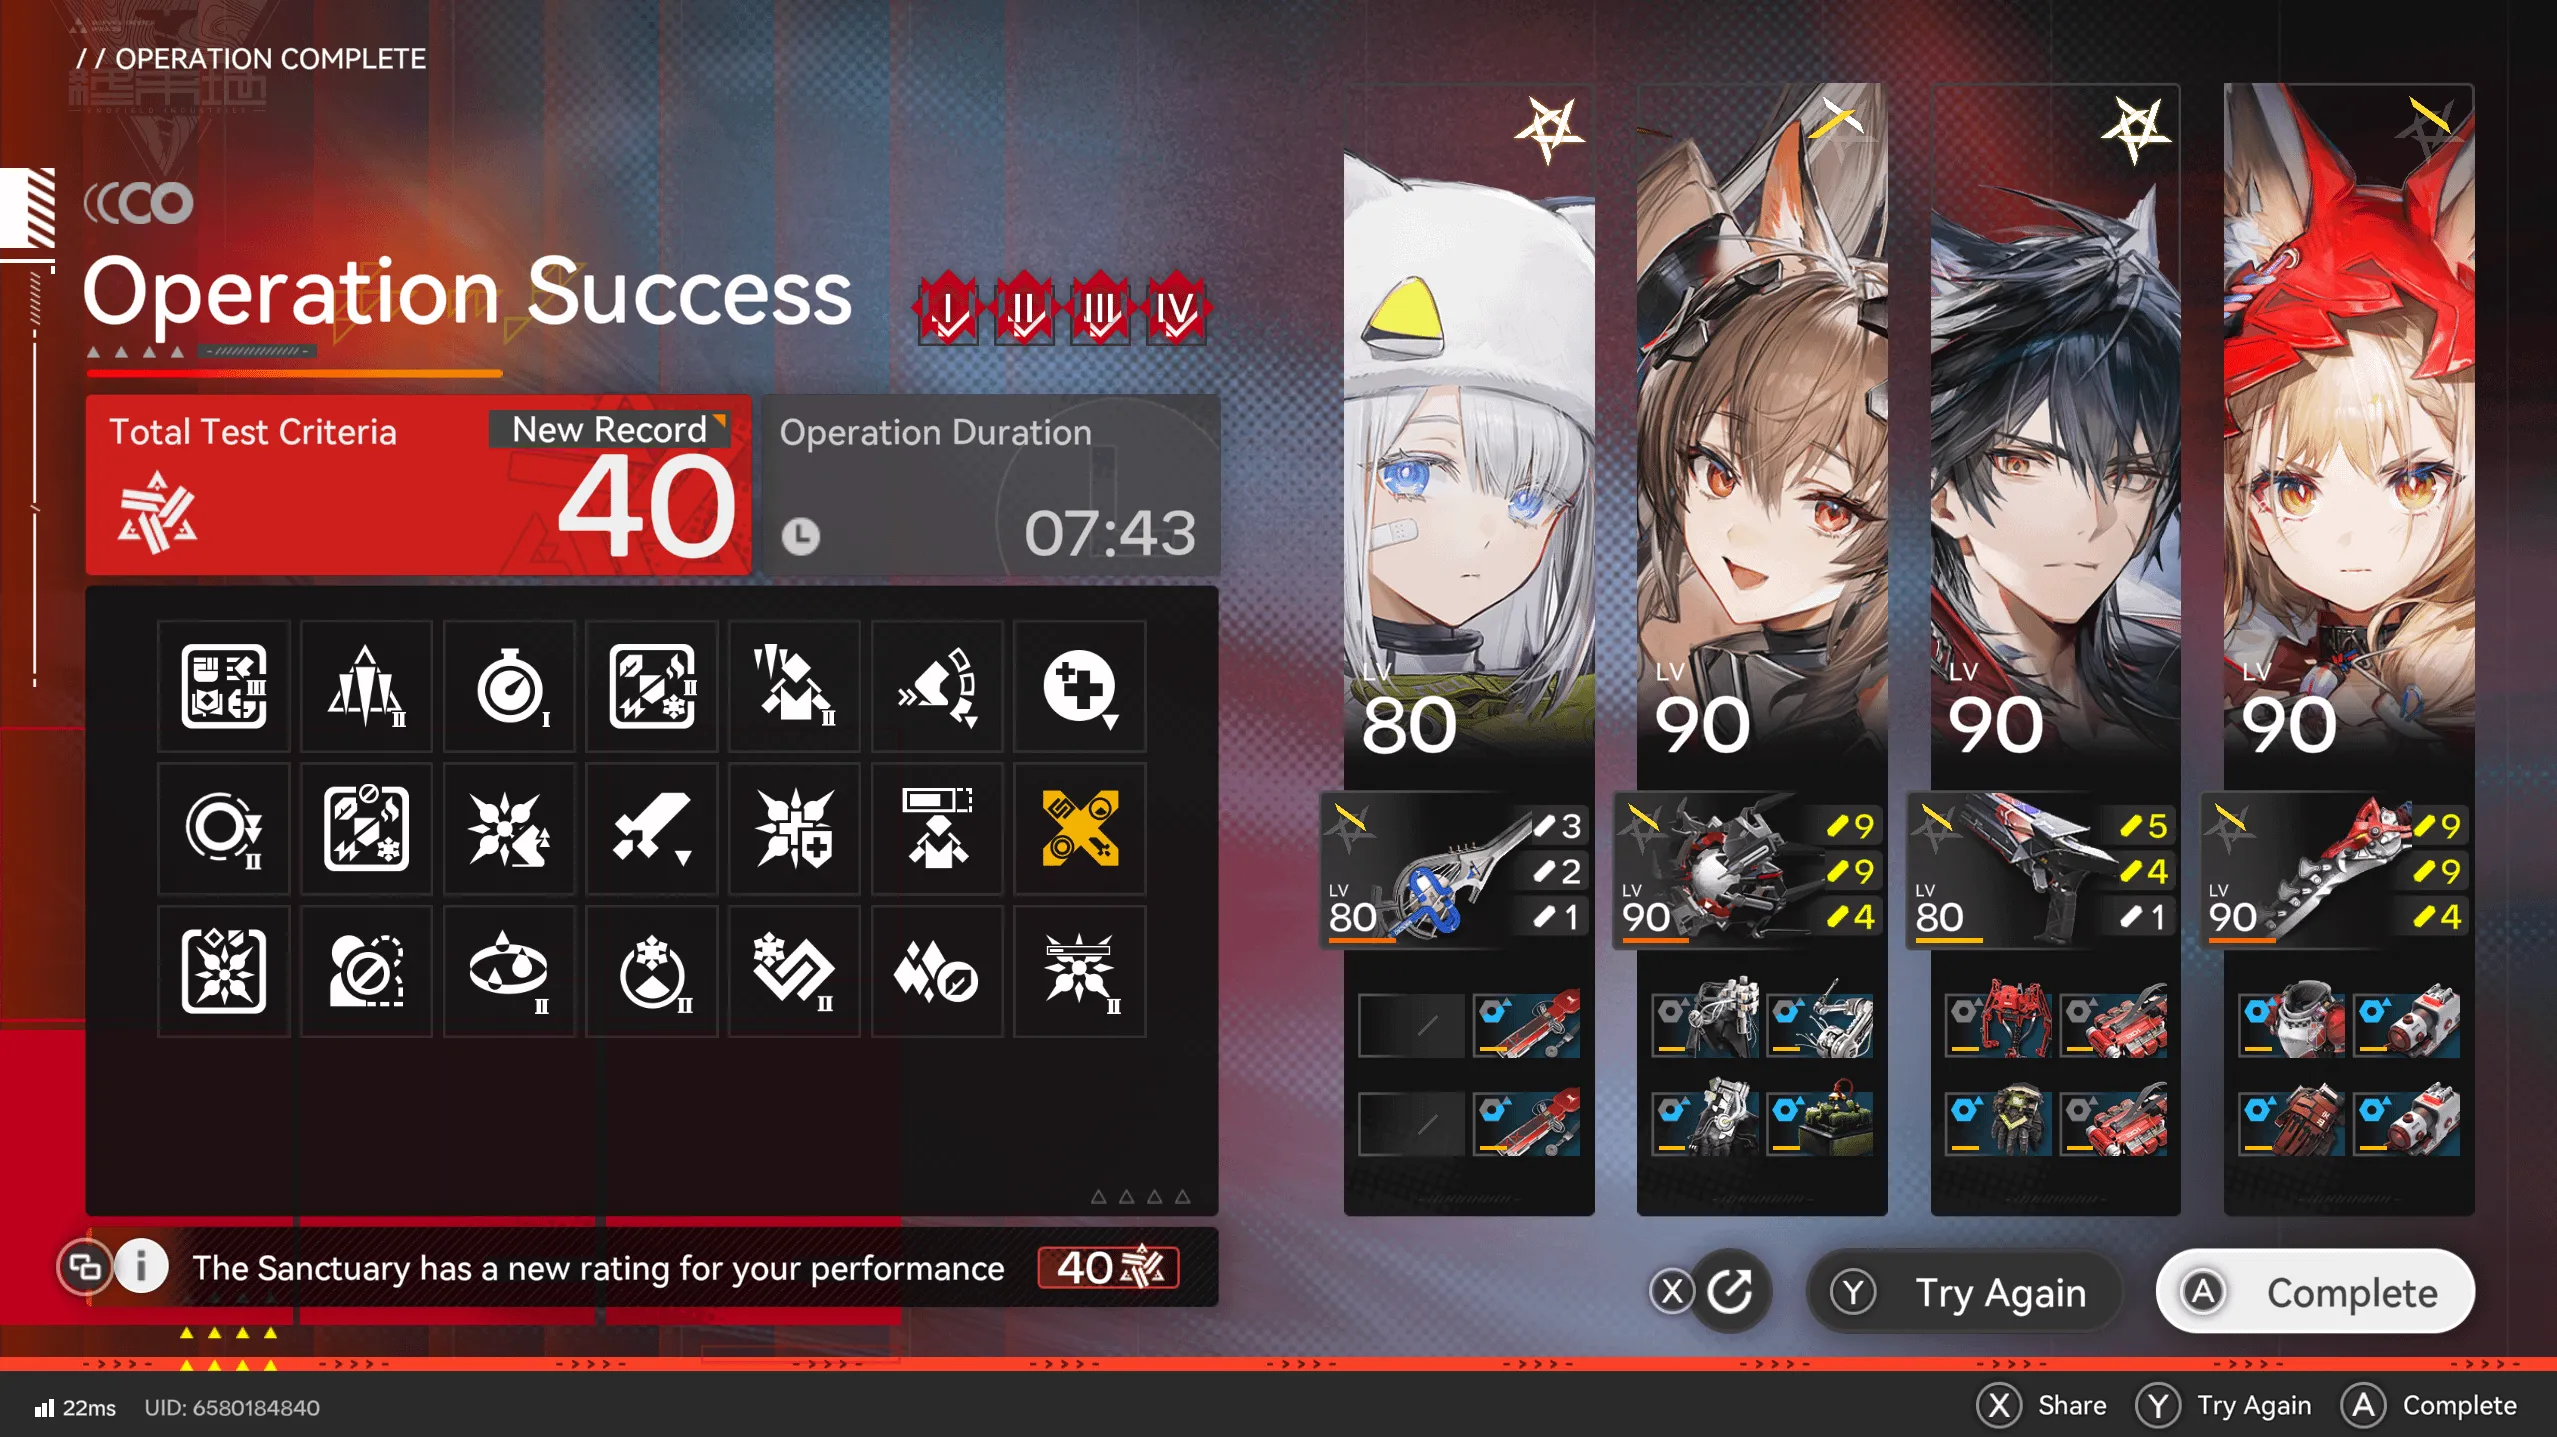 Lv 40
Lv 40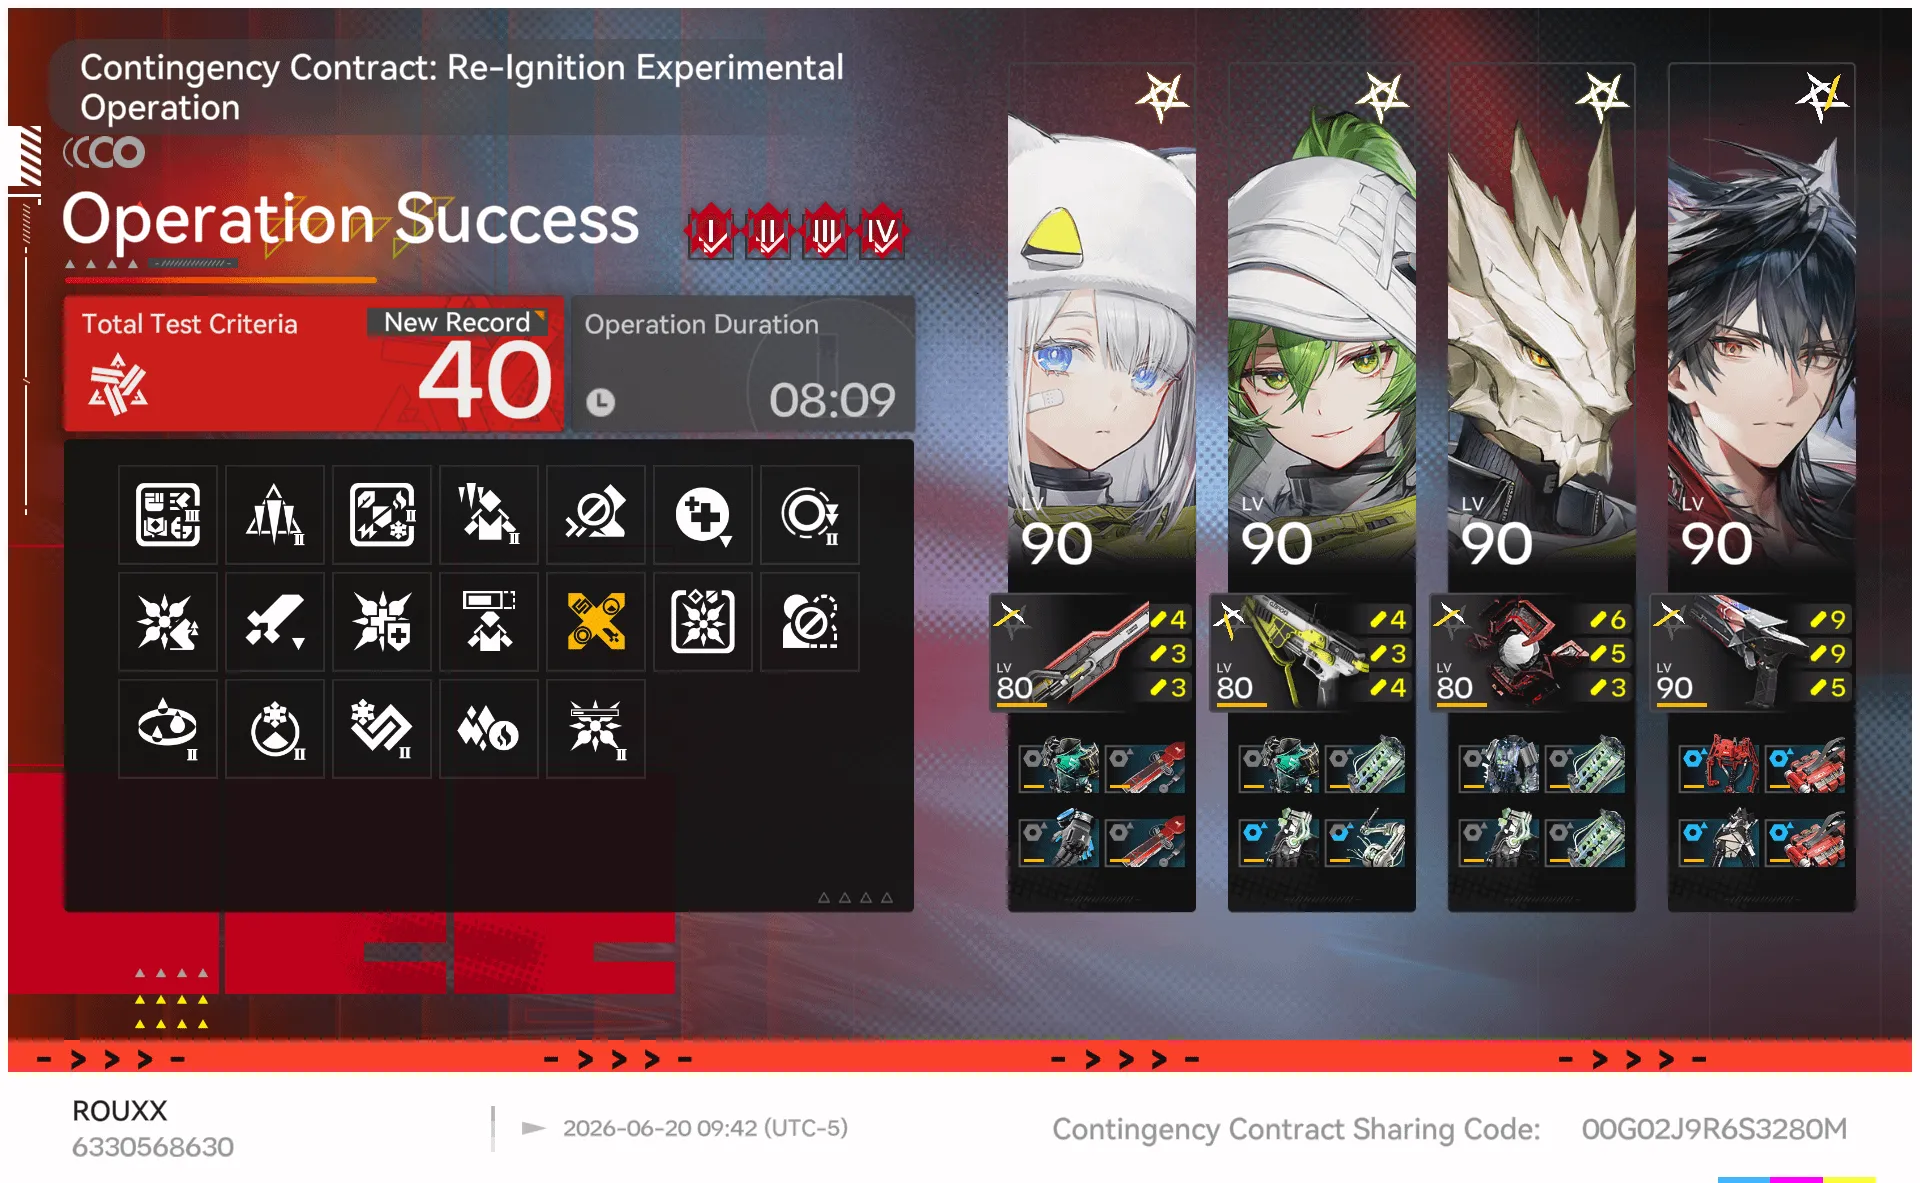 Lv 40
Lv 40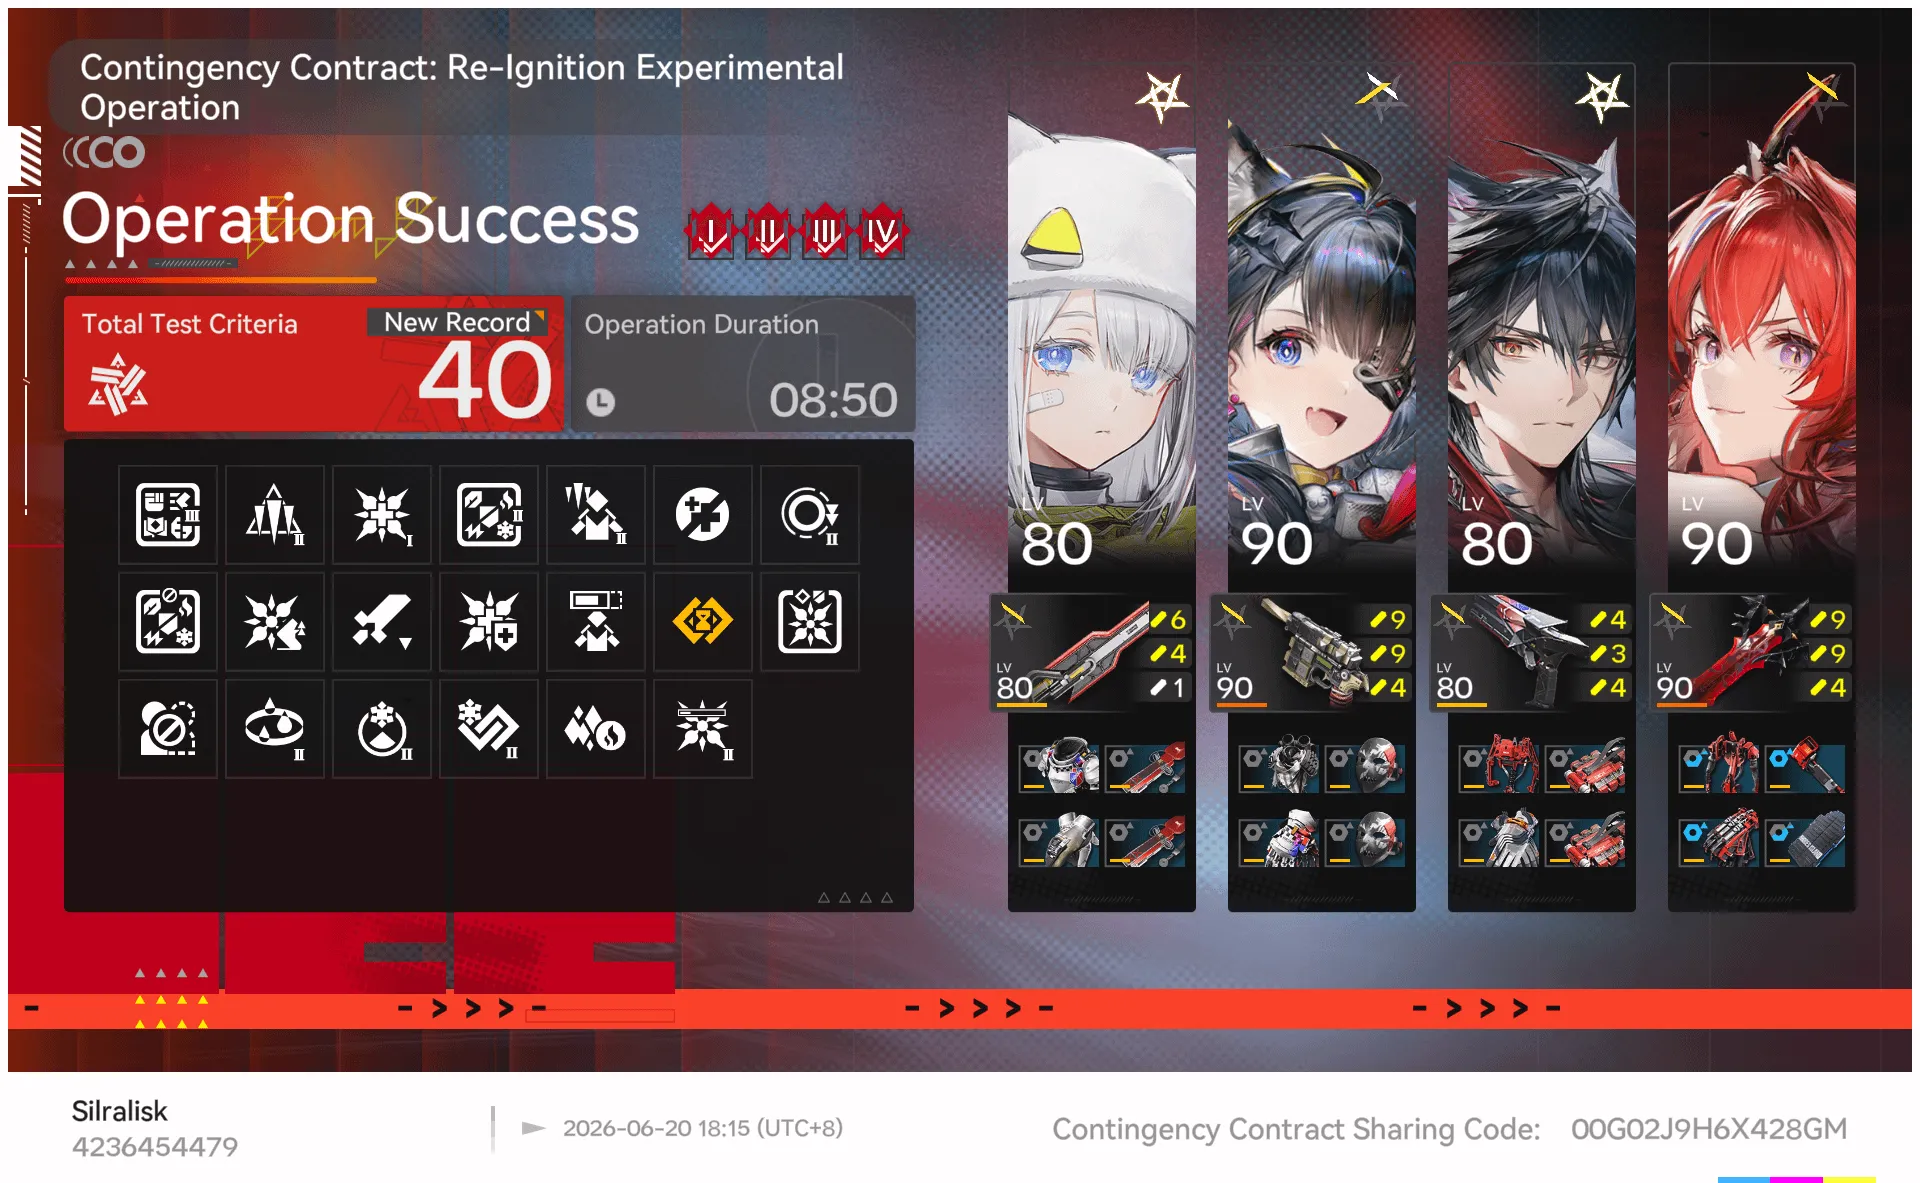 Lv 40
Lv 40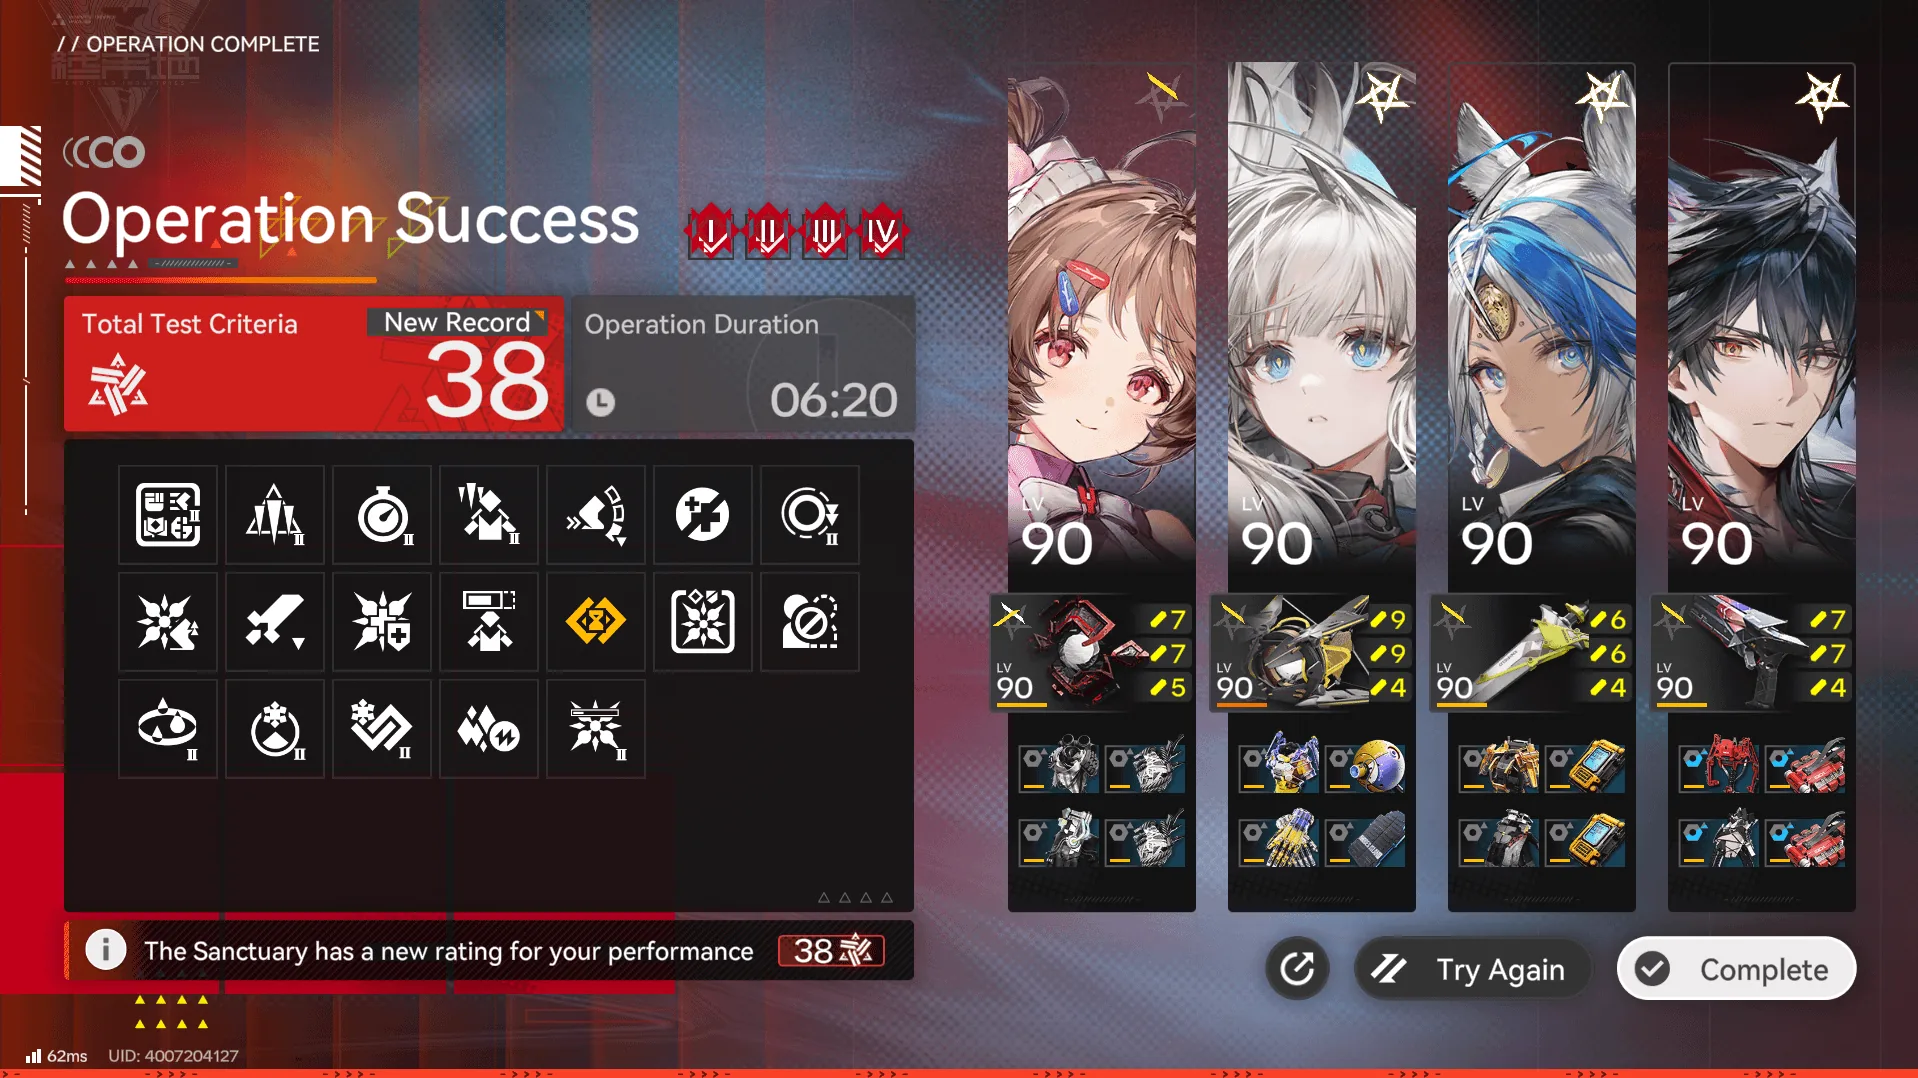 Lv 38
Lv 38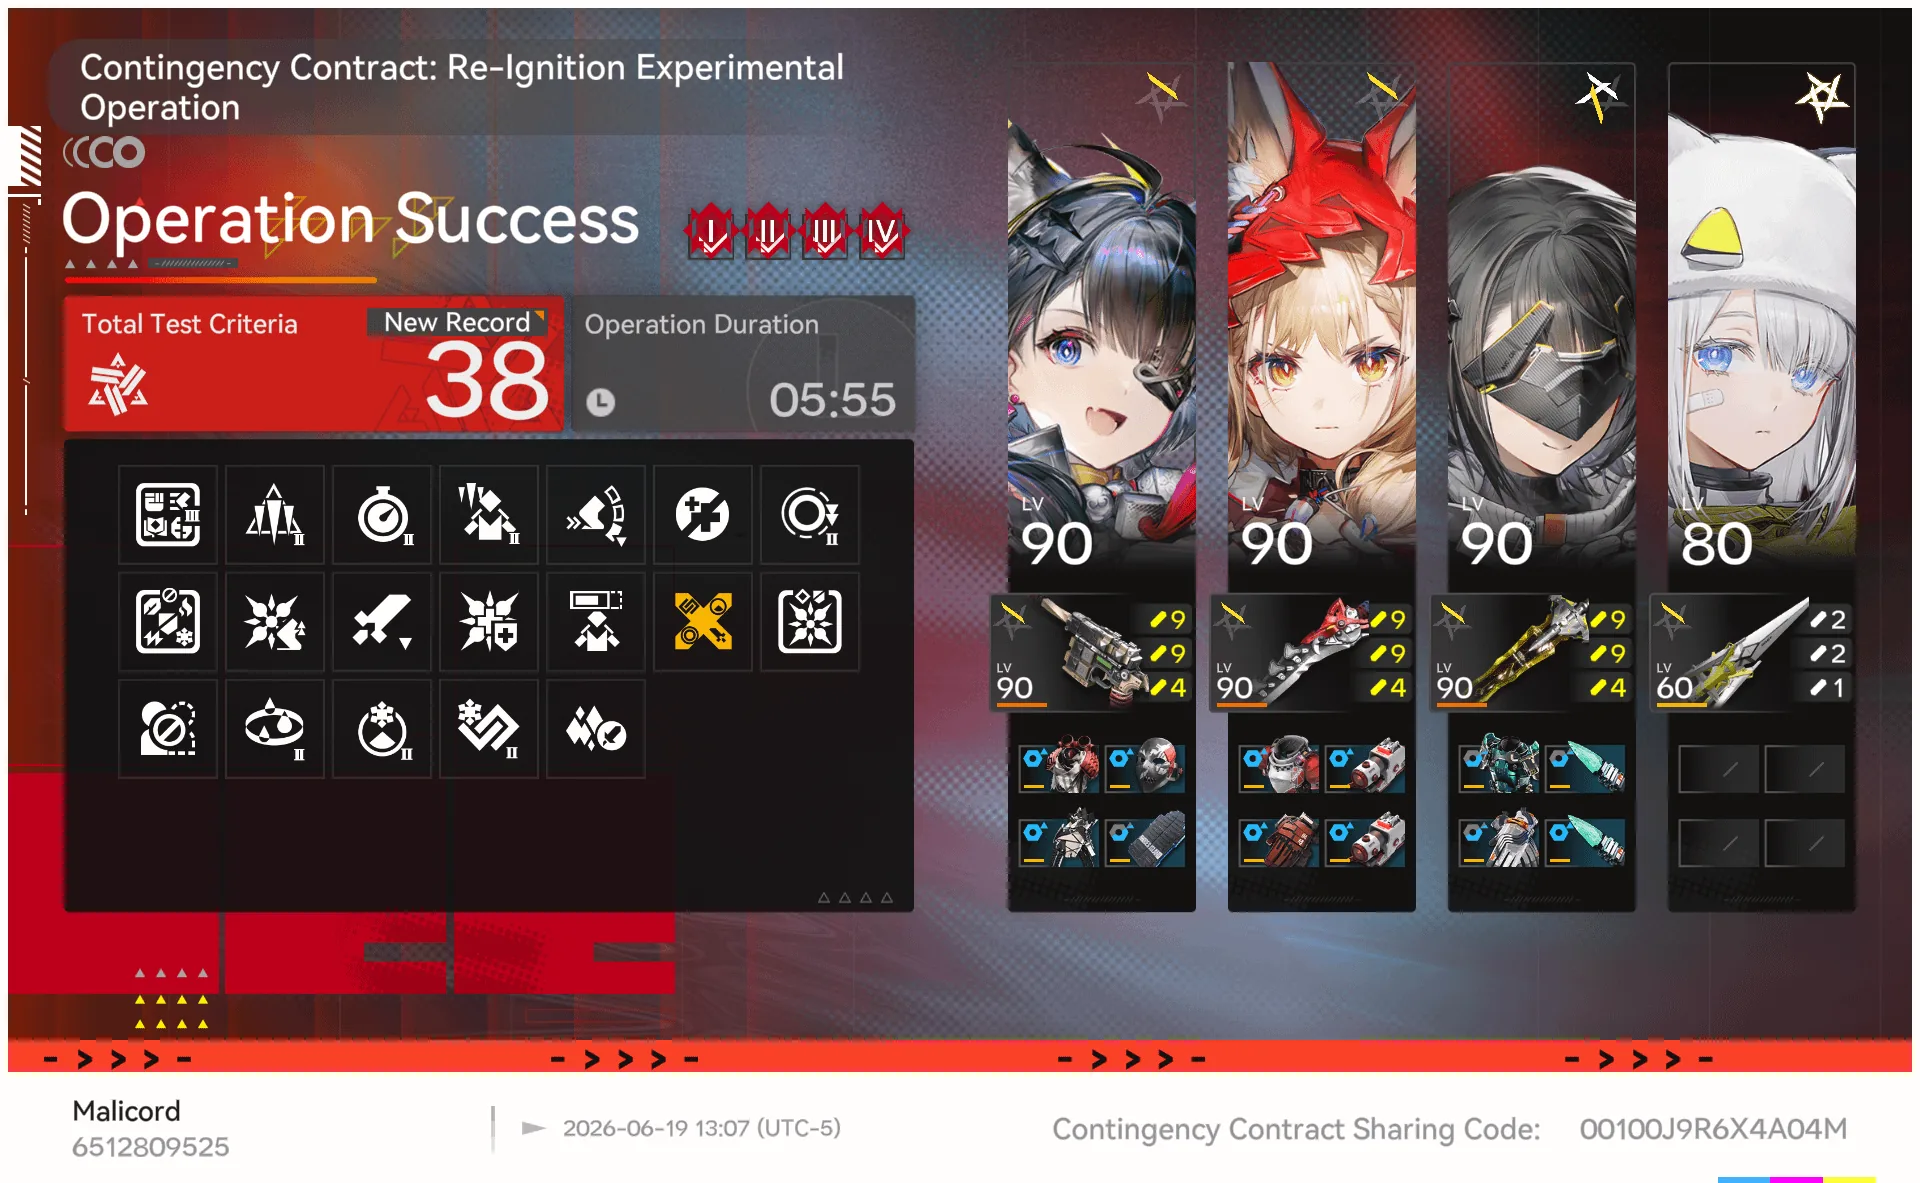 Lv 38
Lv 38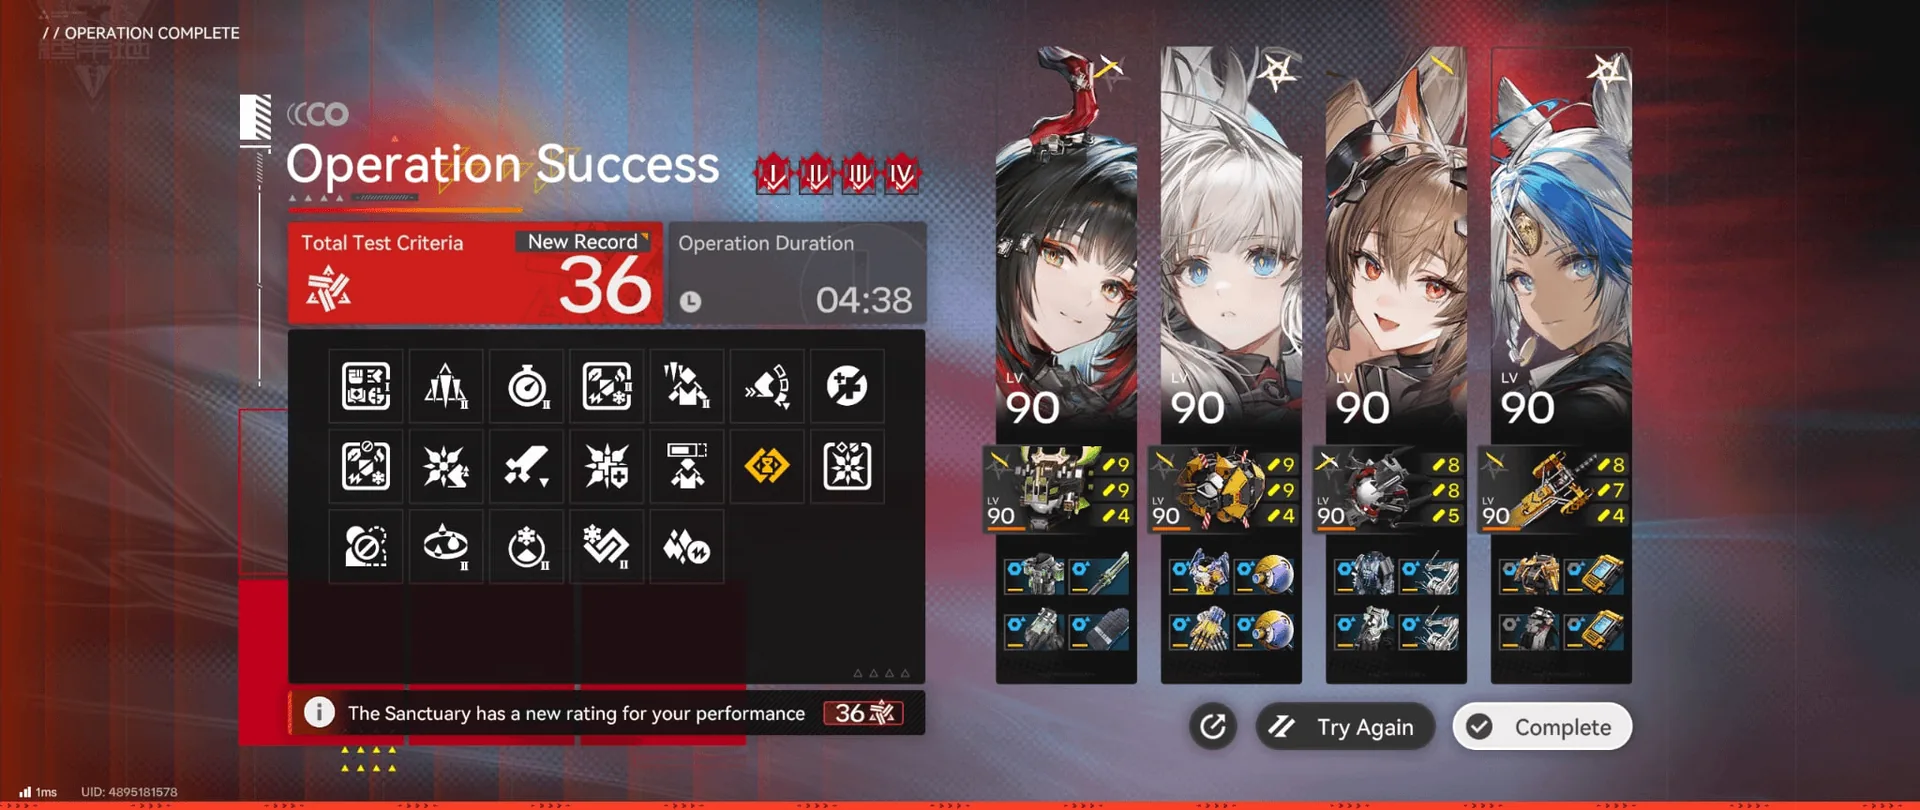 Lv 36
Lv 36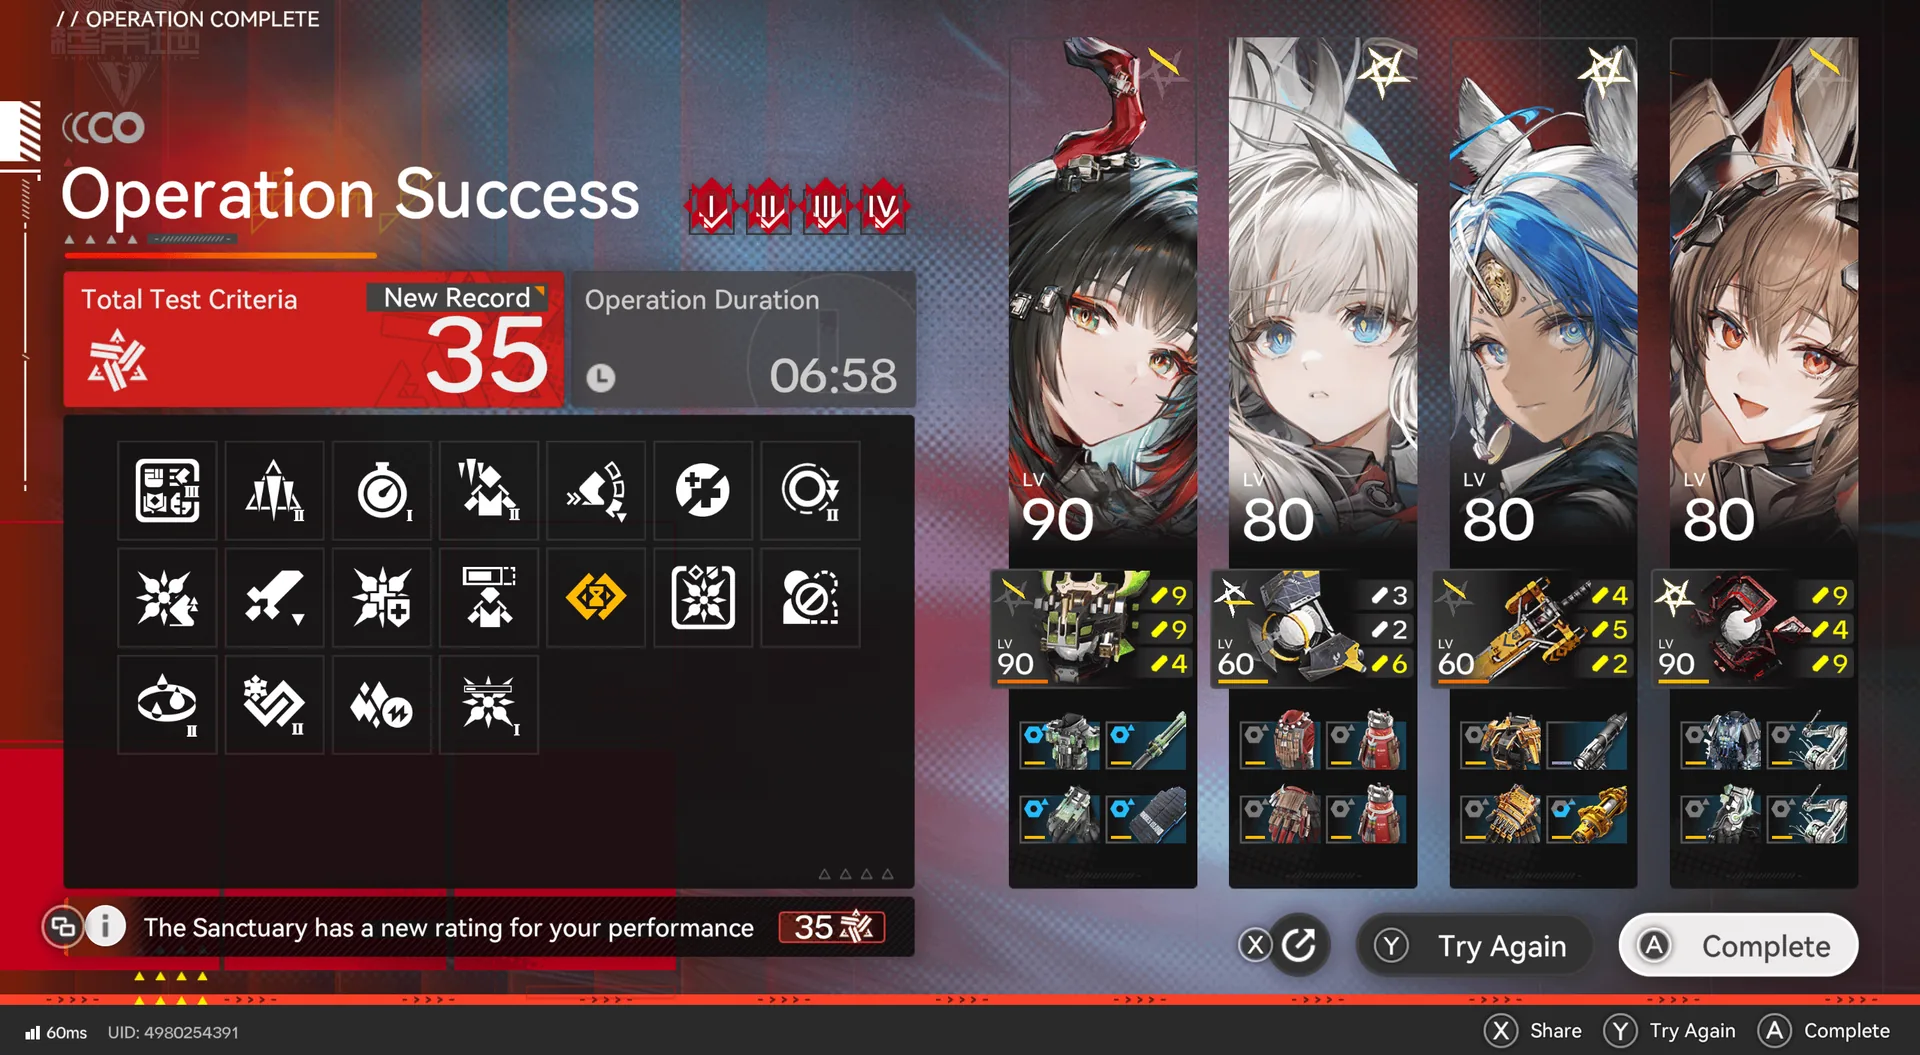 Lv 35
Lv 35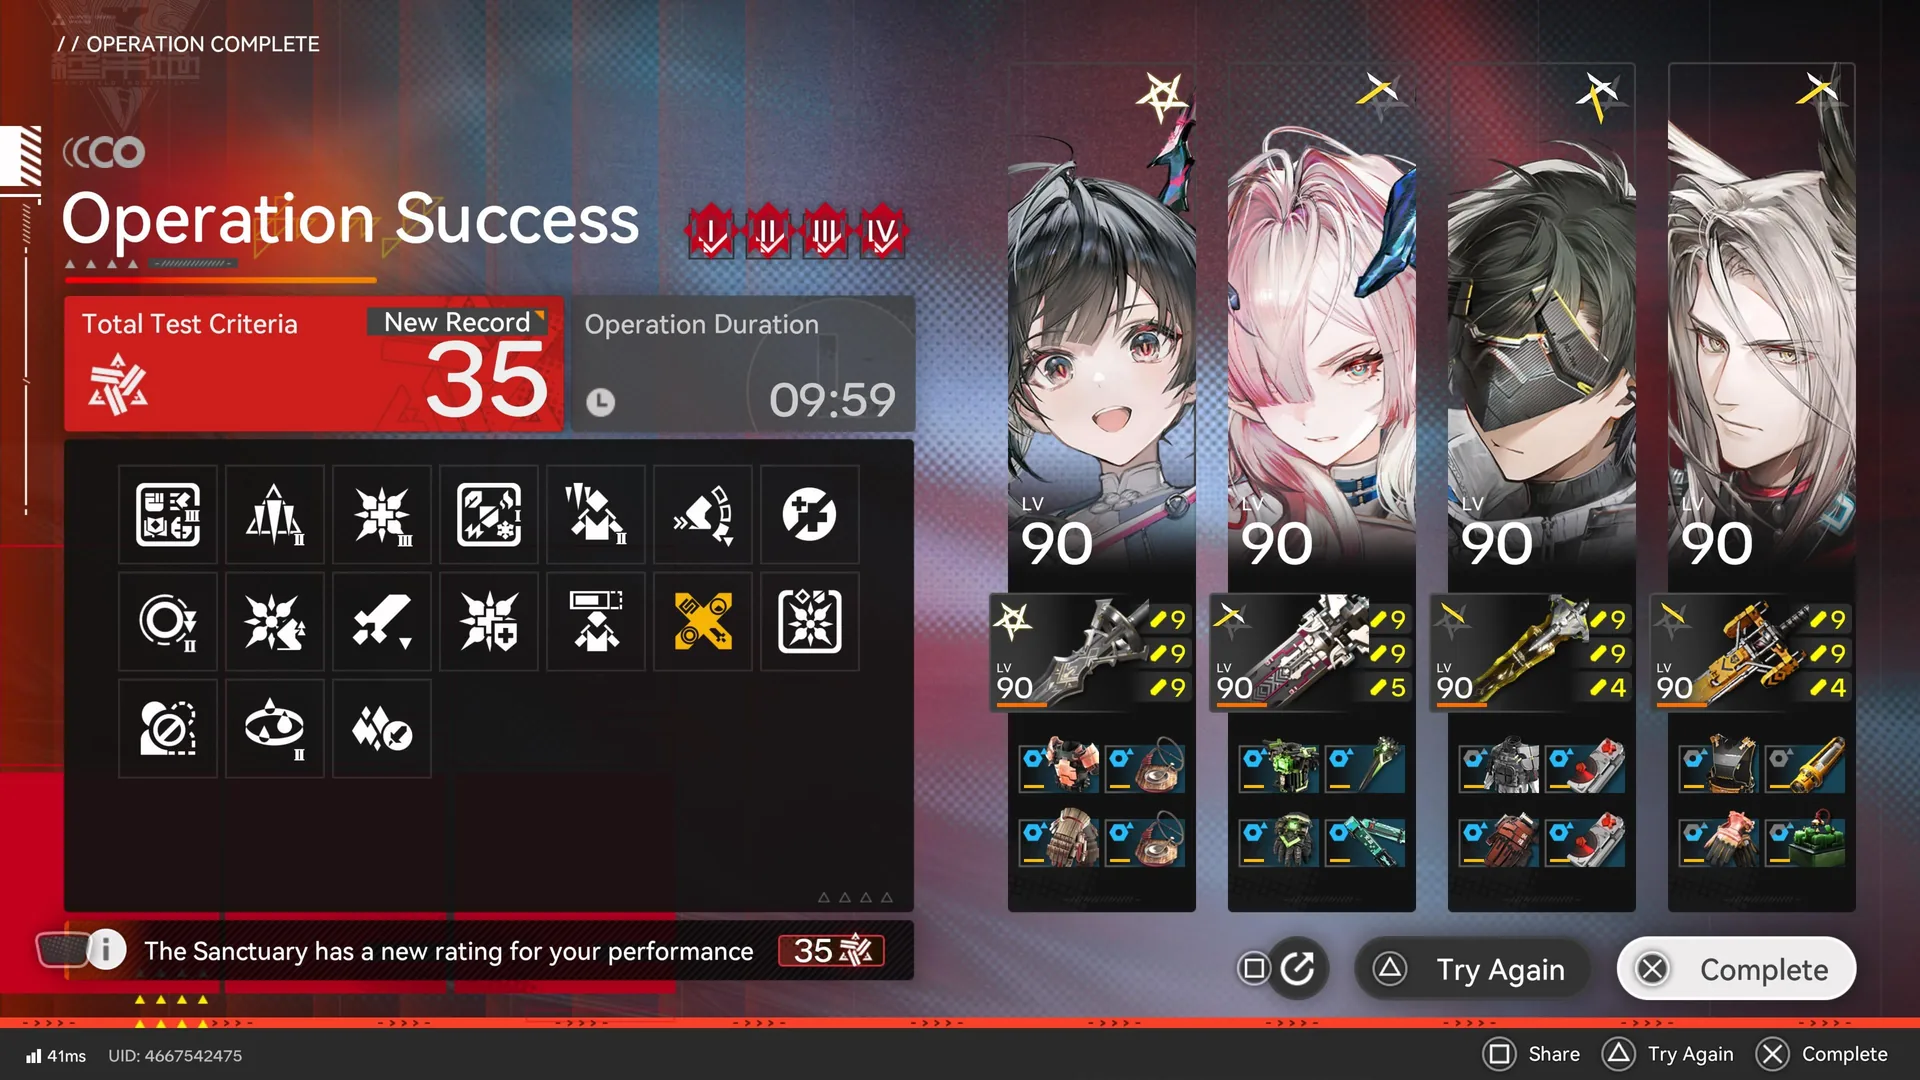 Lv 35
Lv 35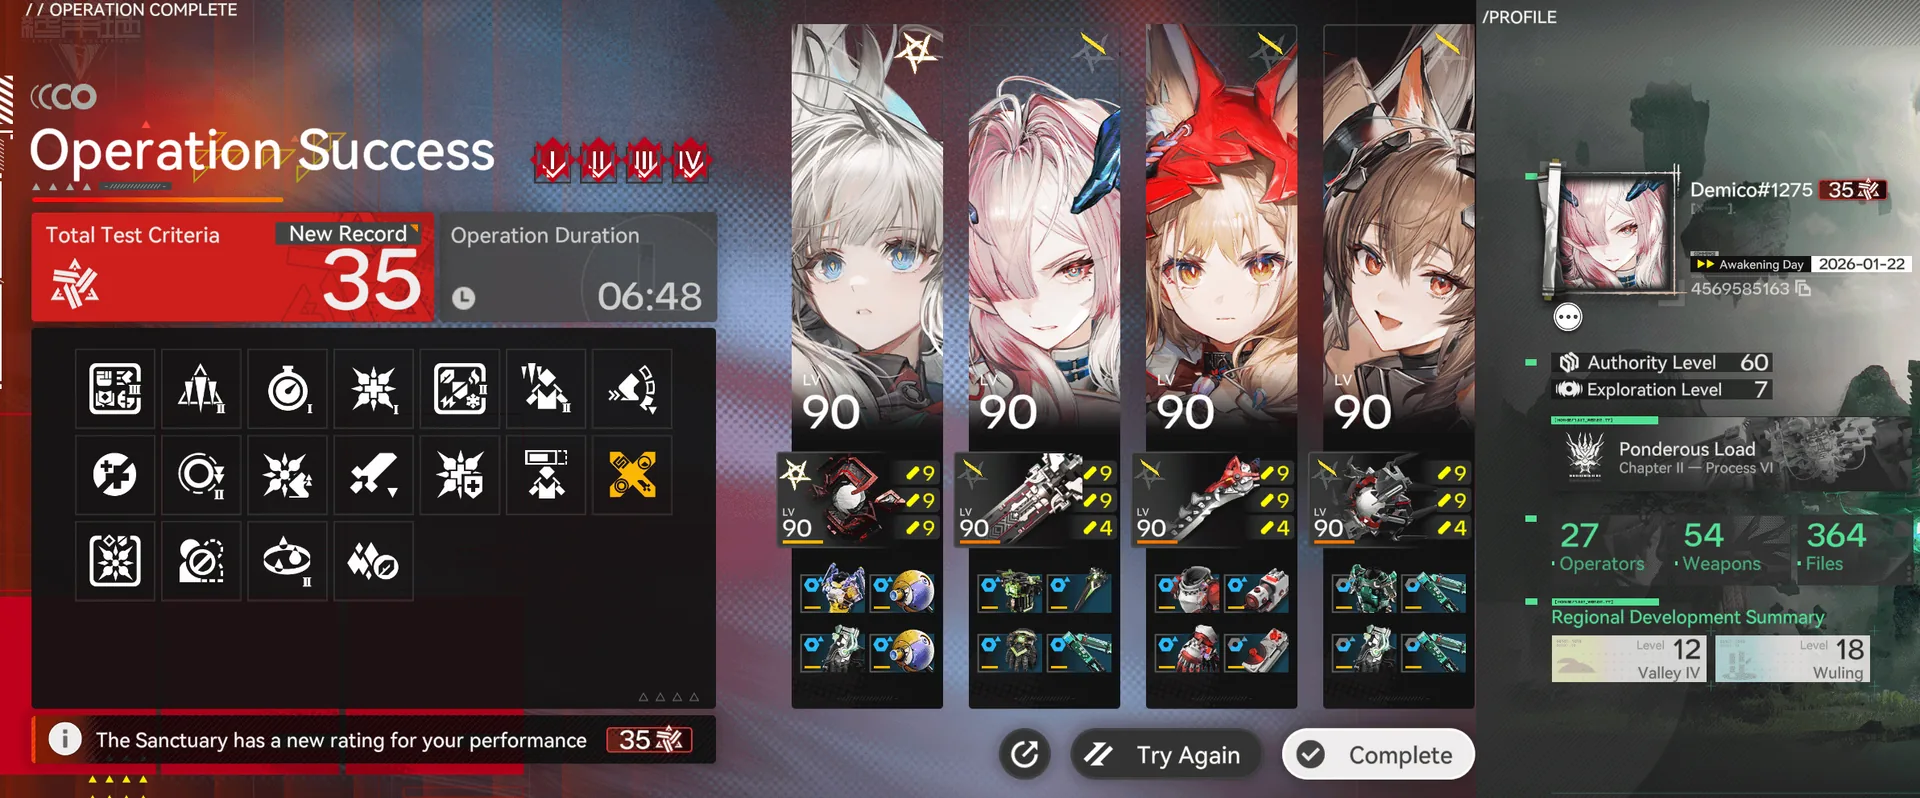 Lv 35
Lv 35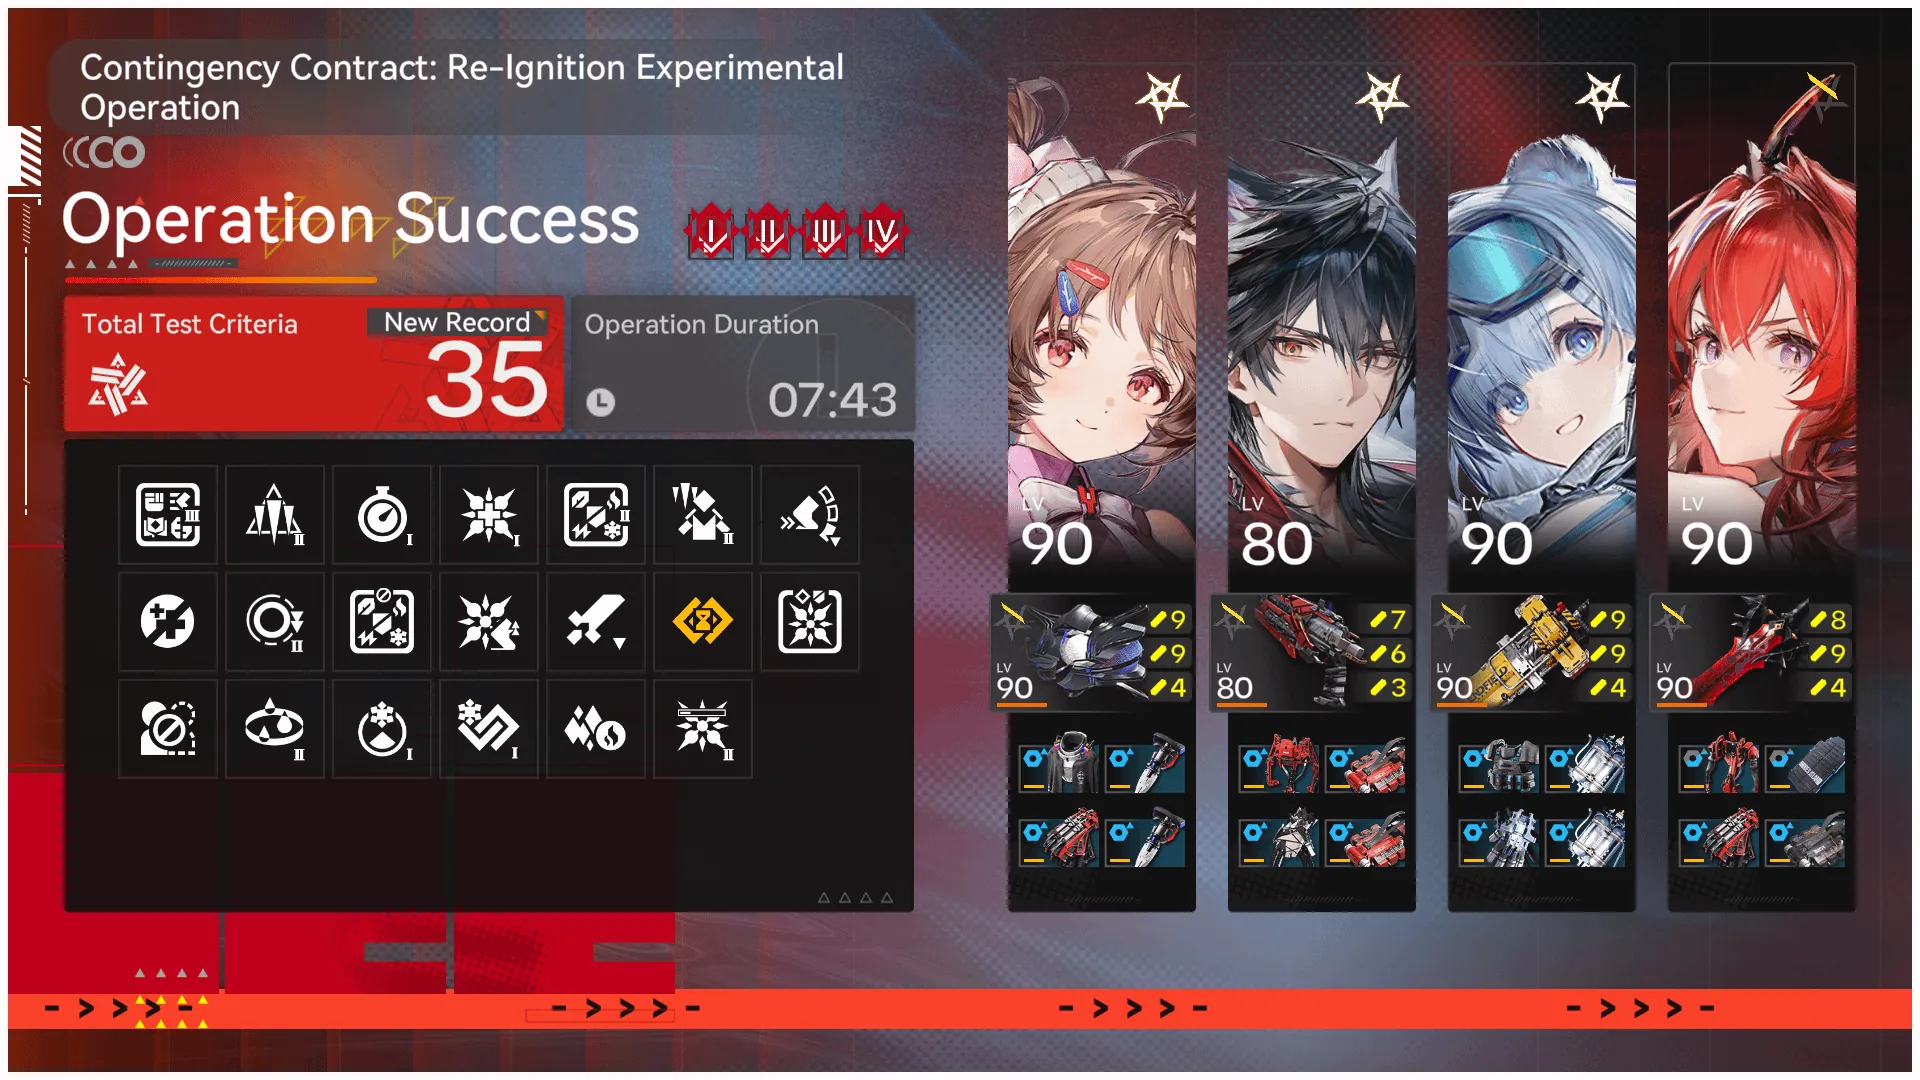 Lv 35
Lv 35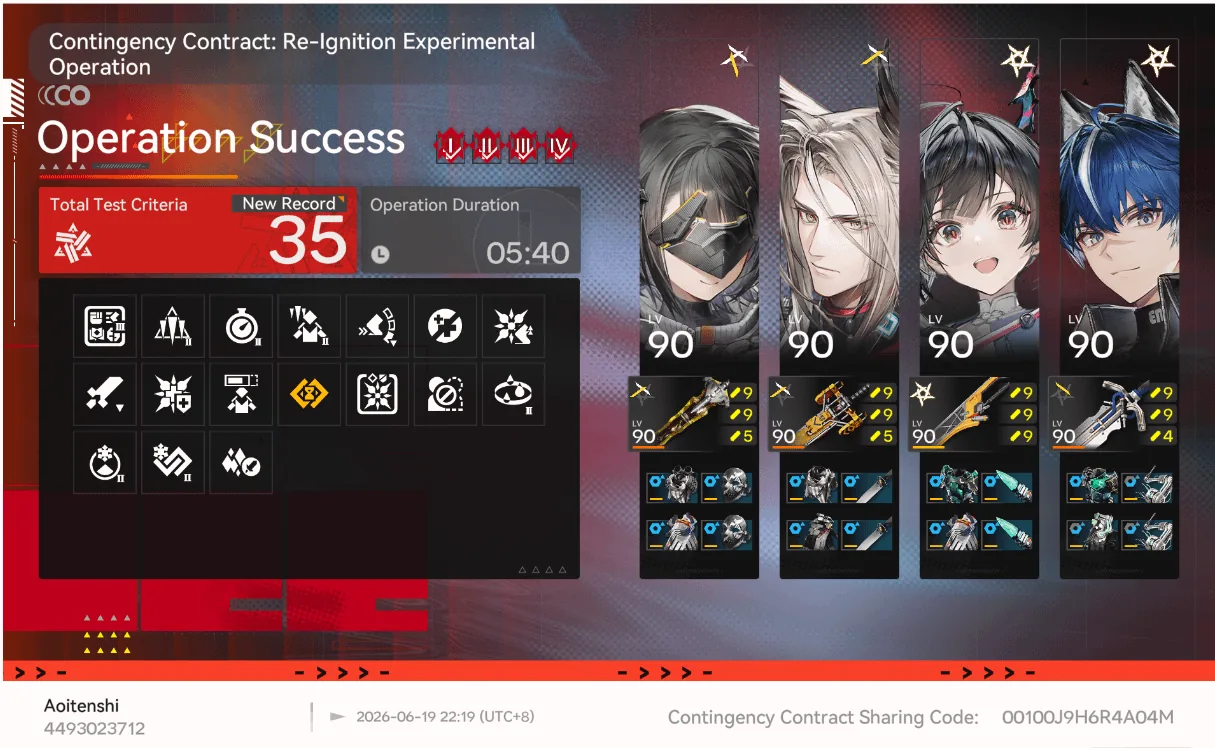 Lv 35
Lv 35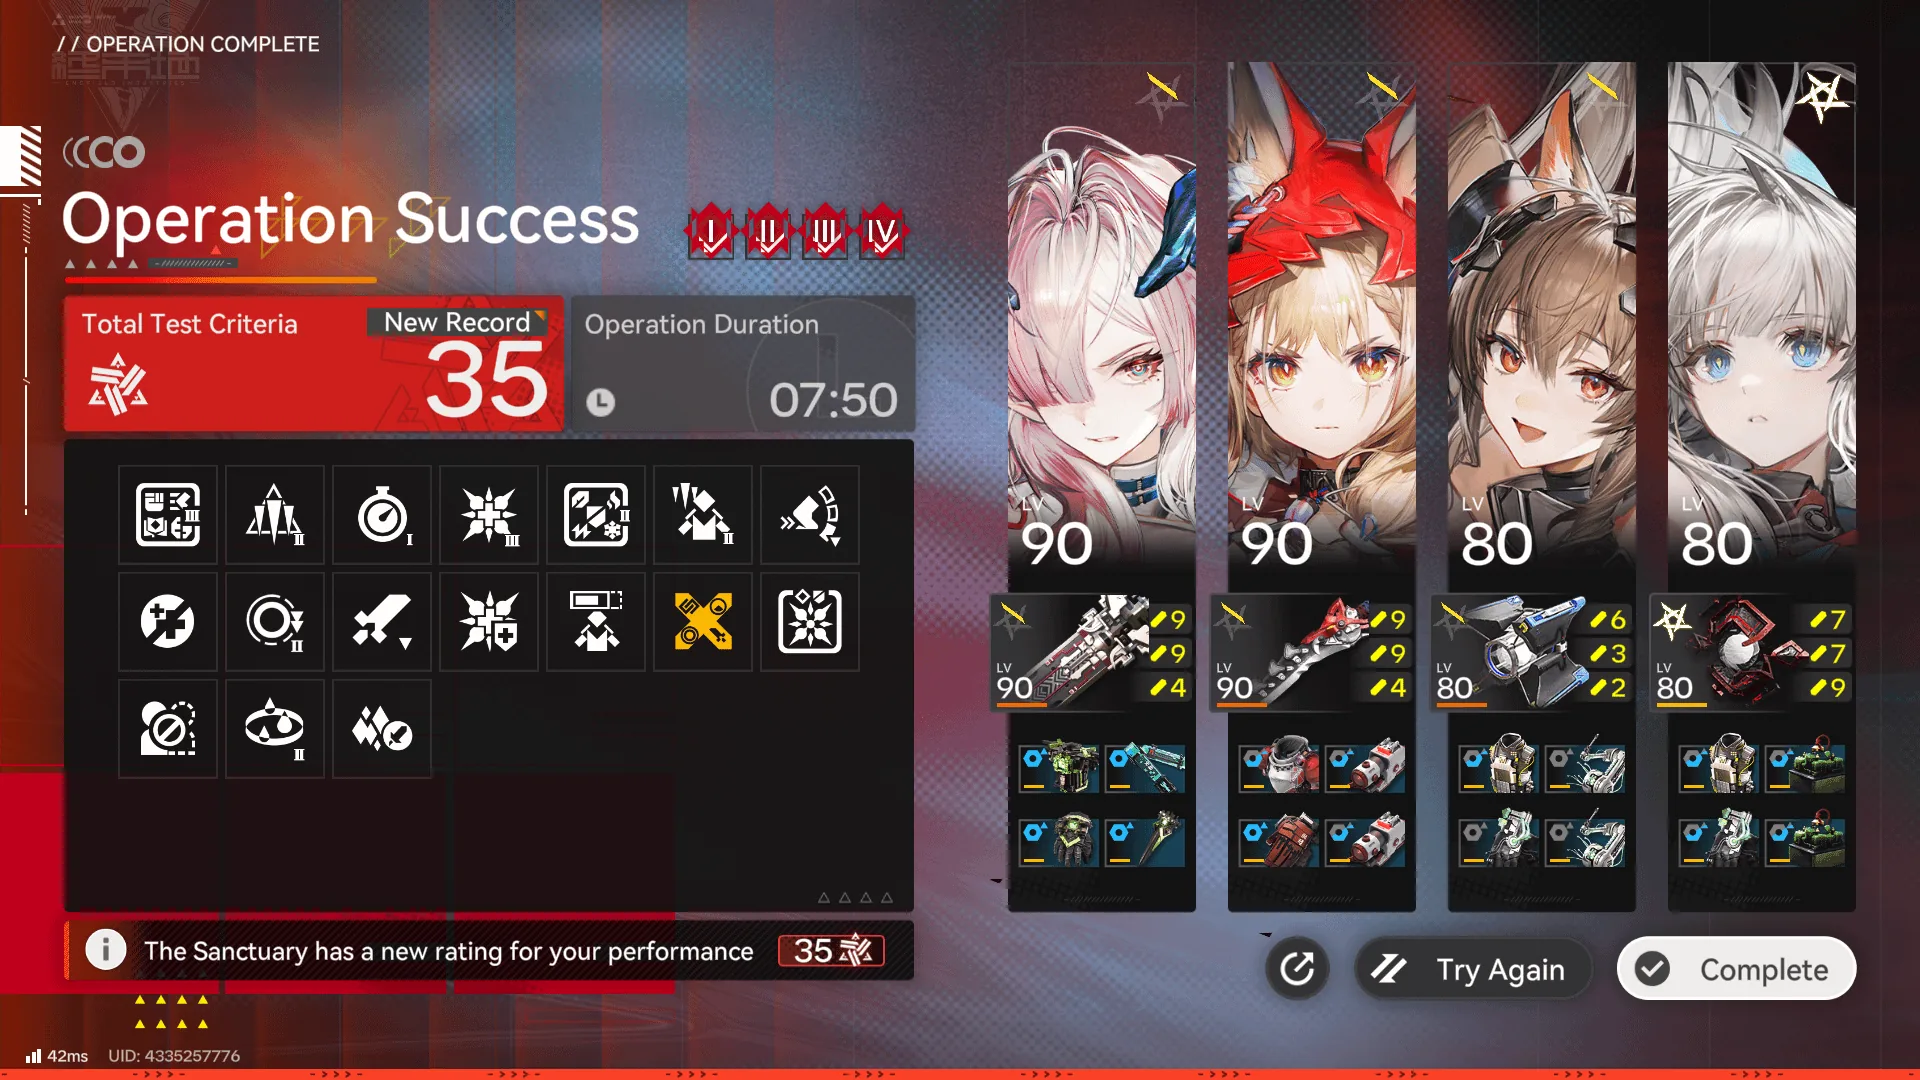 Lv 35
Lv 35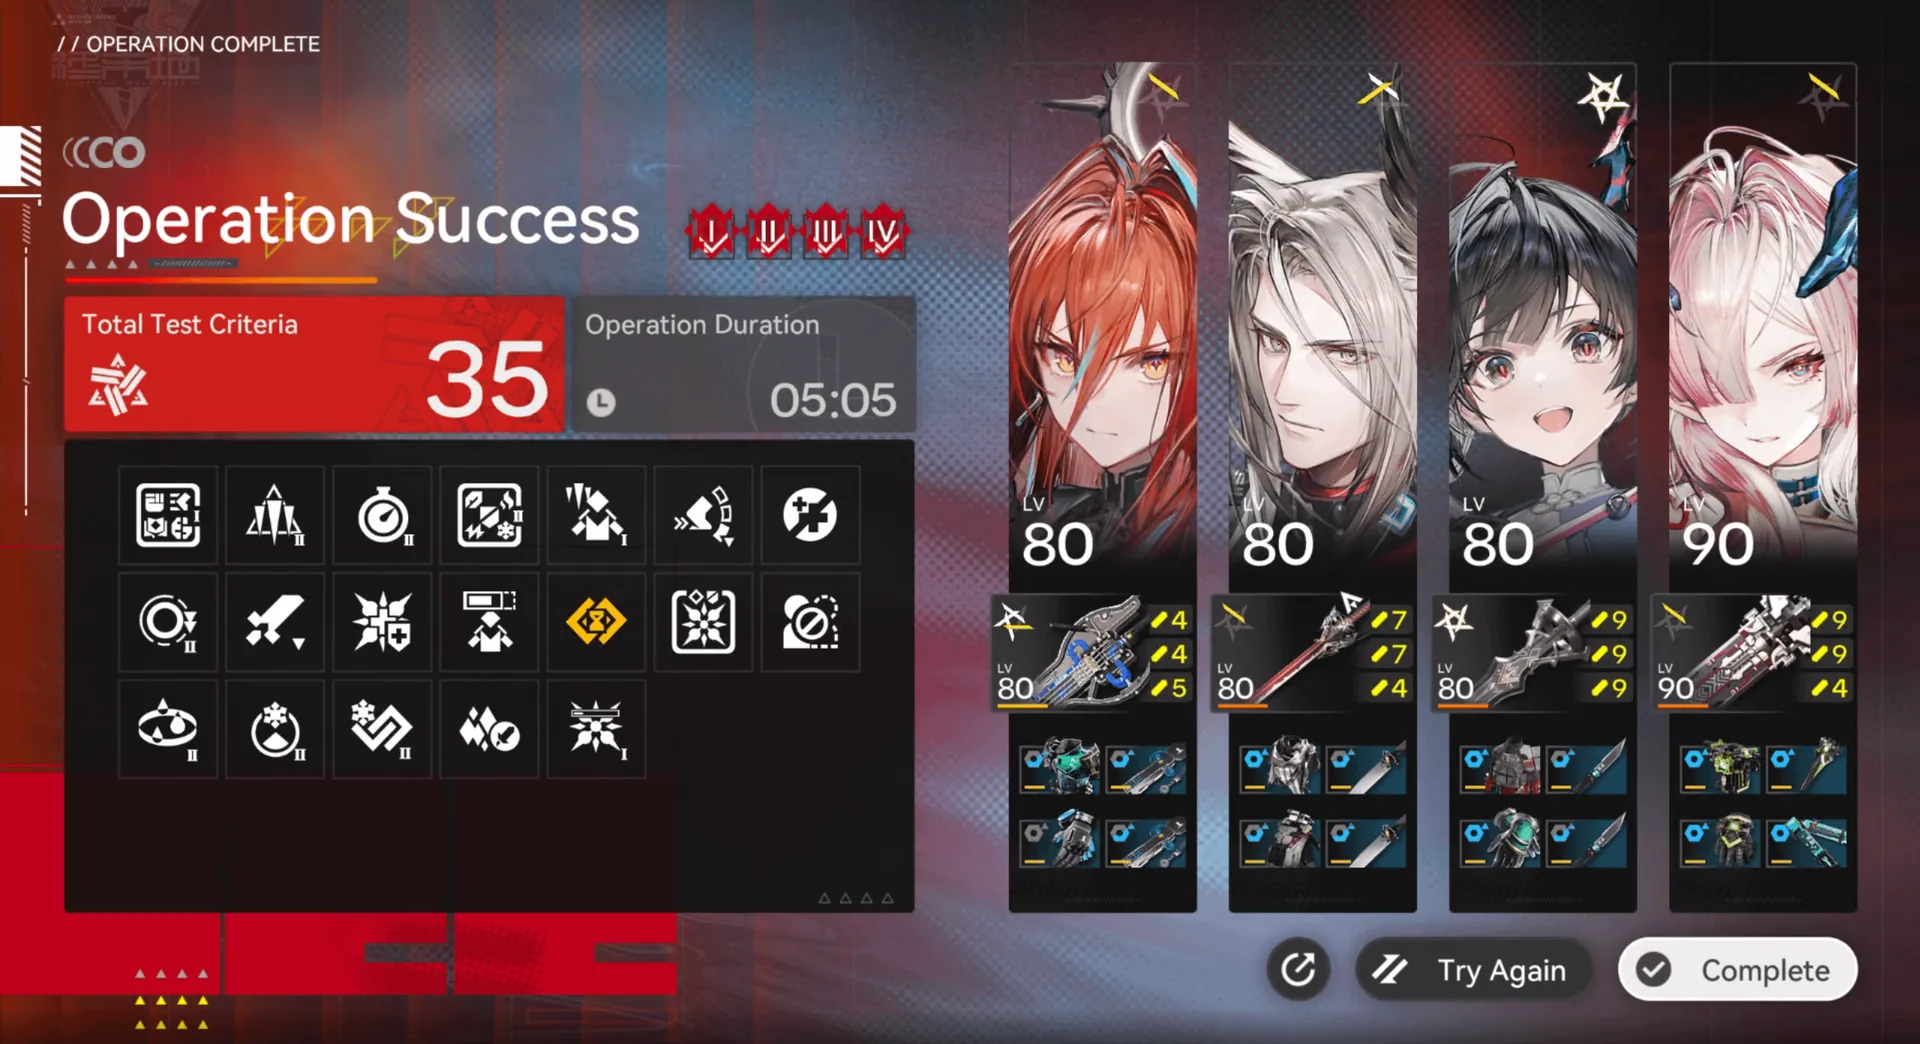 Lv 35
Lv 35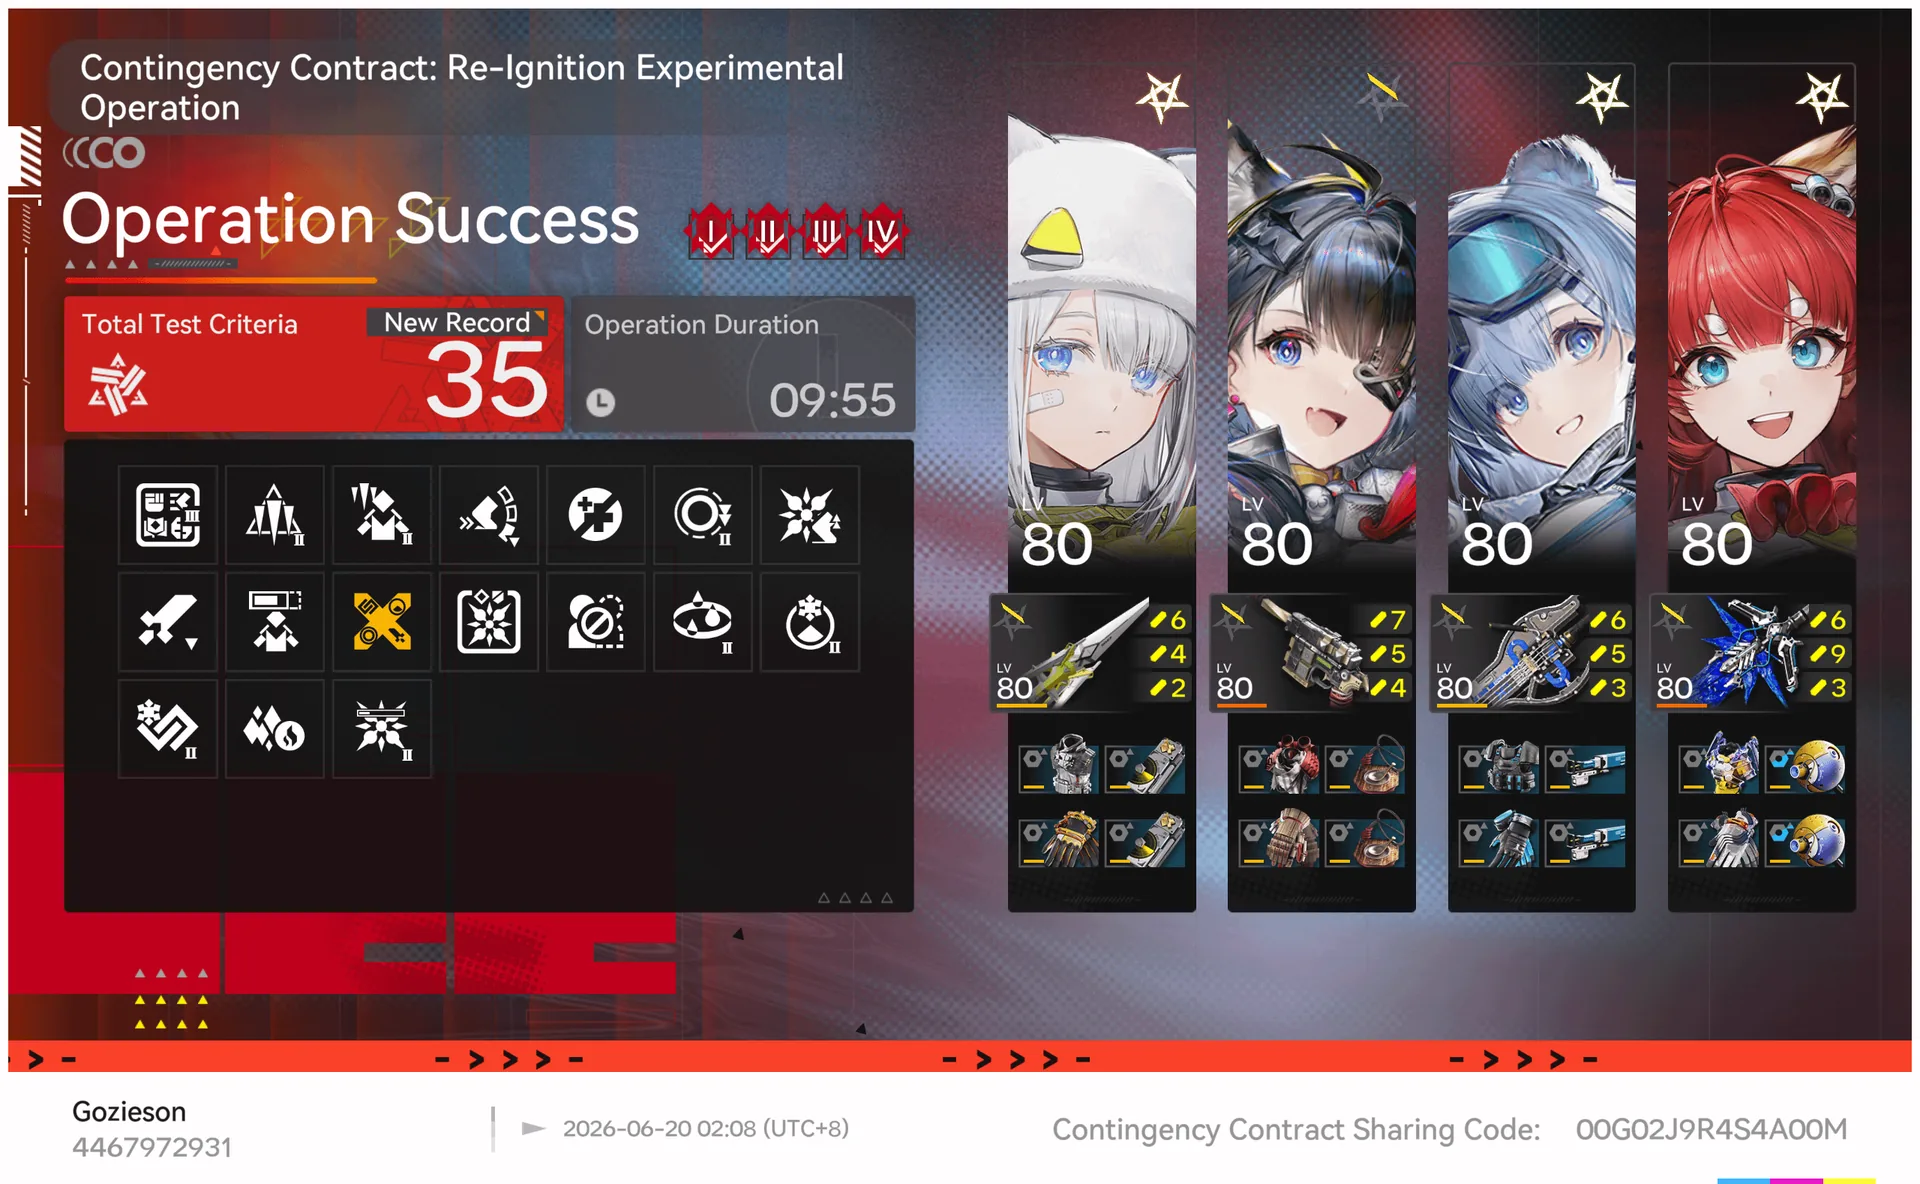 Lv 35
Lv 35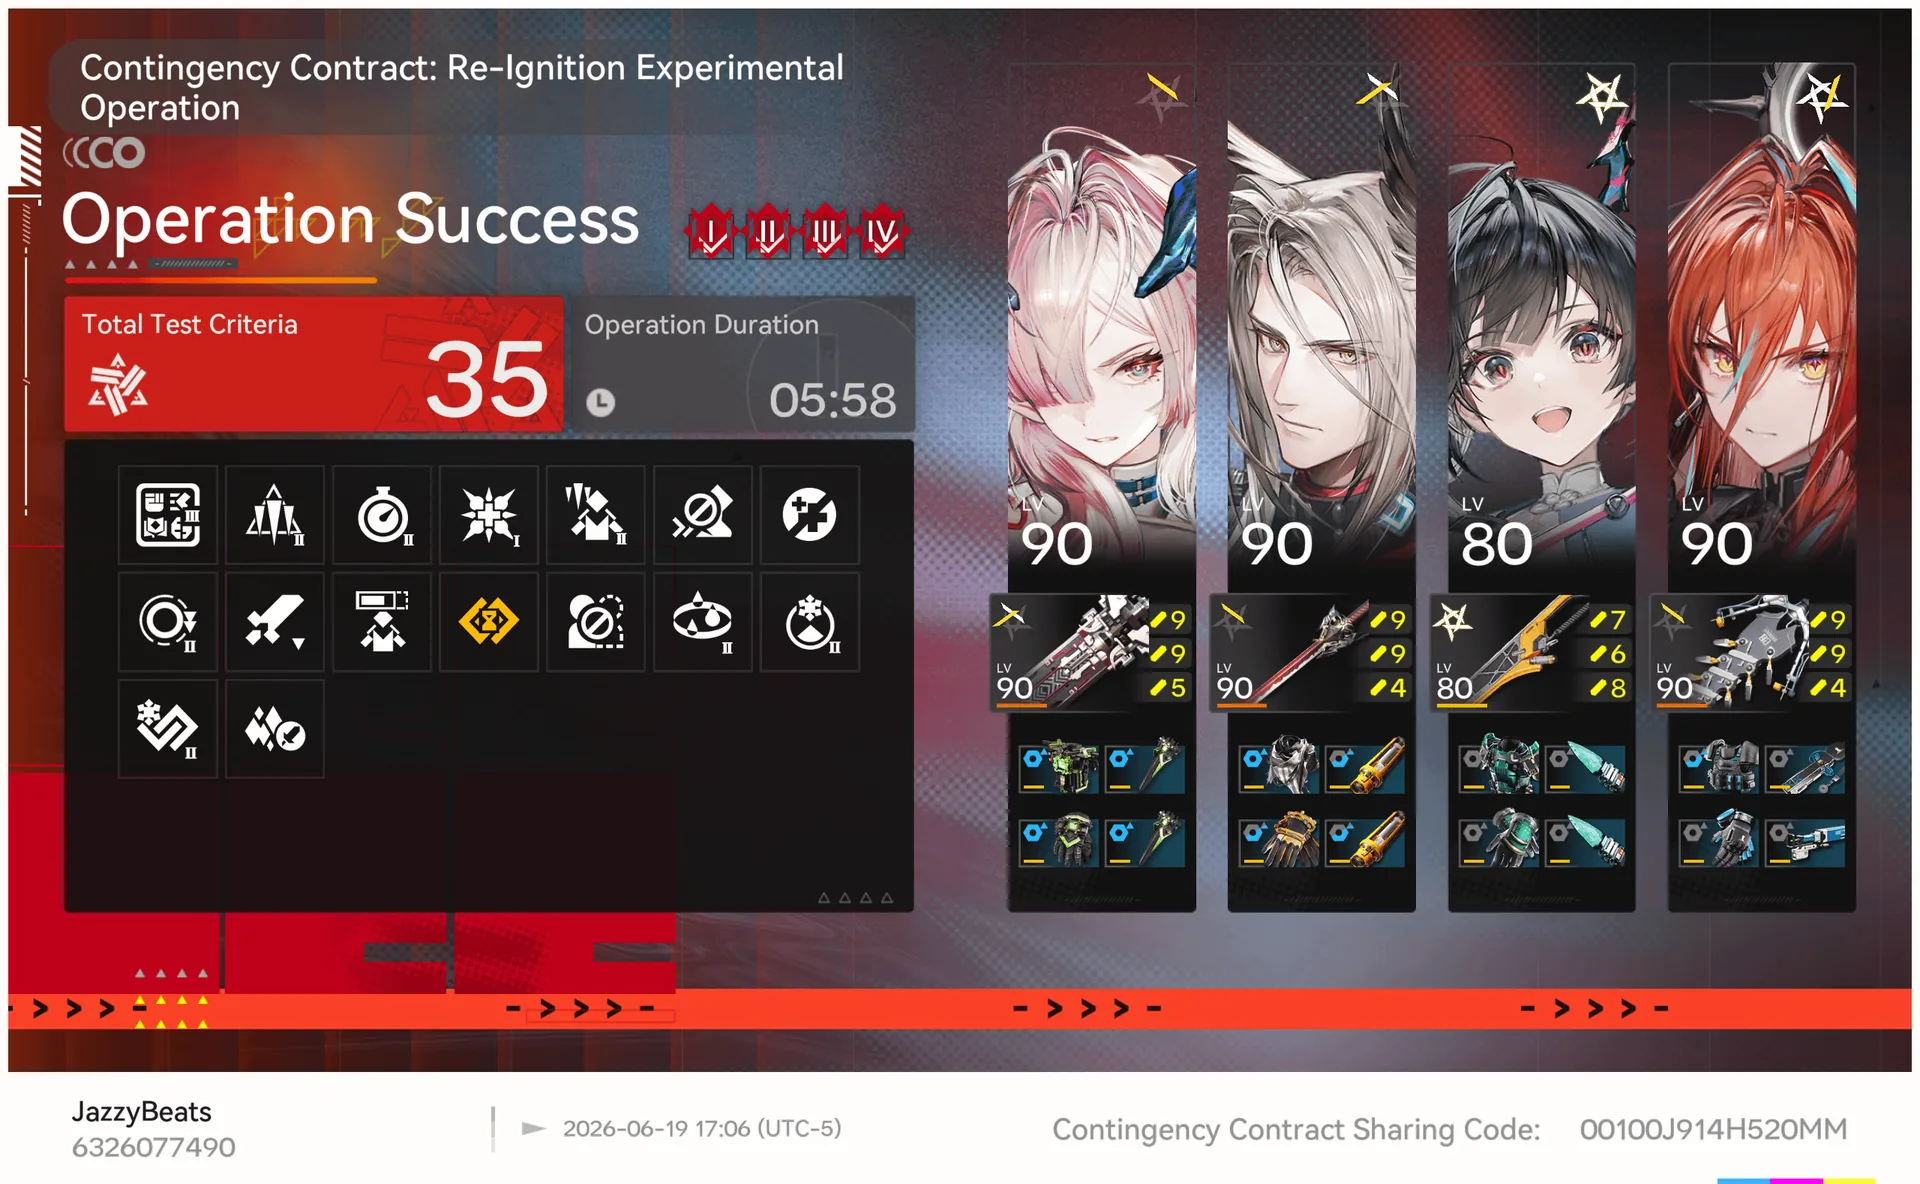 Lv 35
Lv 35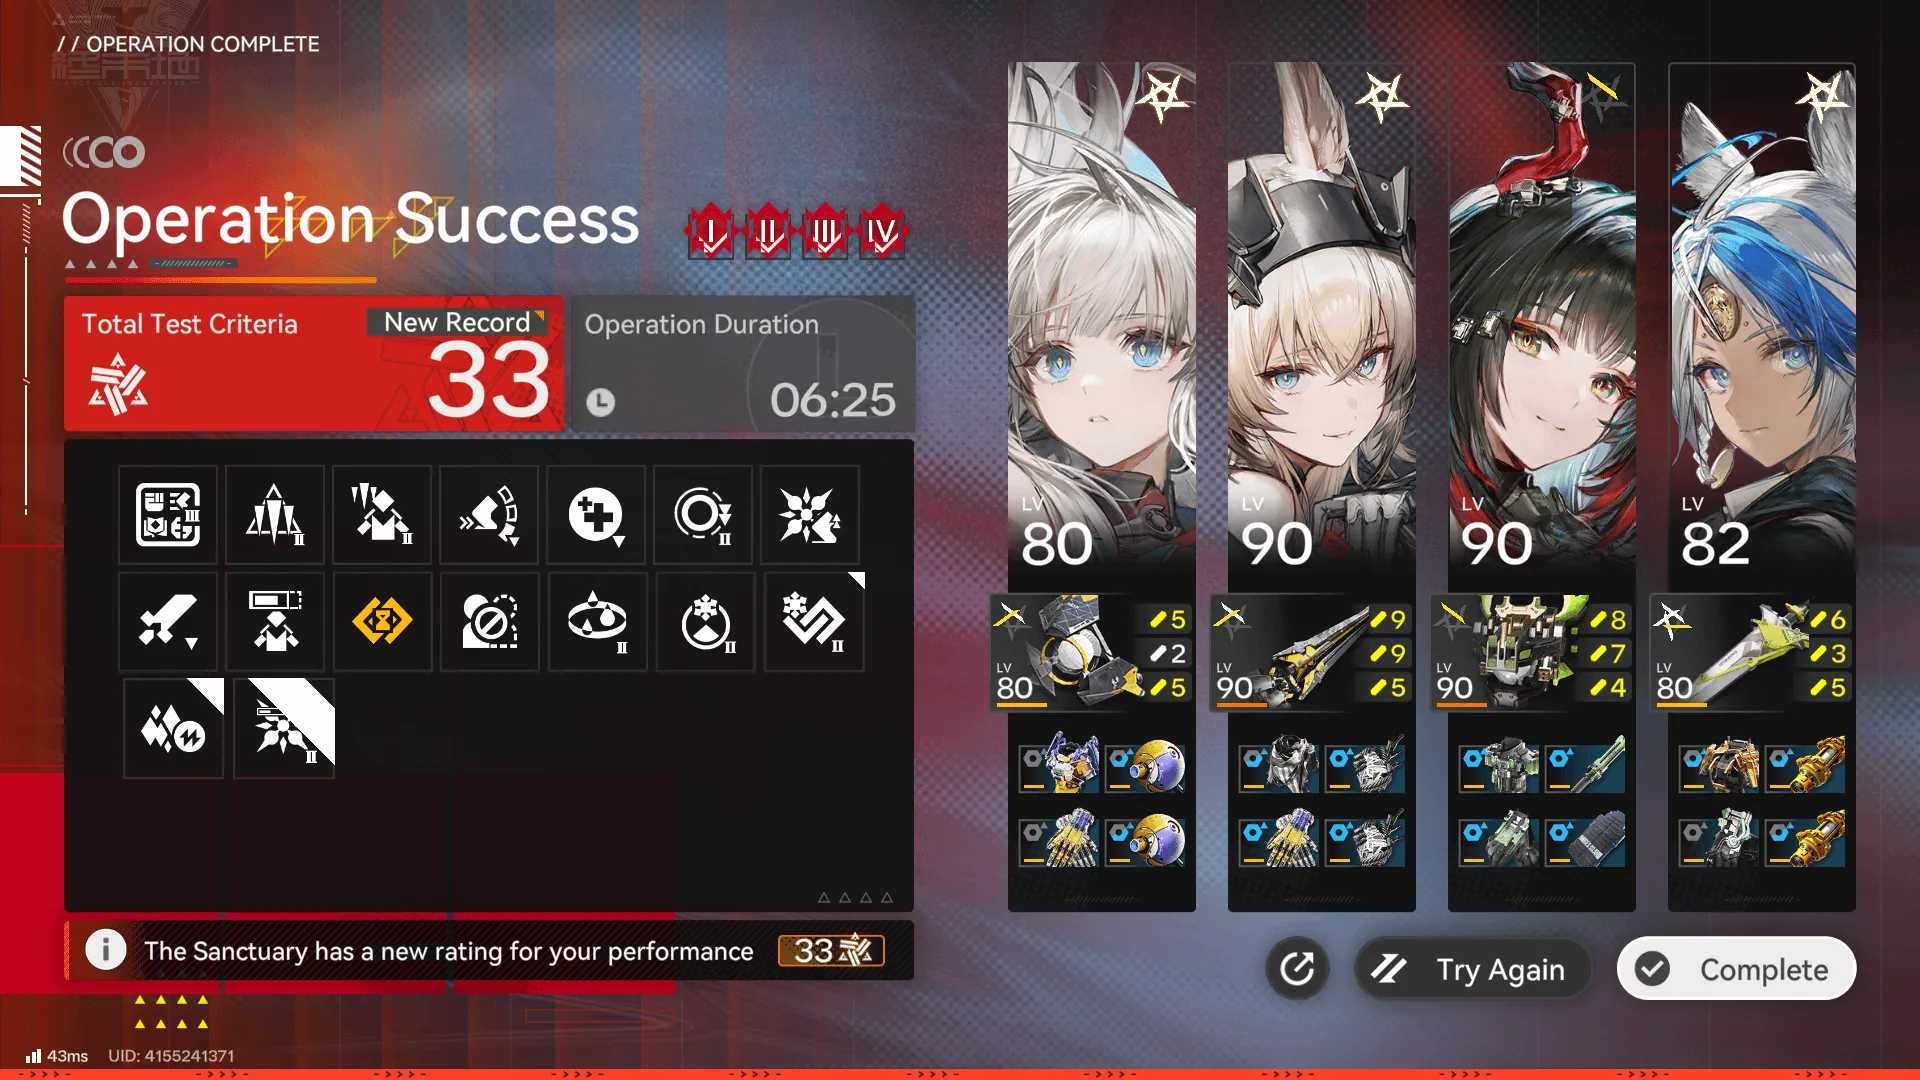 Lv 33
Lv 33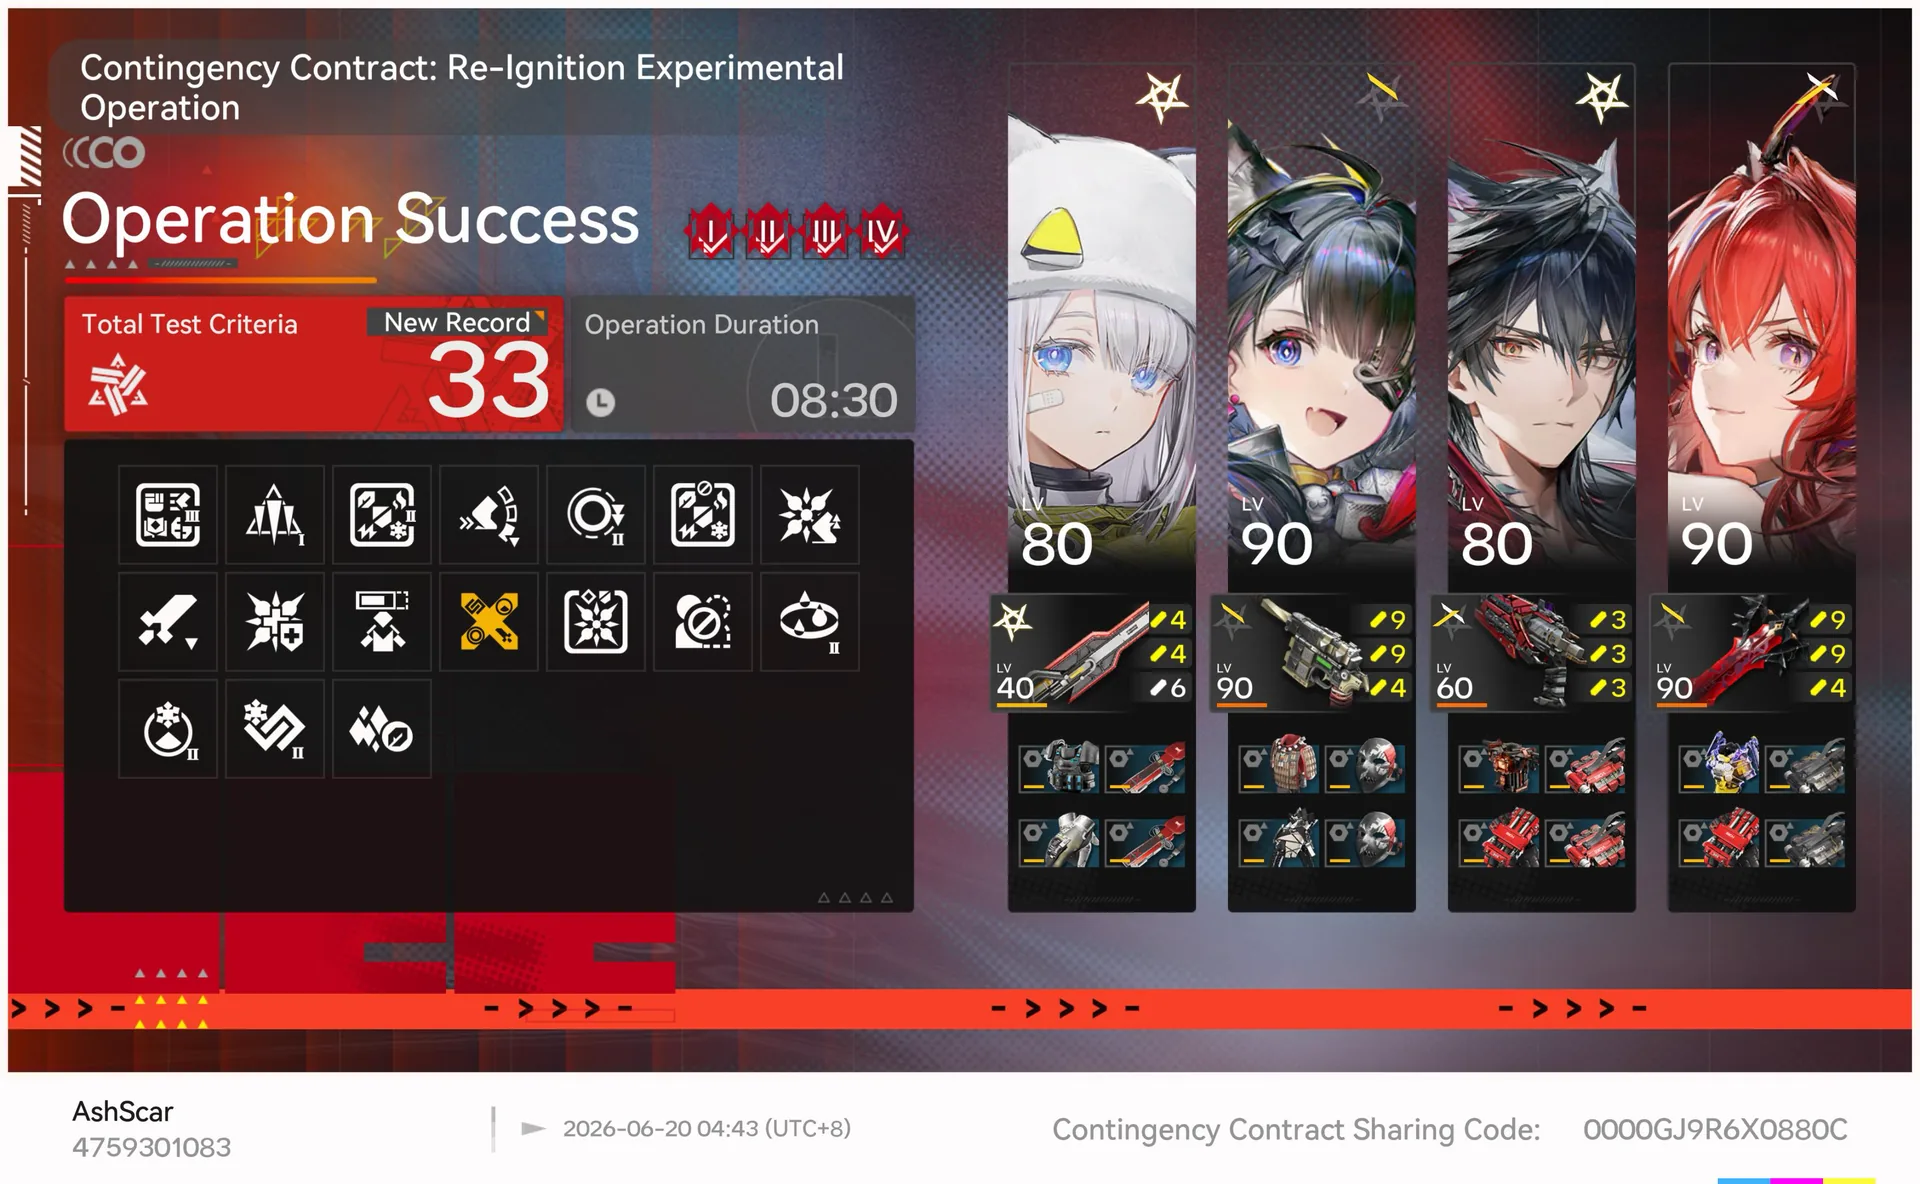 Lv 33
Lv 33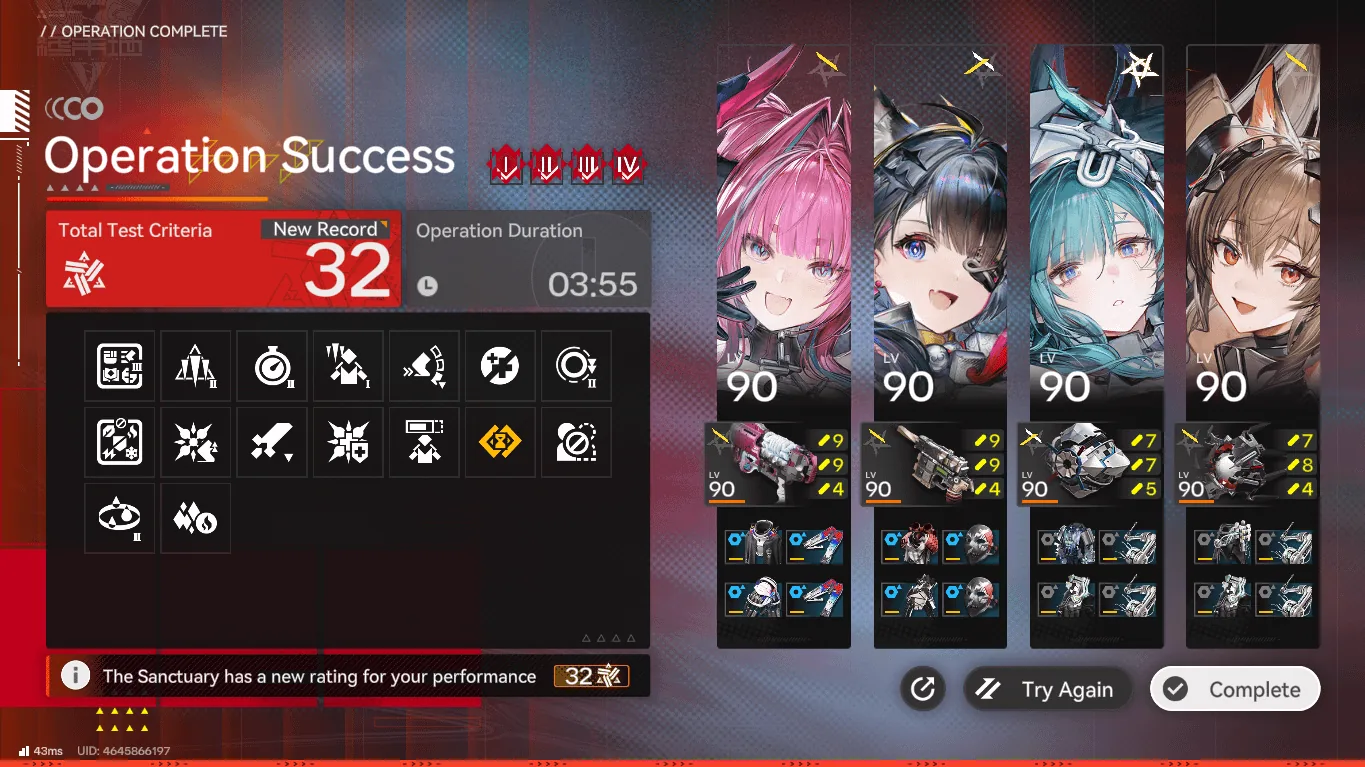 Lv 32
Lv 32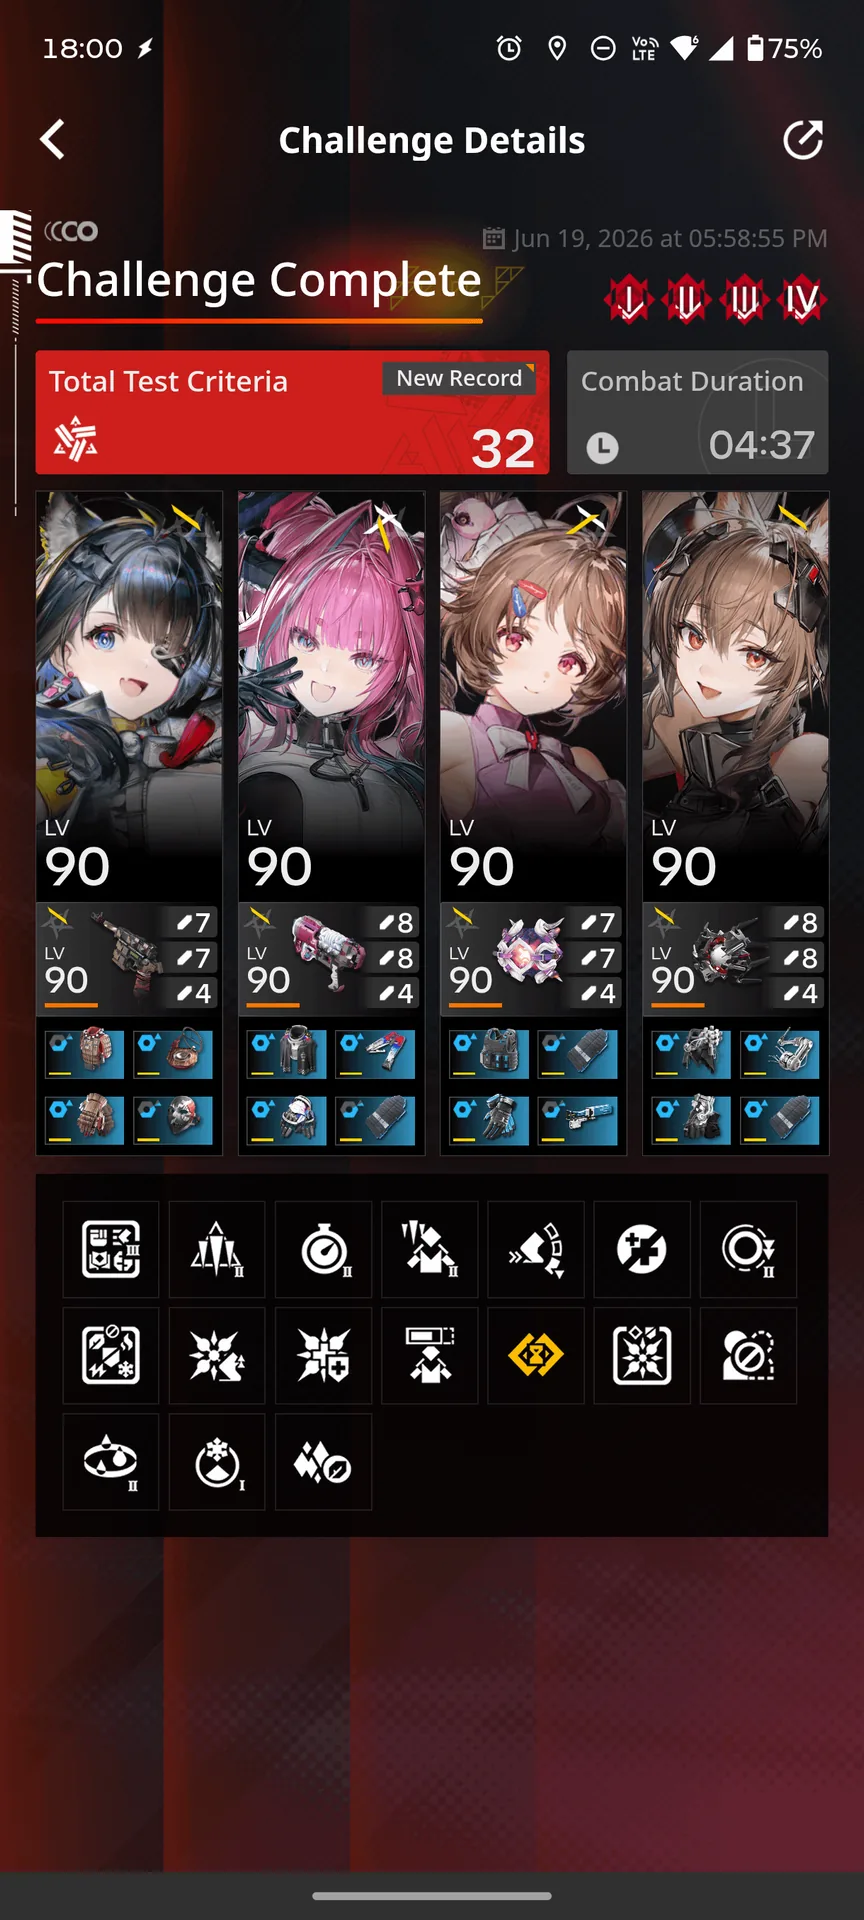 Lv 32
Lv 32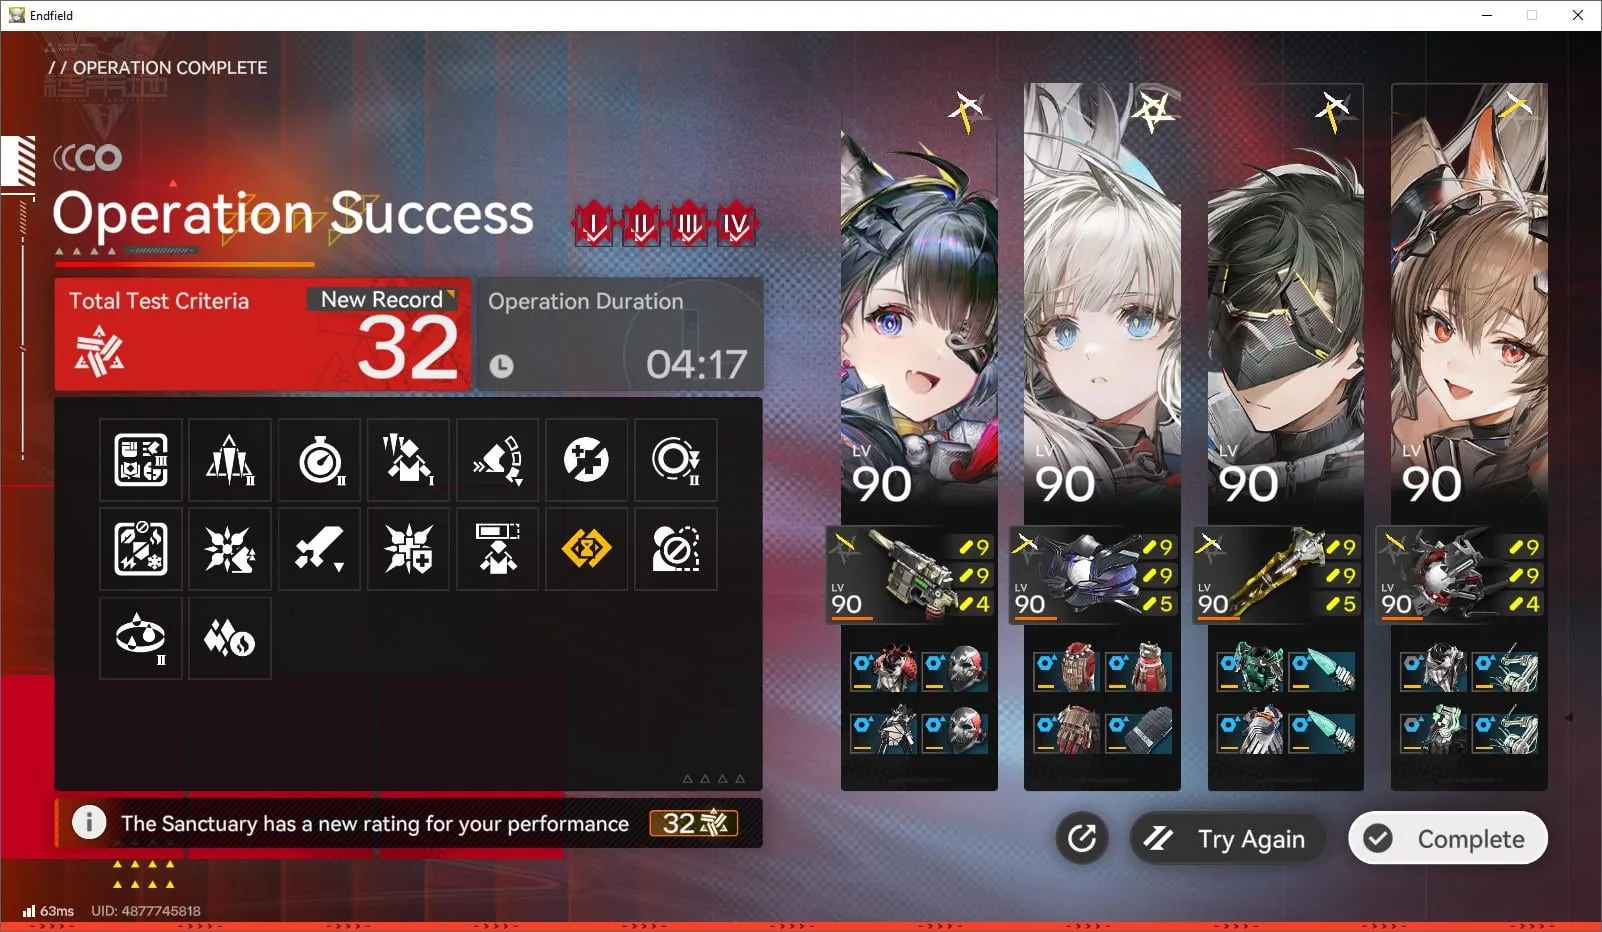 Lv 32
Lv 32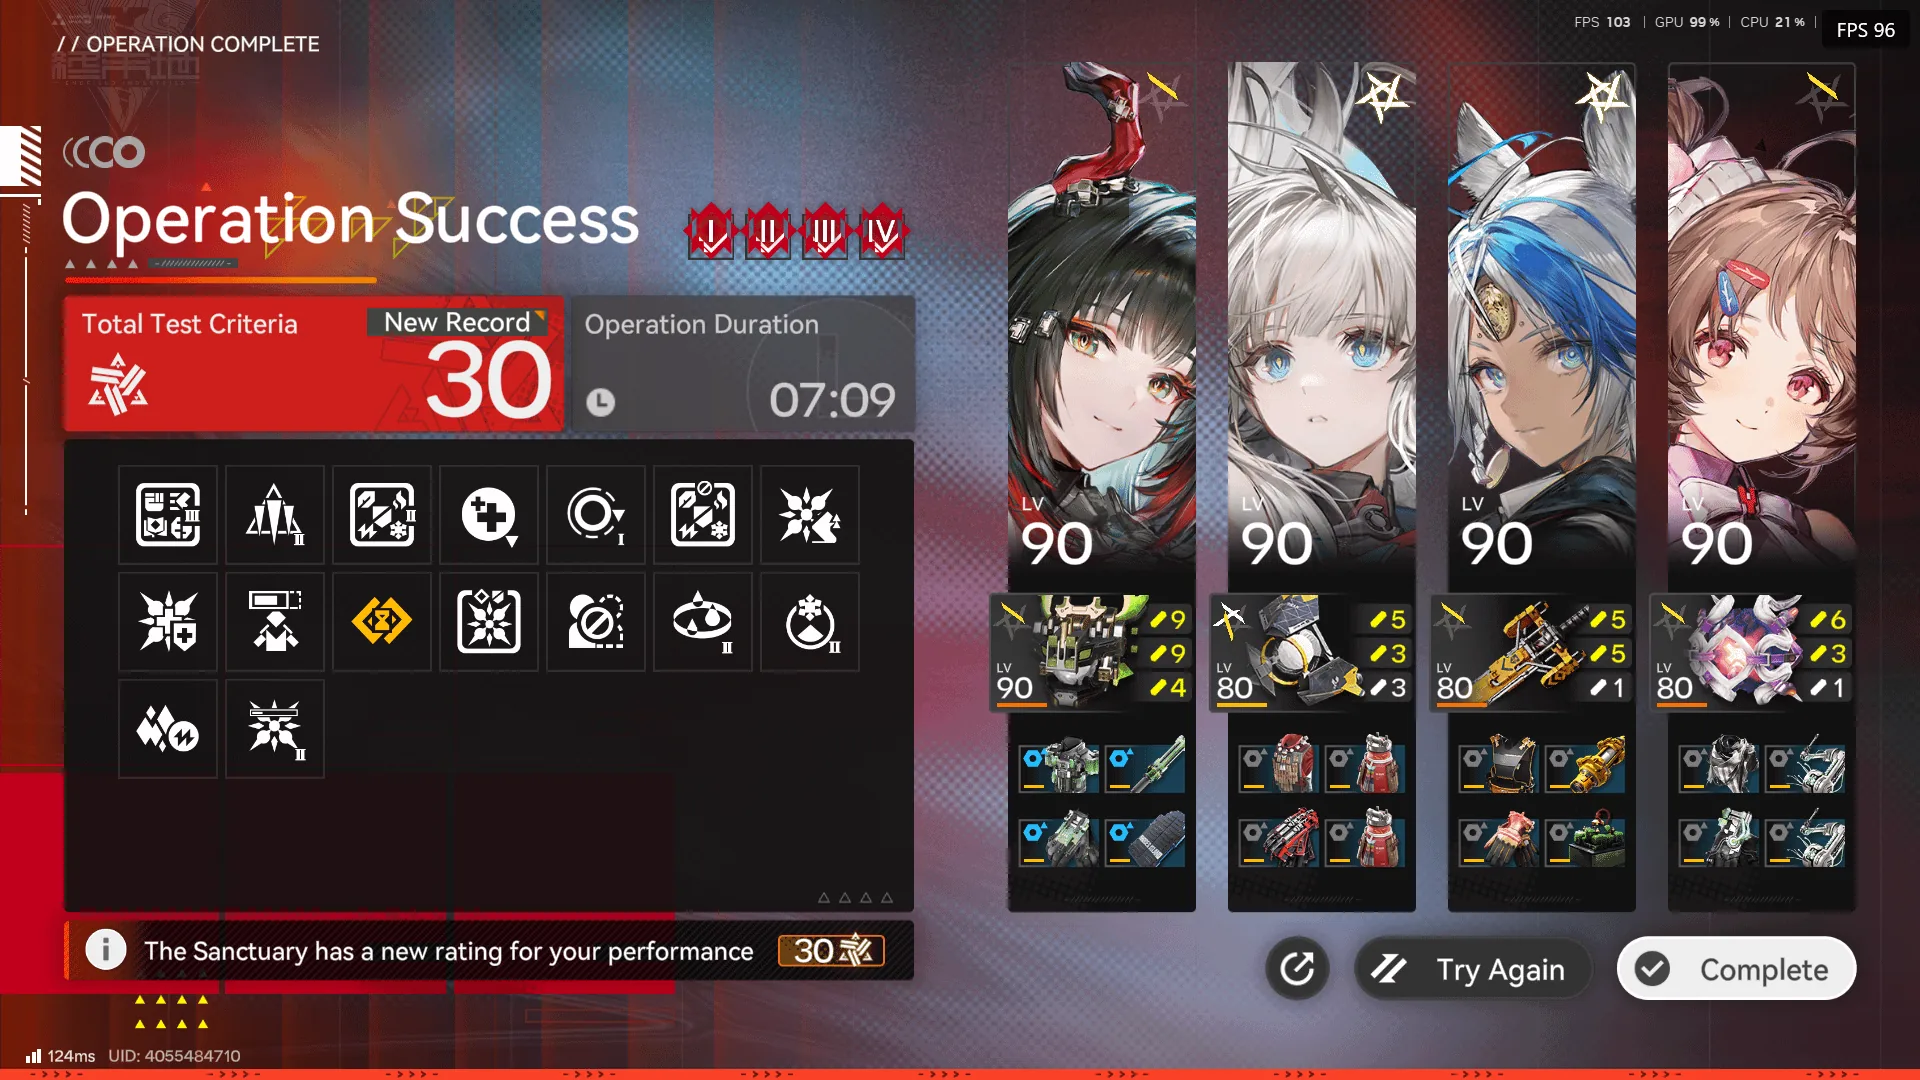 Lv 30
Lv 30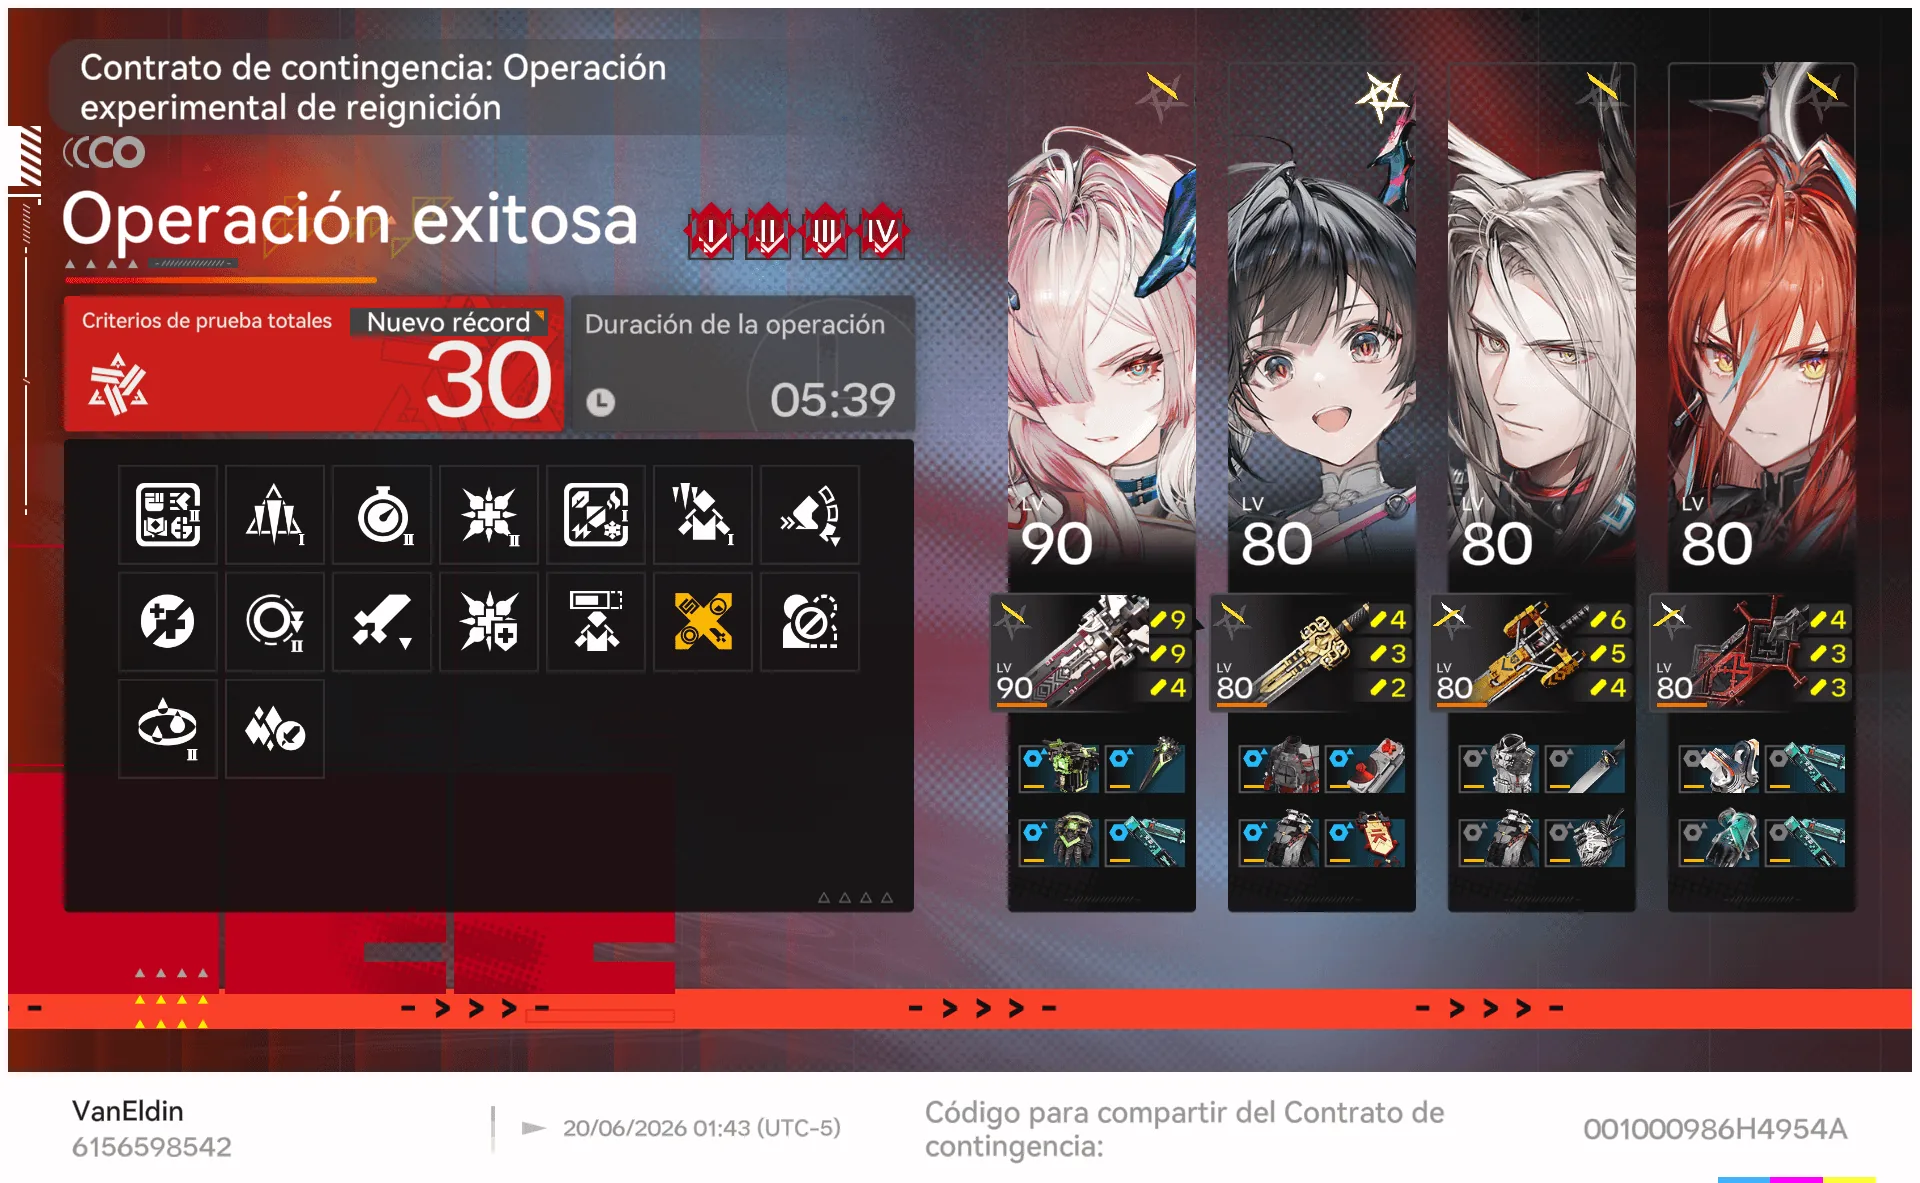 Lv 30
Lv 30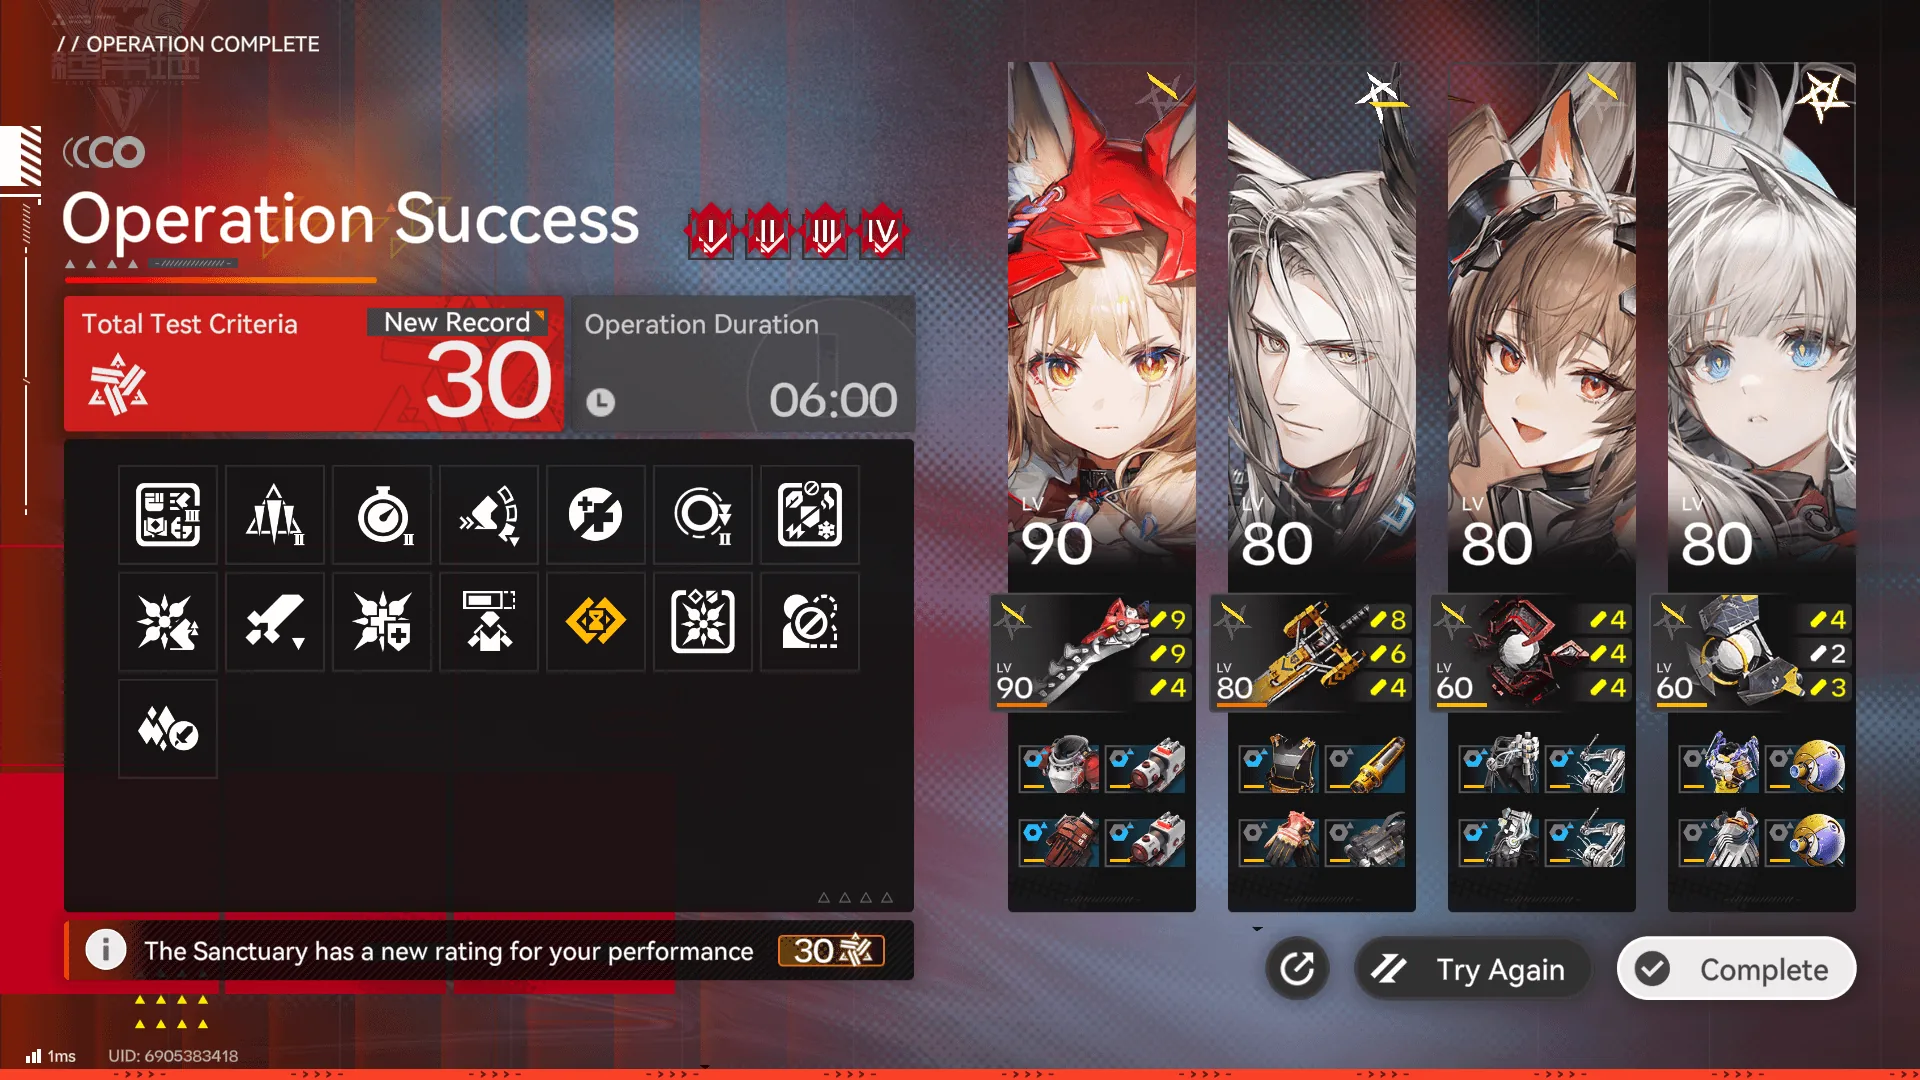 Lv 30
Lv 30Risk 40-50 - Apex
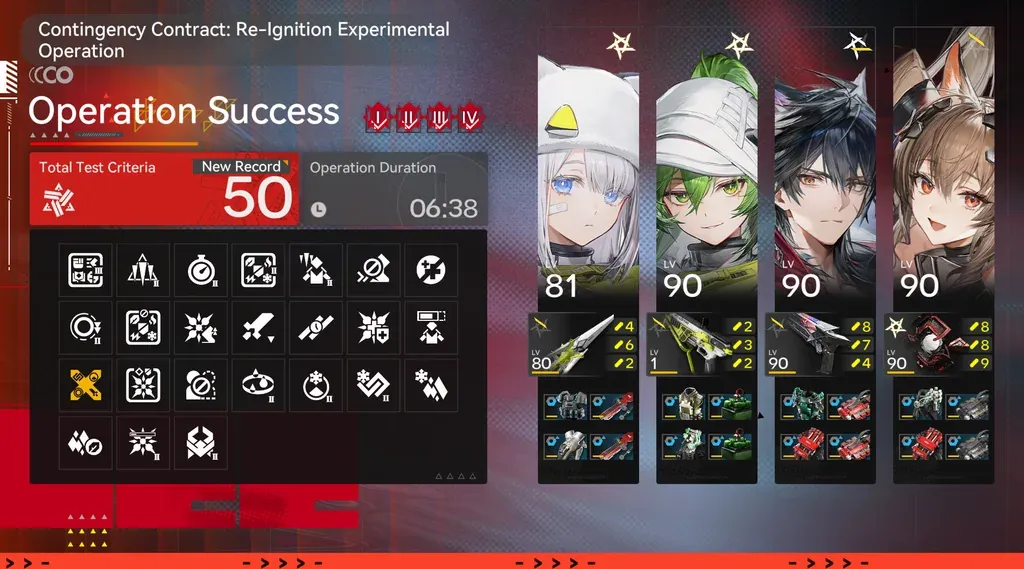 Lv 50
Lv 50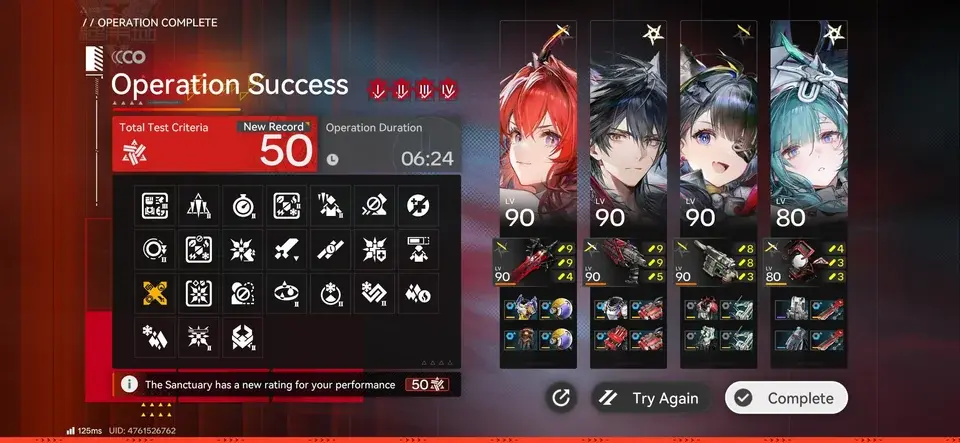 Lv 50
Lv 50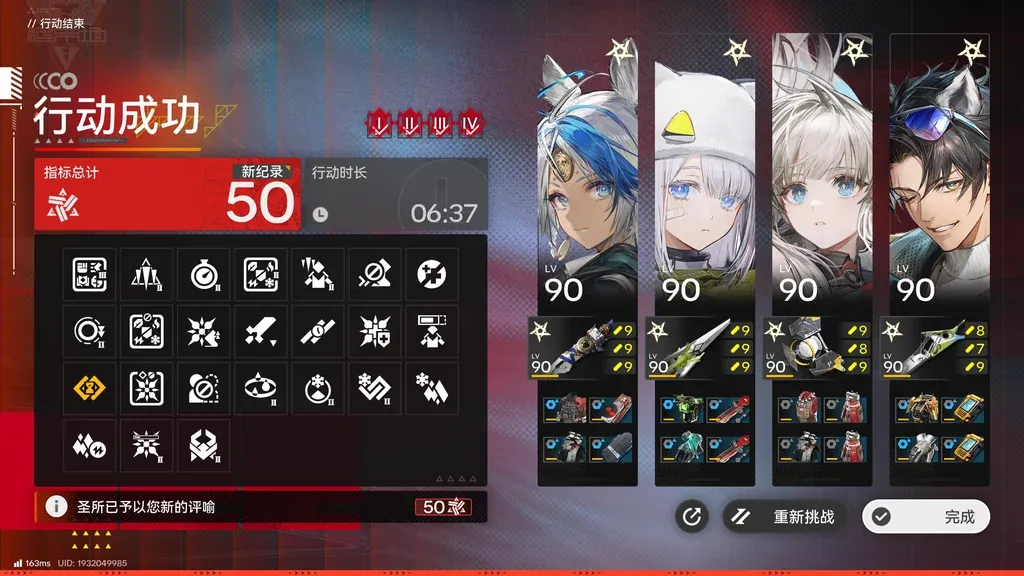 Lv 50
Lv 50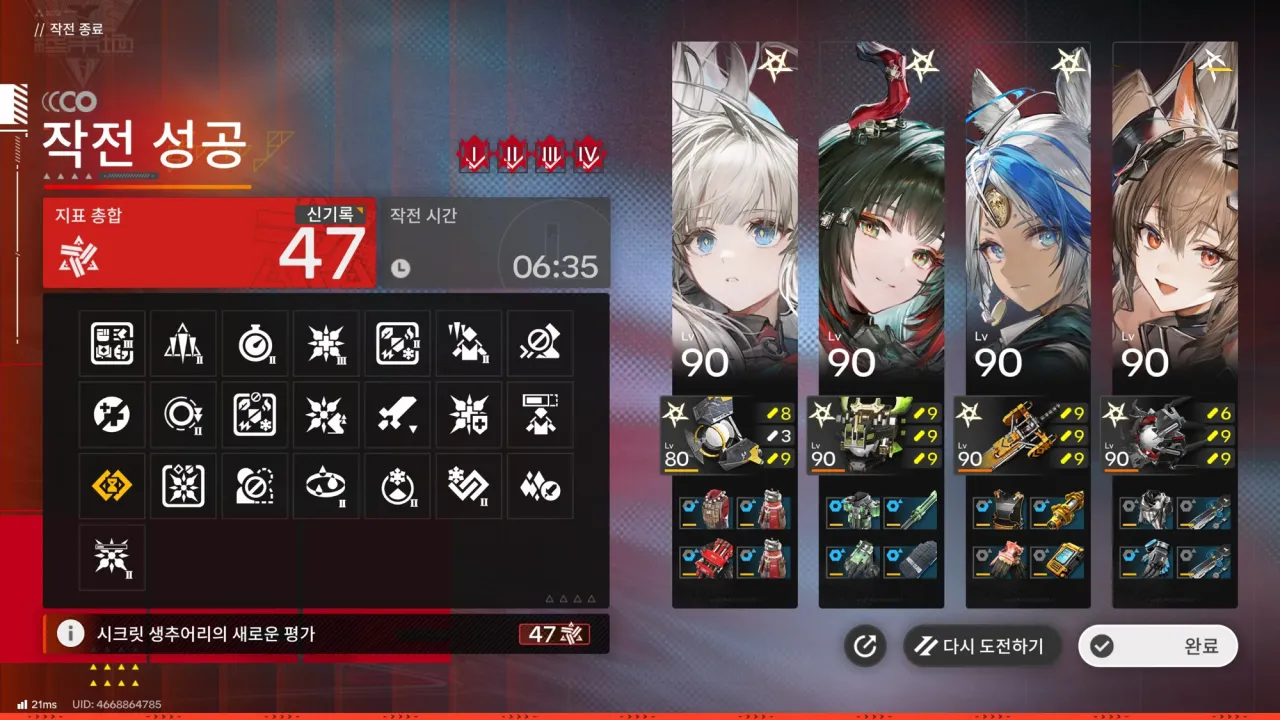 Lv 47
Lv 47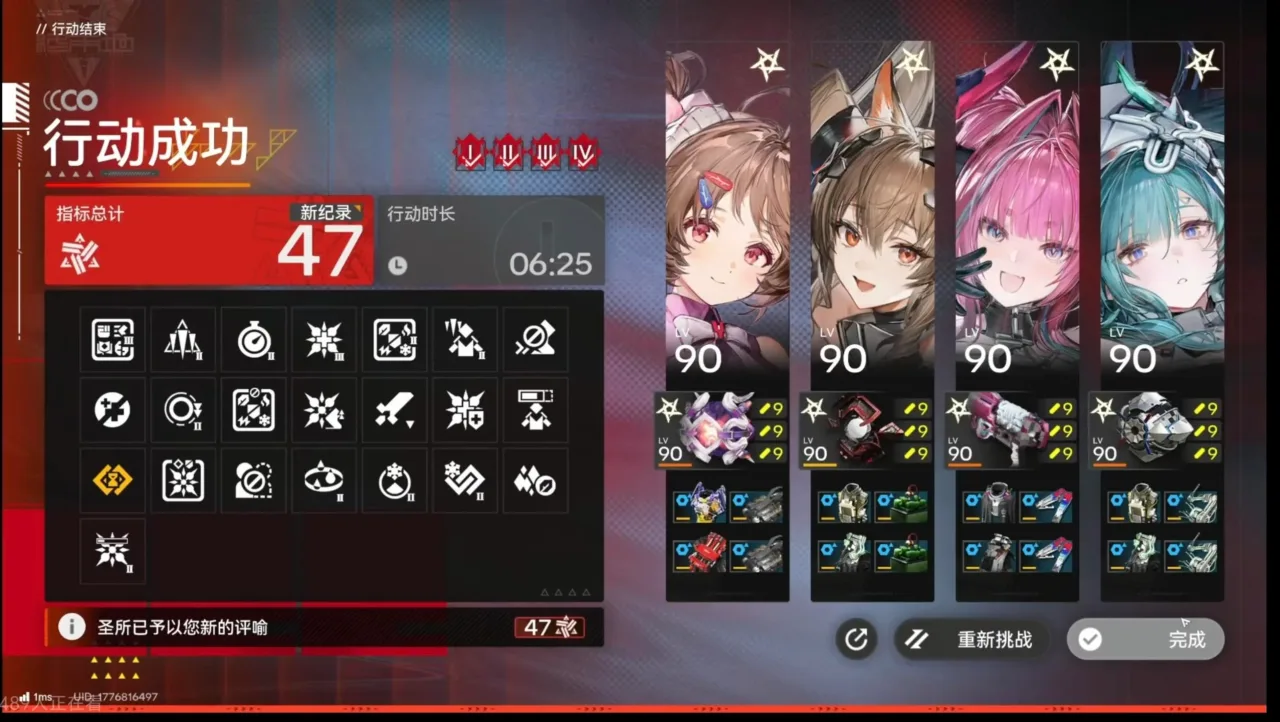 Lv 47
Lv 47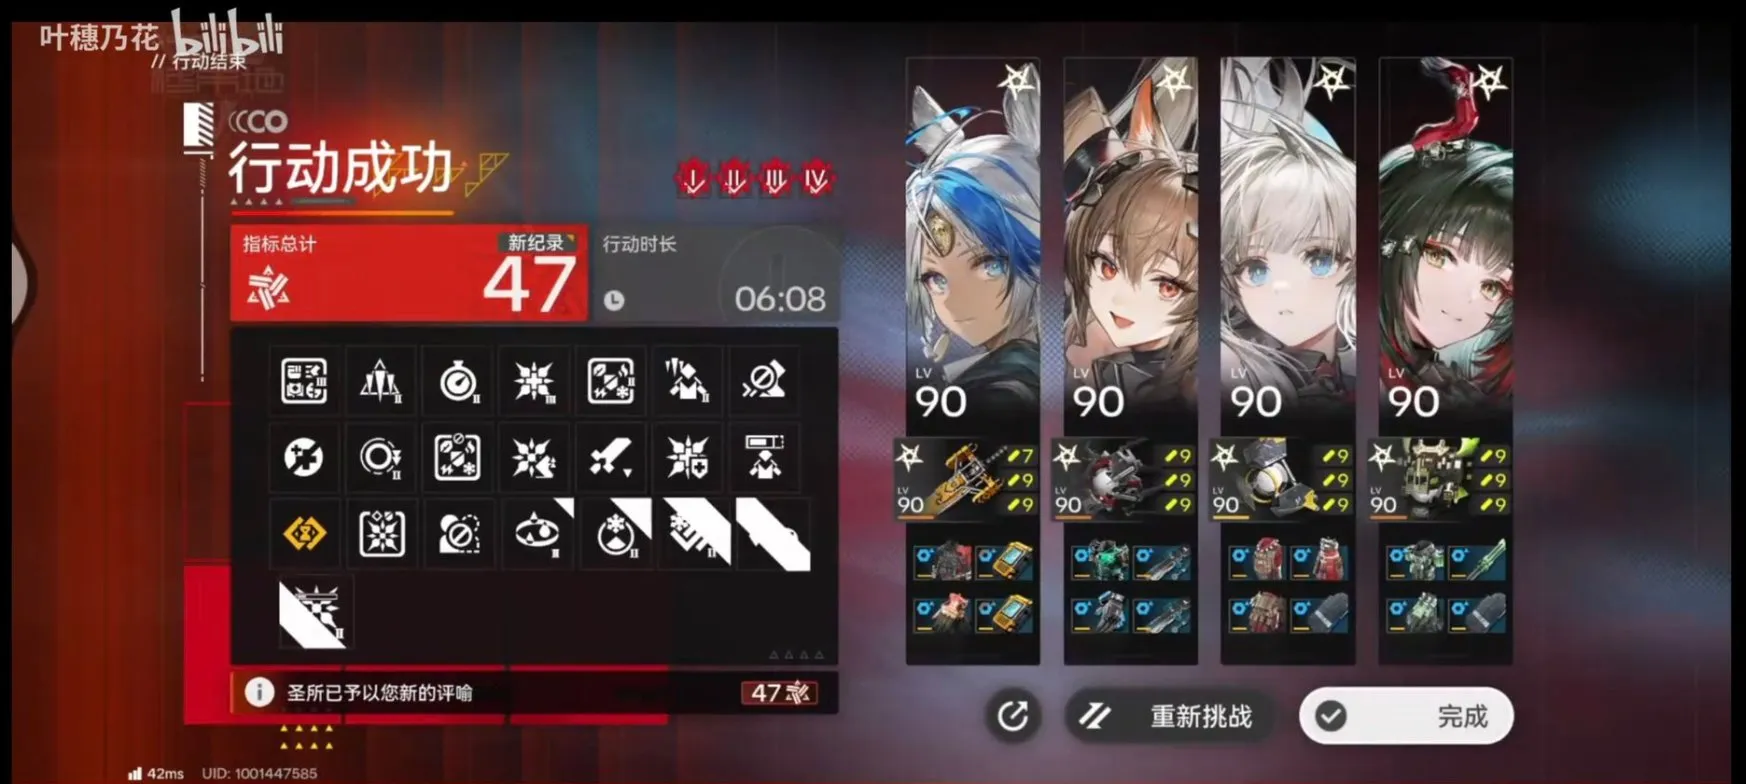 Lv 47
Lv 47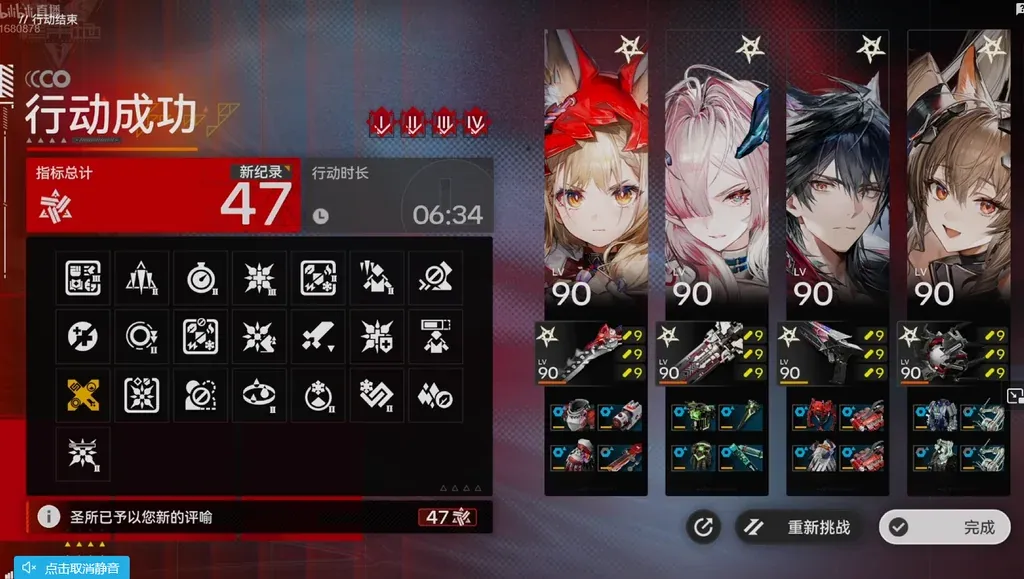 Lv 47
Lv 47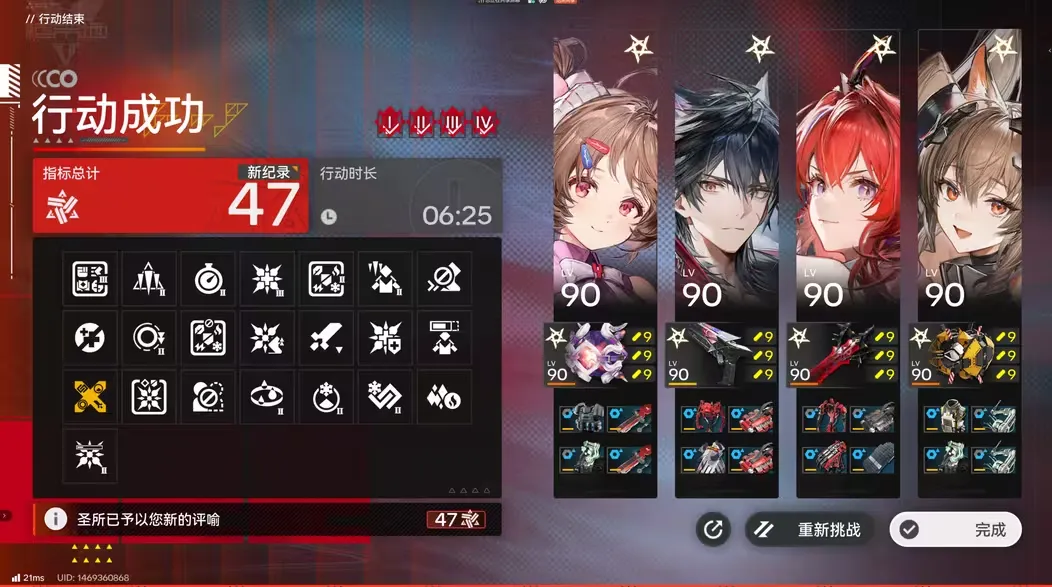 Lv 47
Lv 47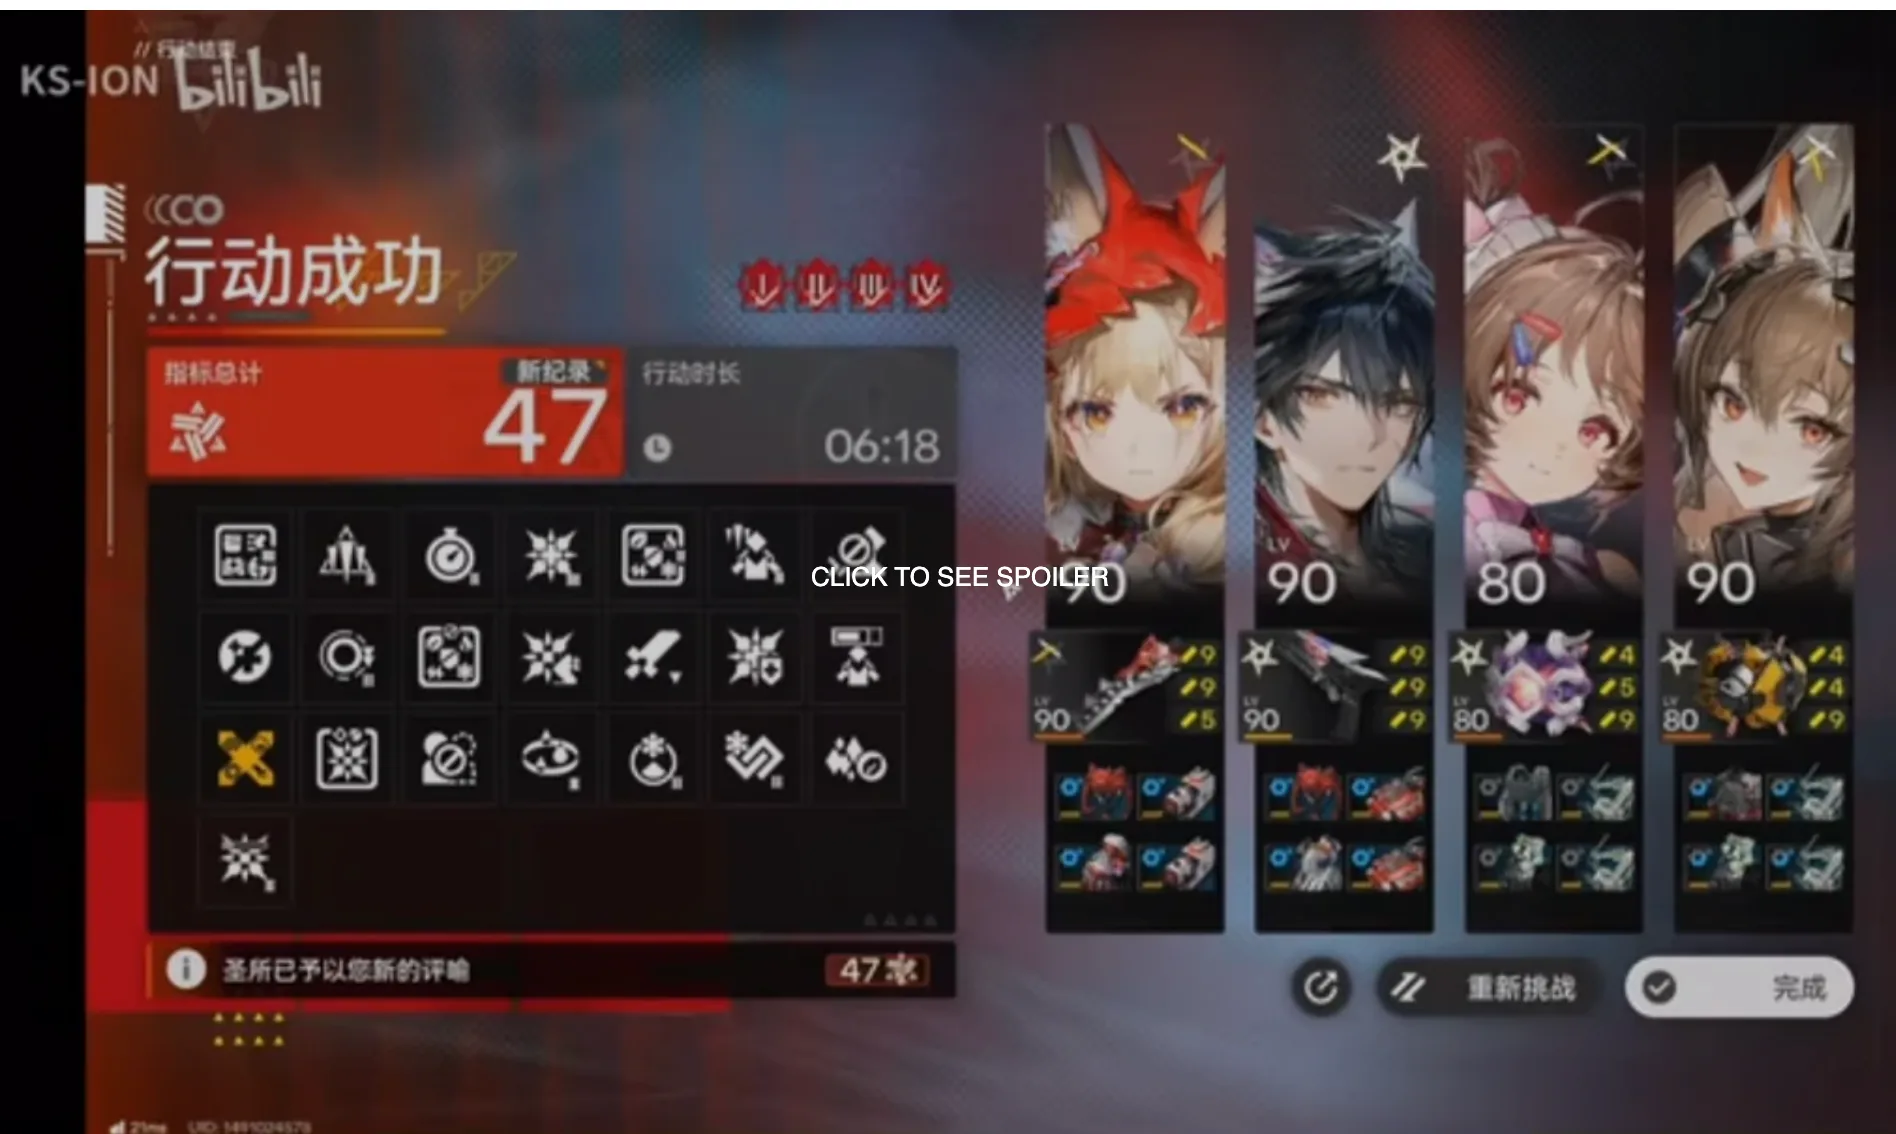 Lv 47
Lv 47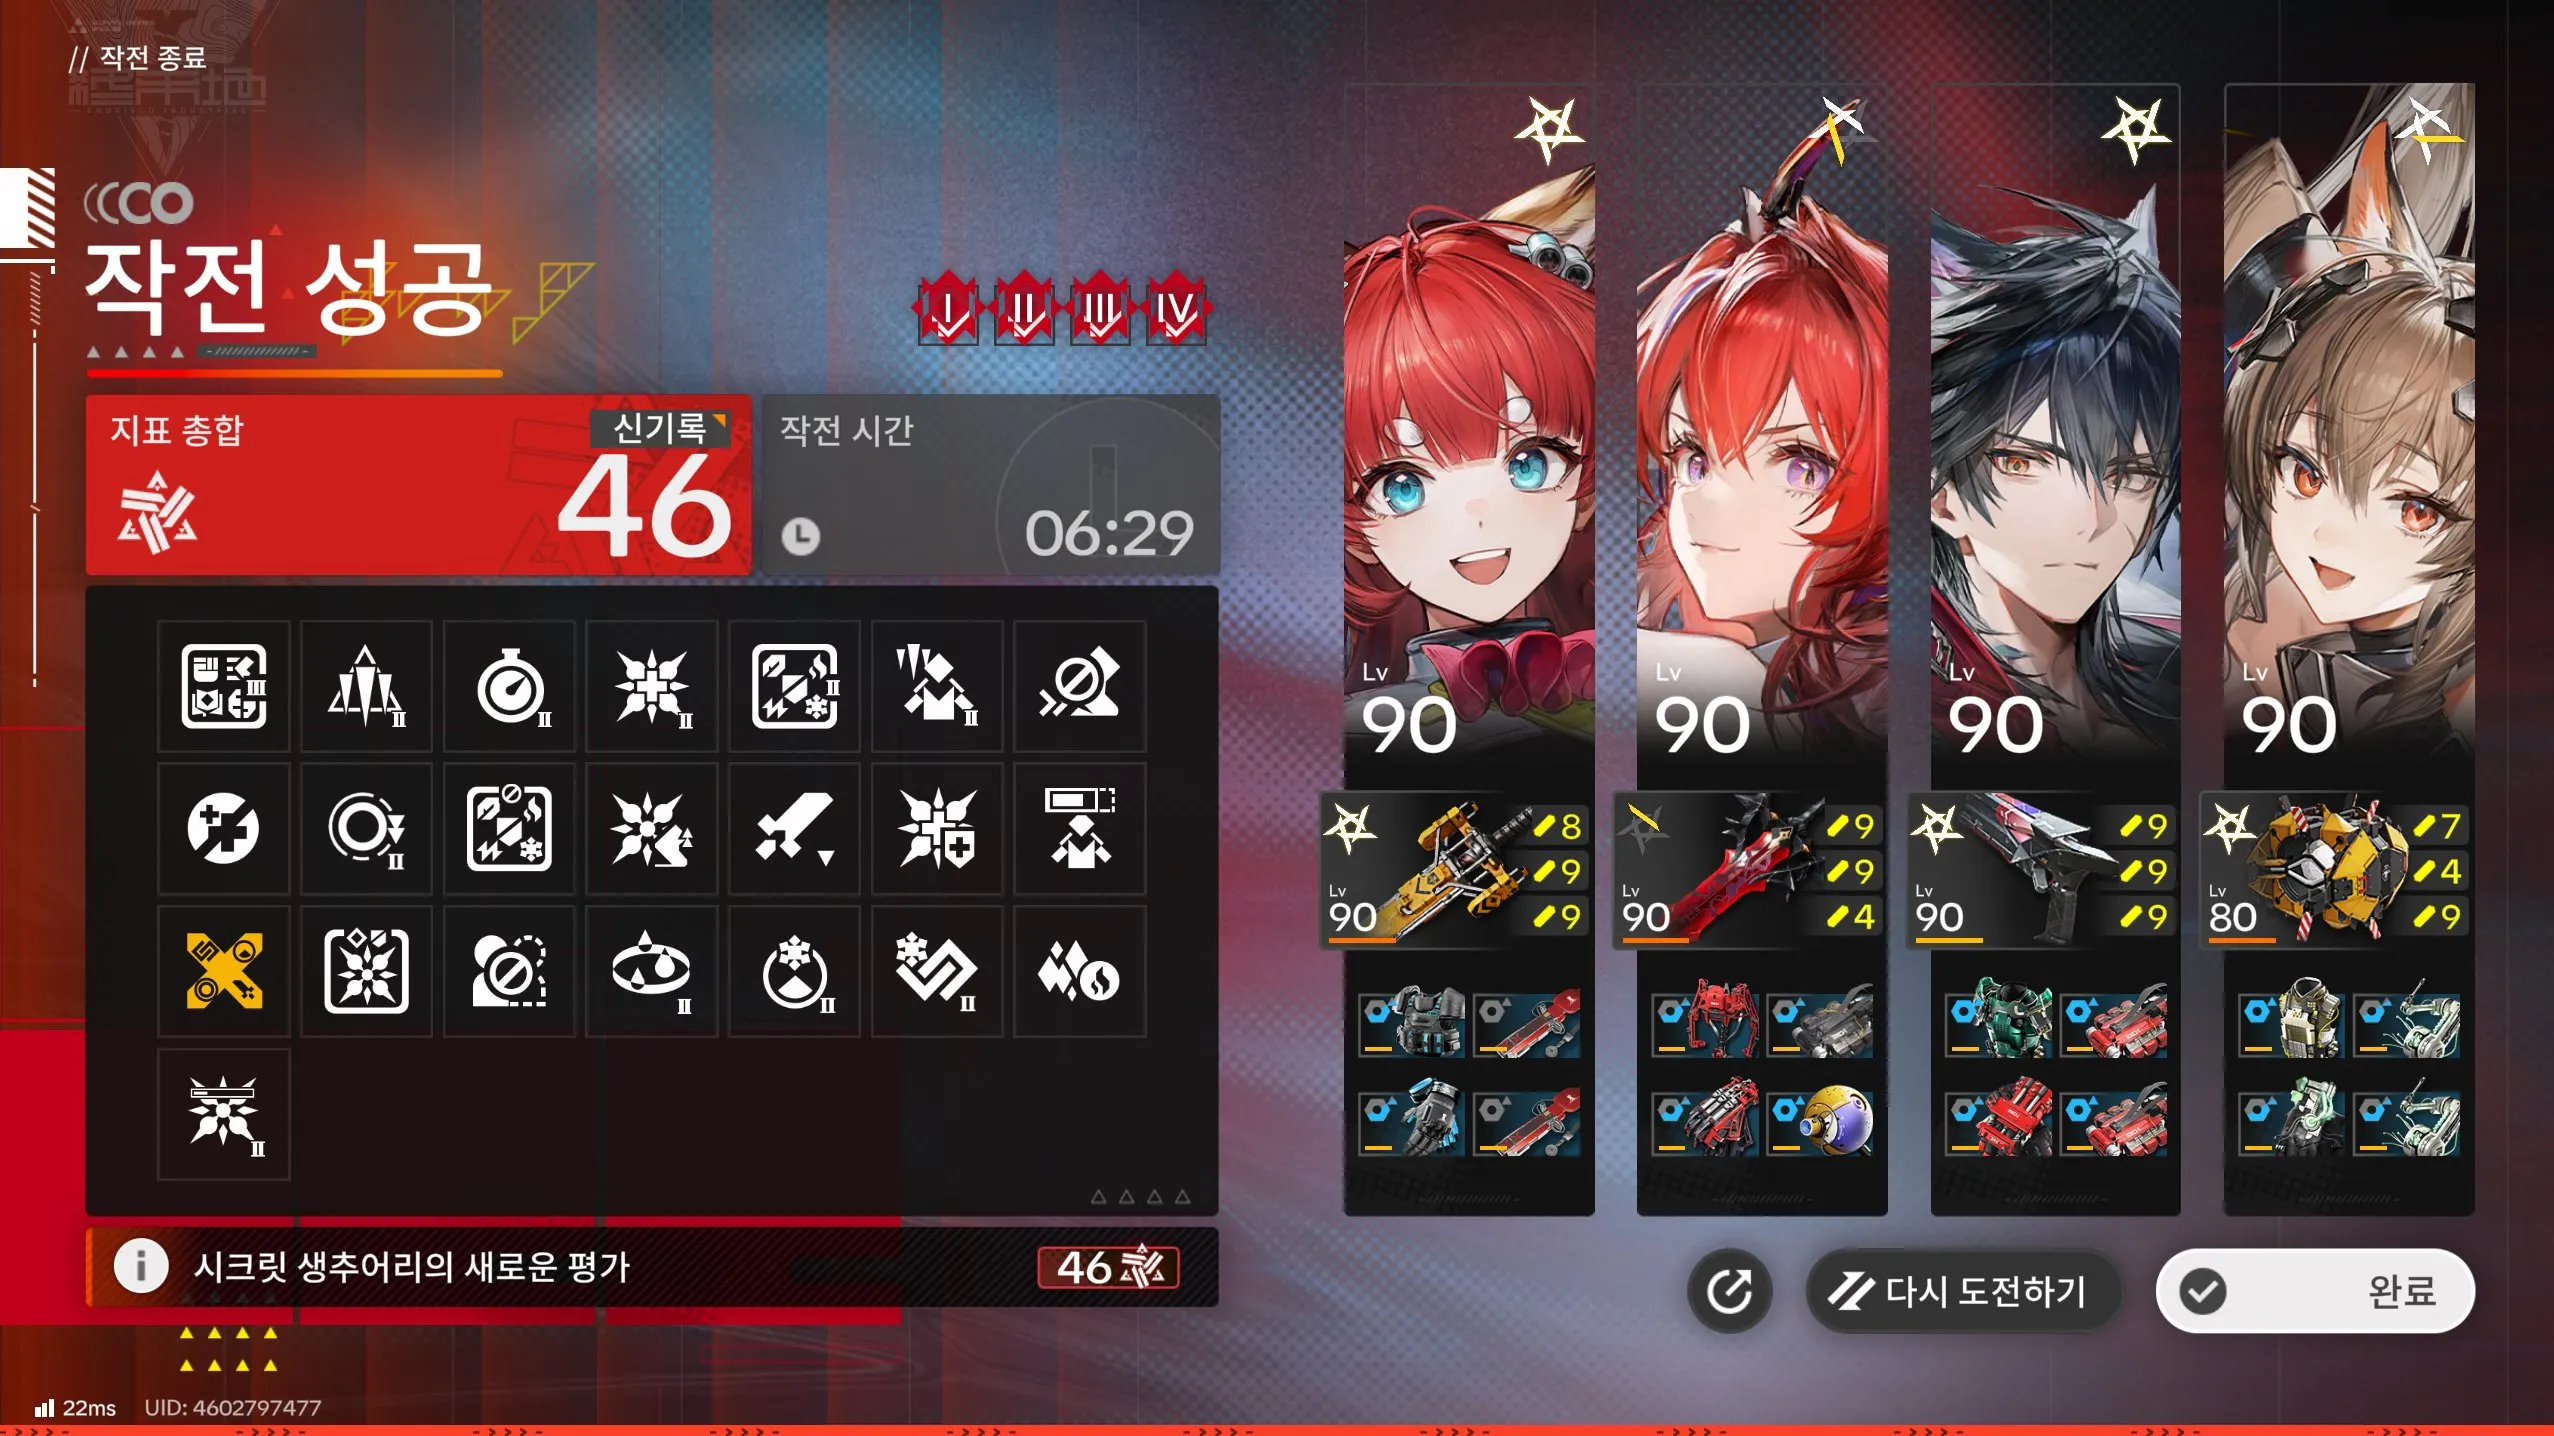 Lv 46
Lv 46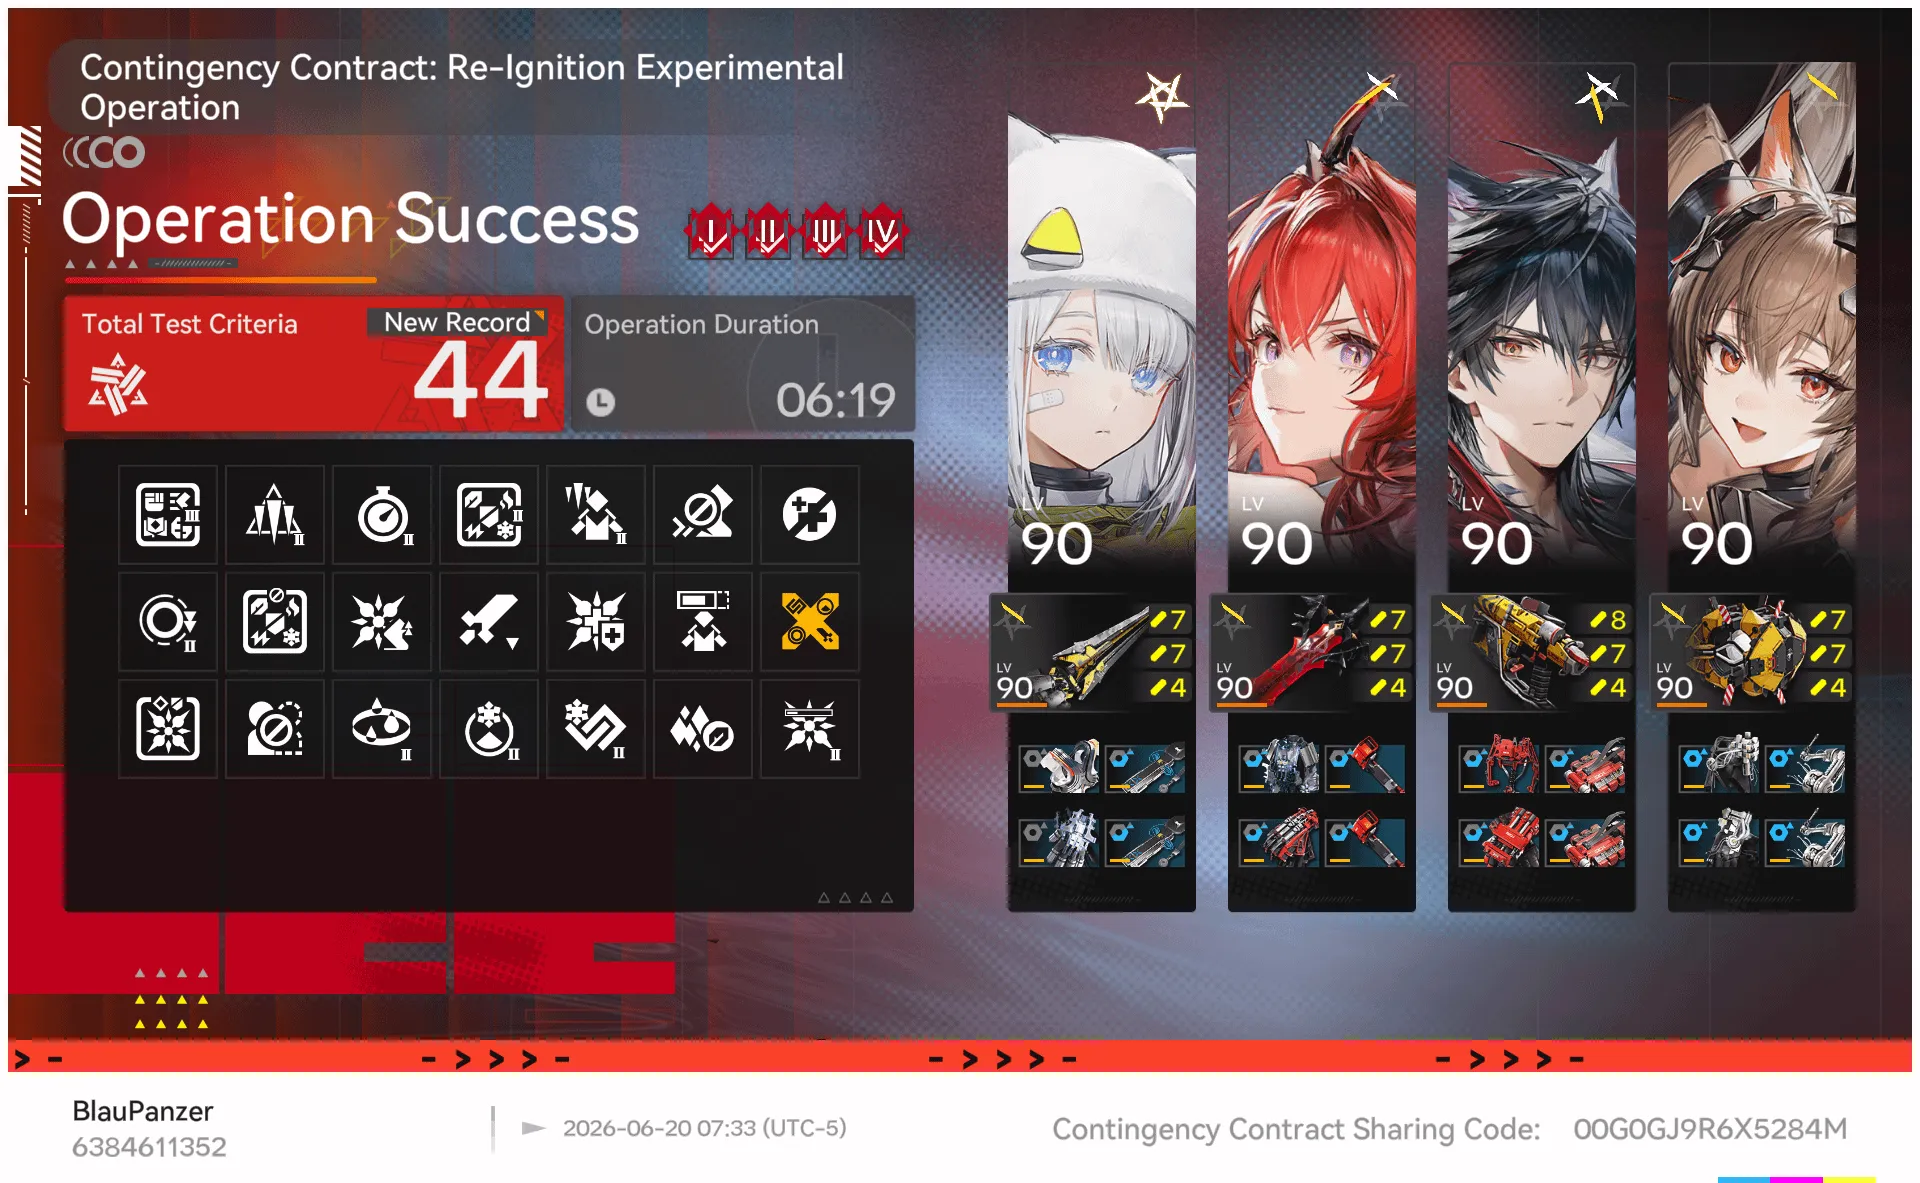 Lv 44
Lv 44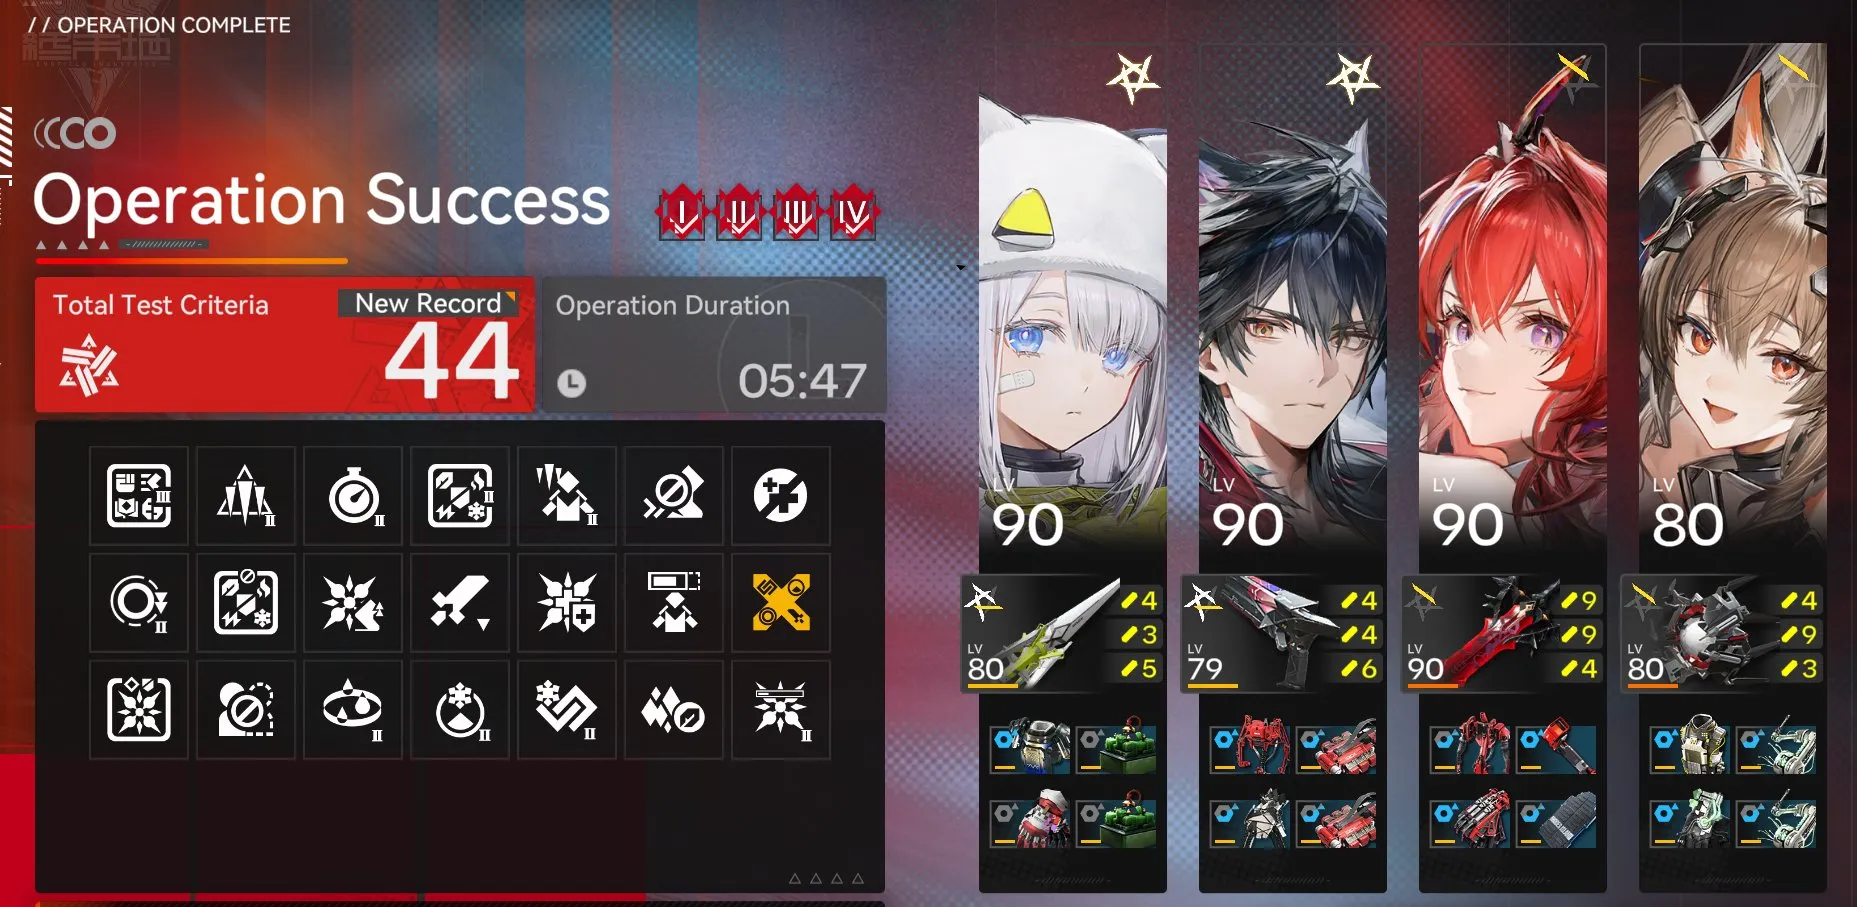 Lv 44
Lv 44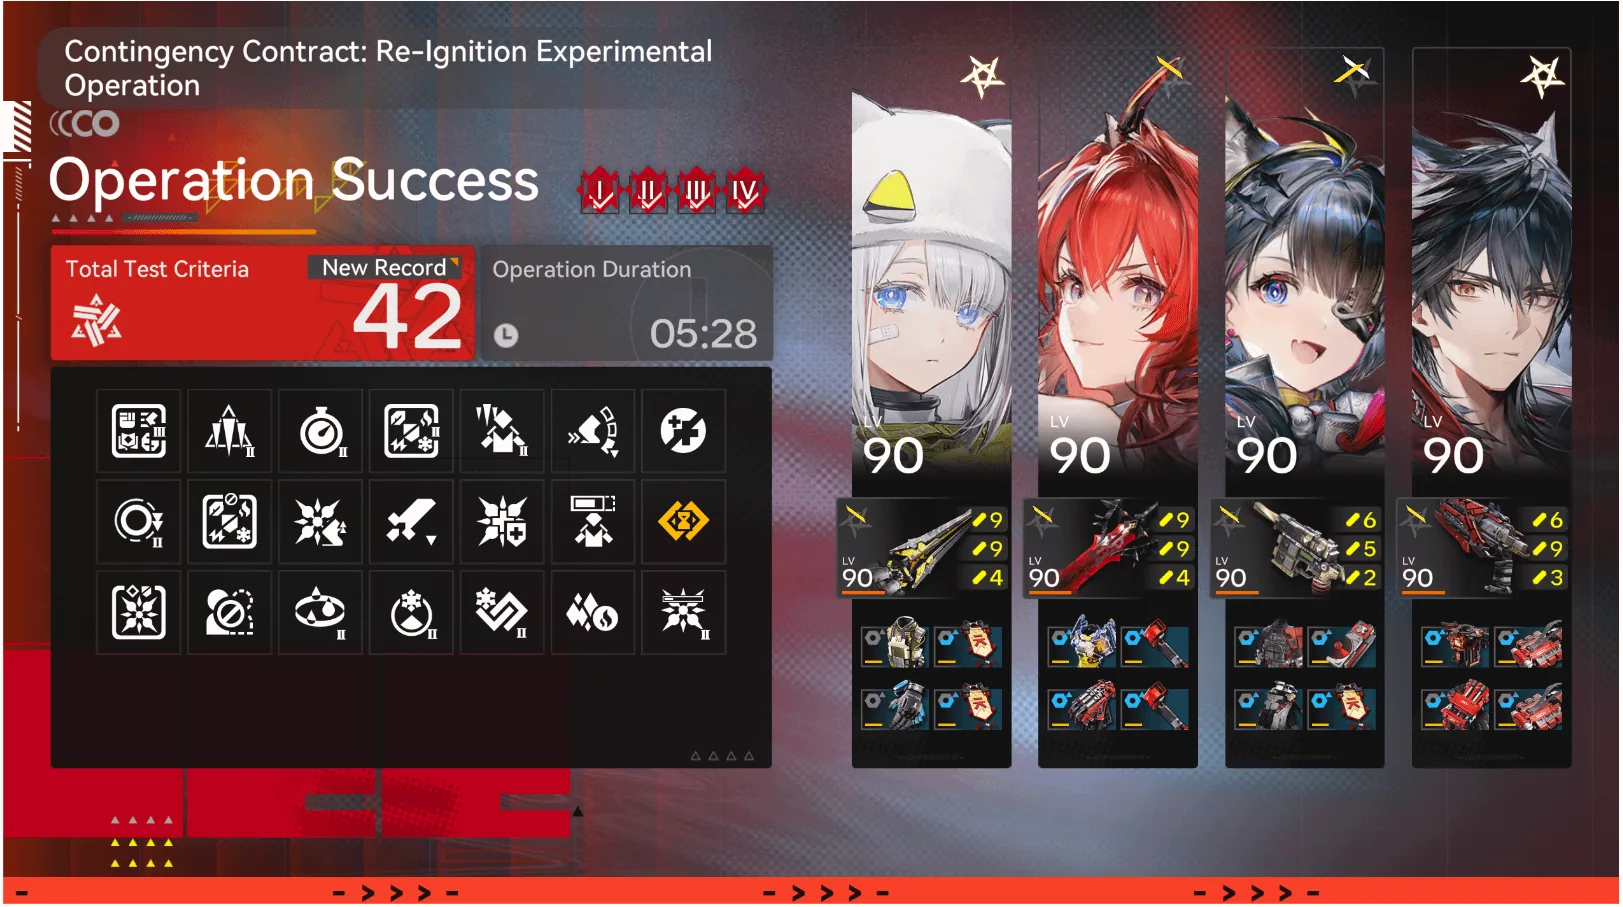 Lv 42
Lv 42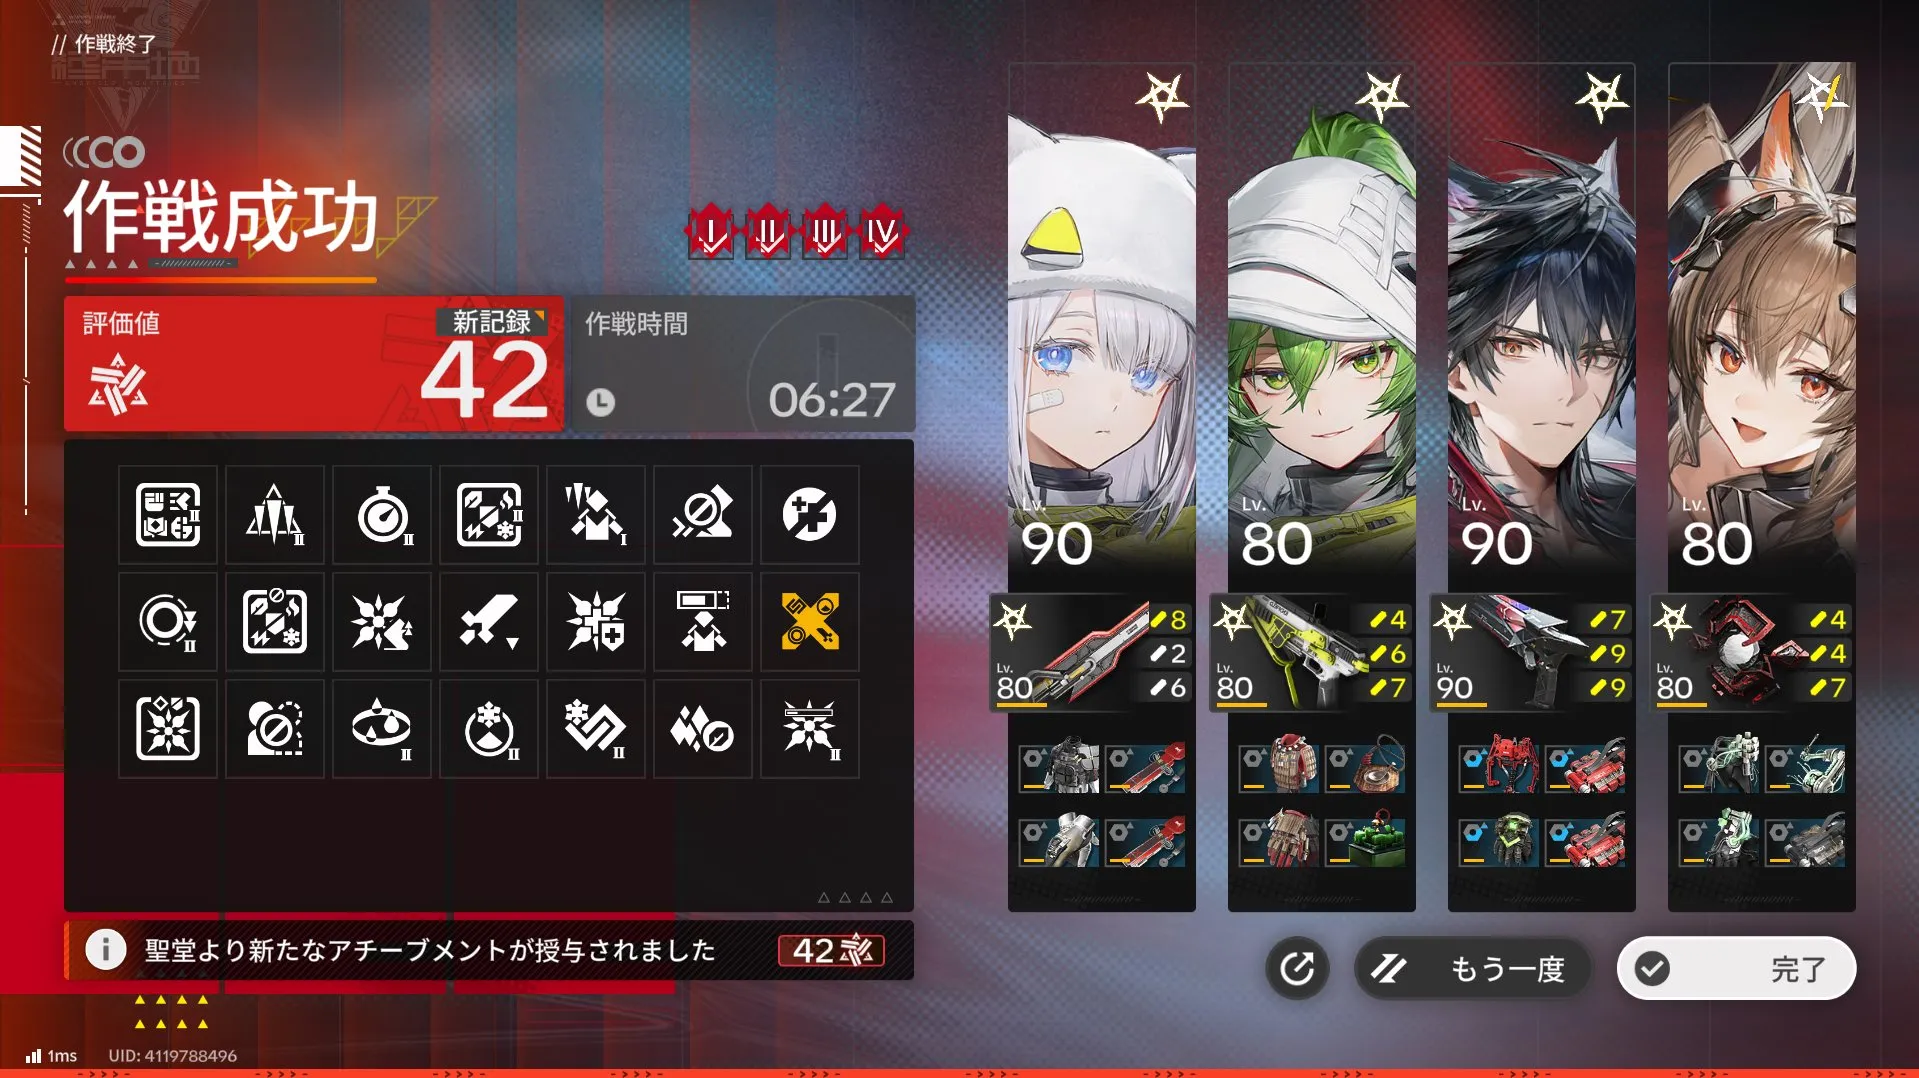 Lv 42
Lv 42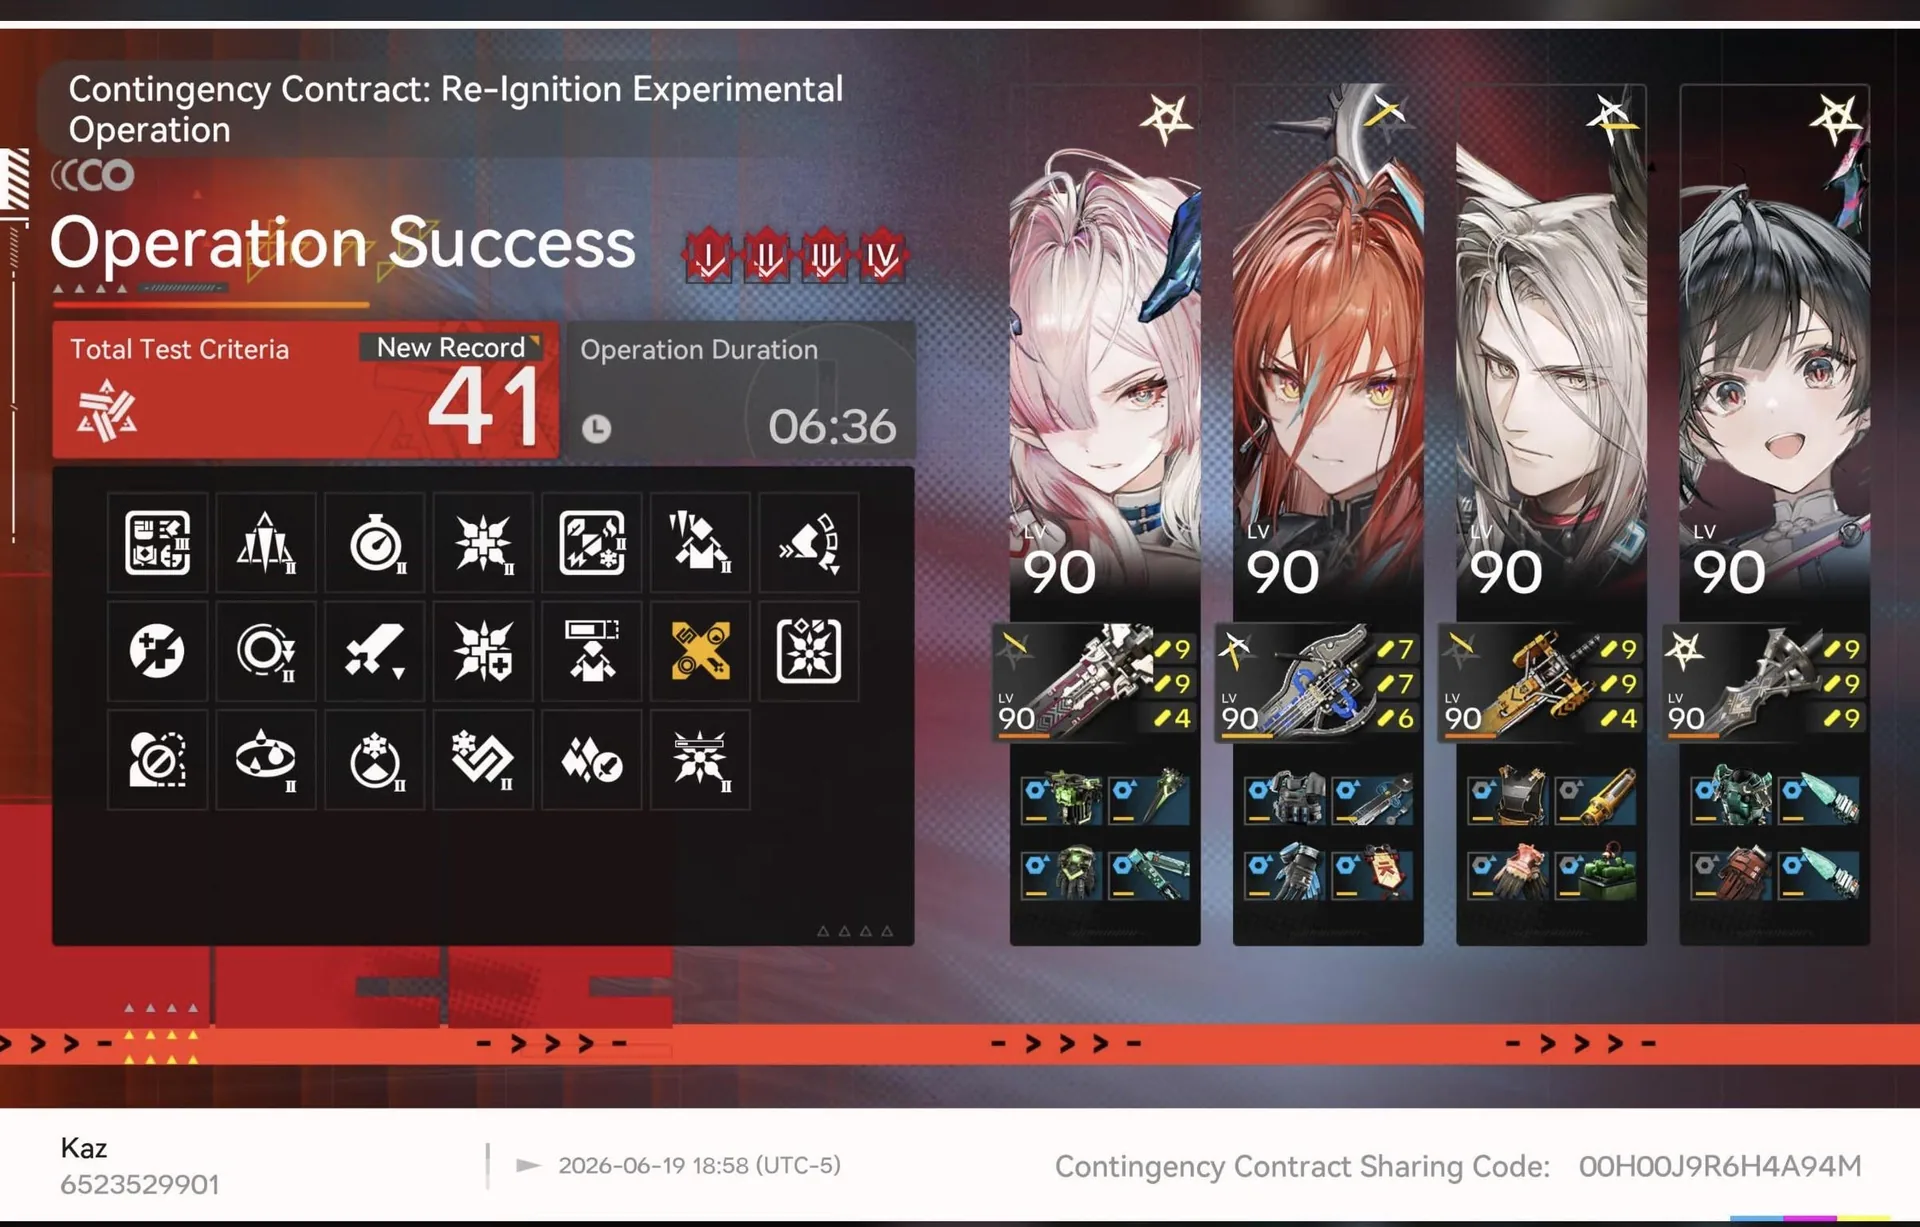 Lv 41
Lv 41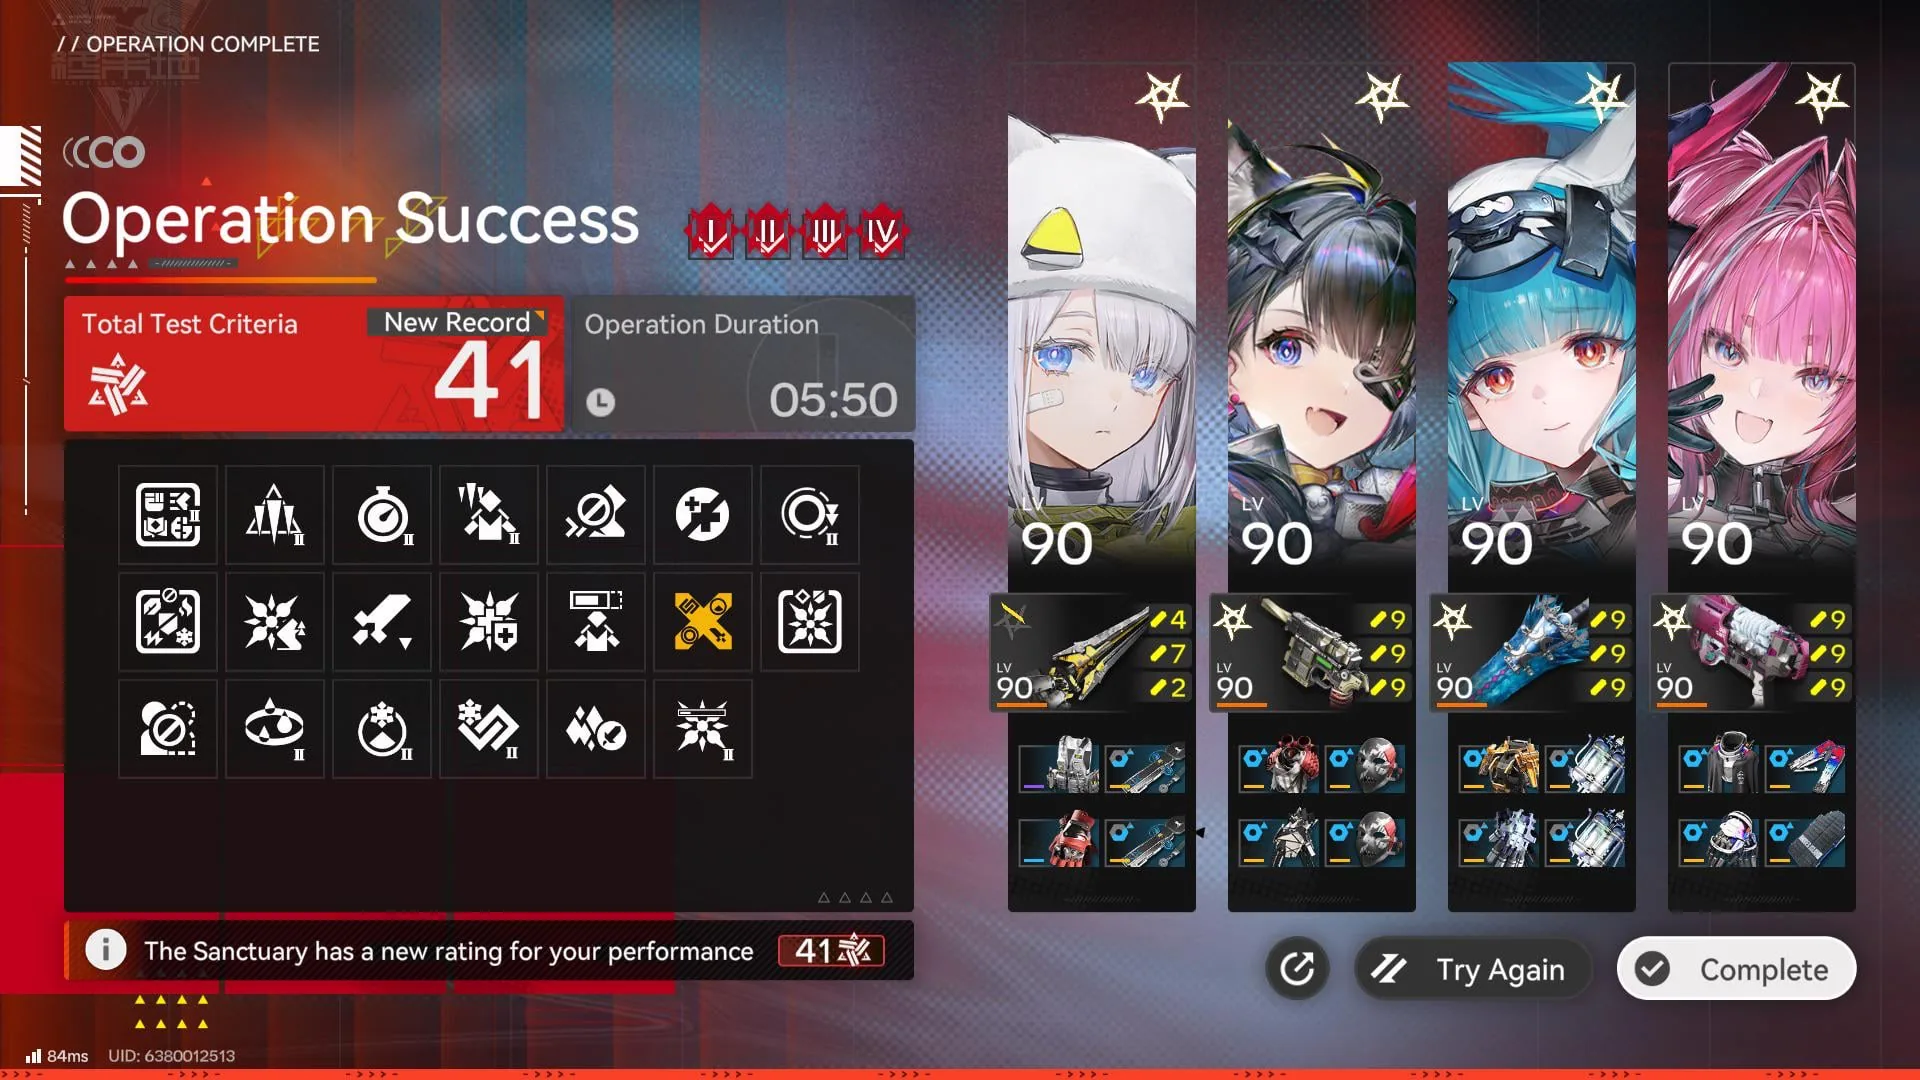 Lv 41
Lv 41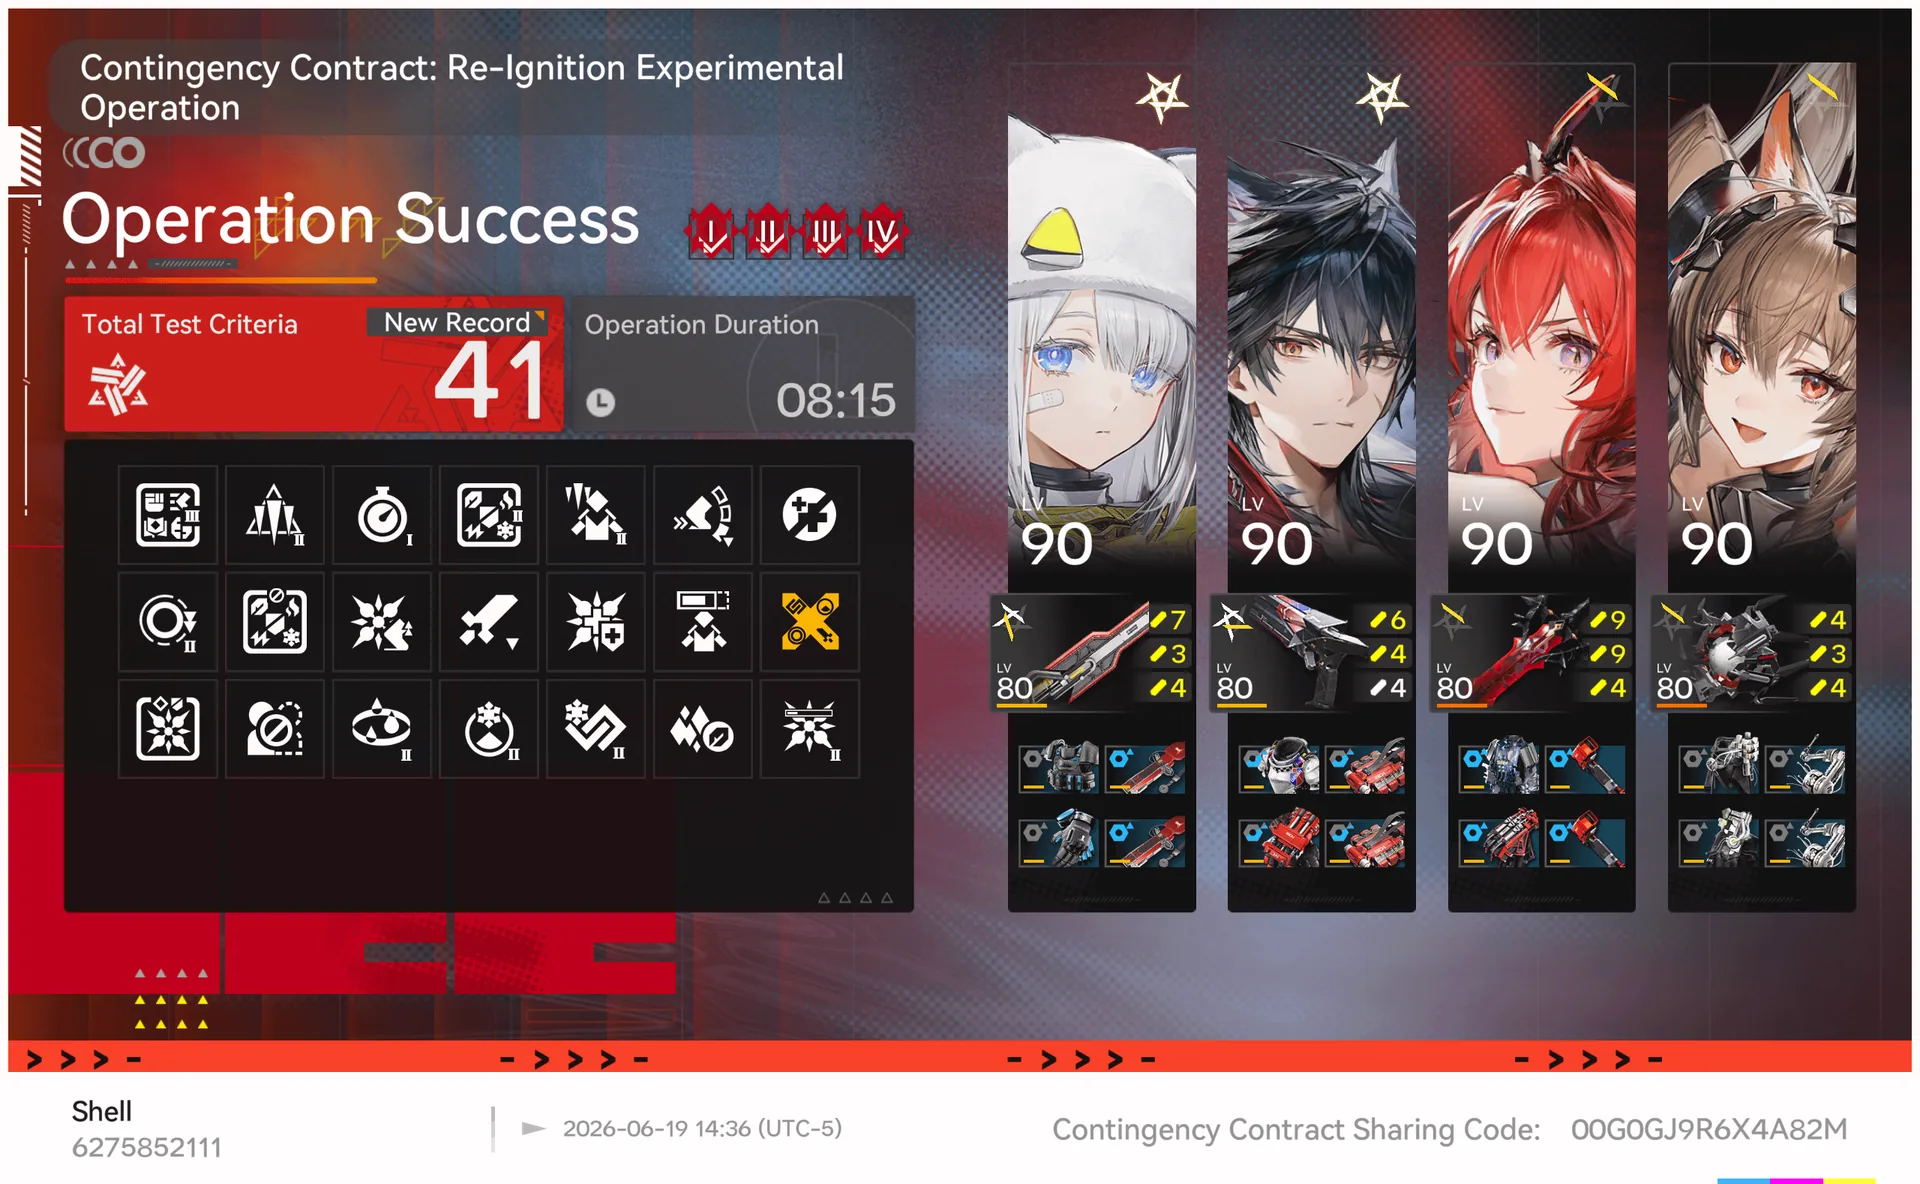 Lv 41
Lv 41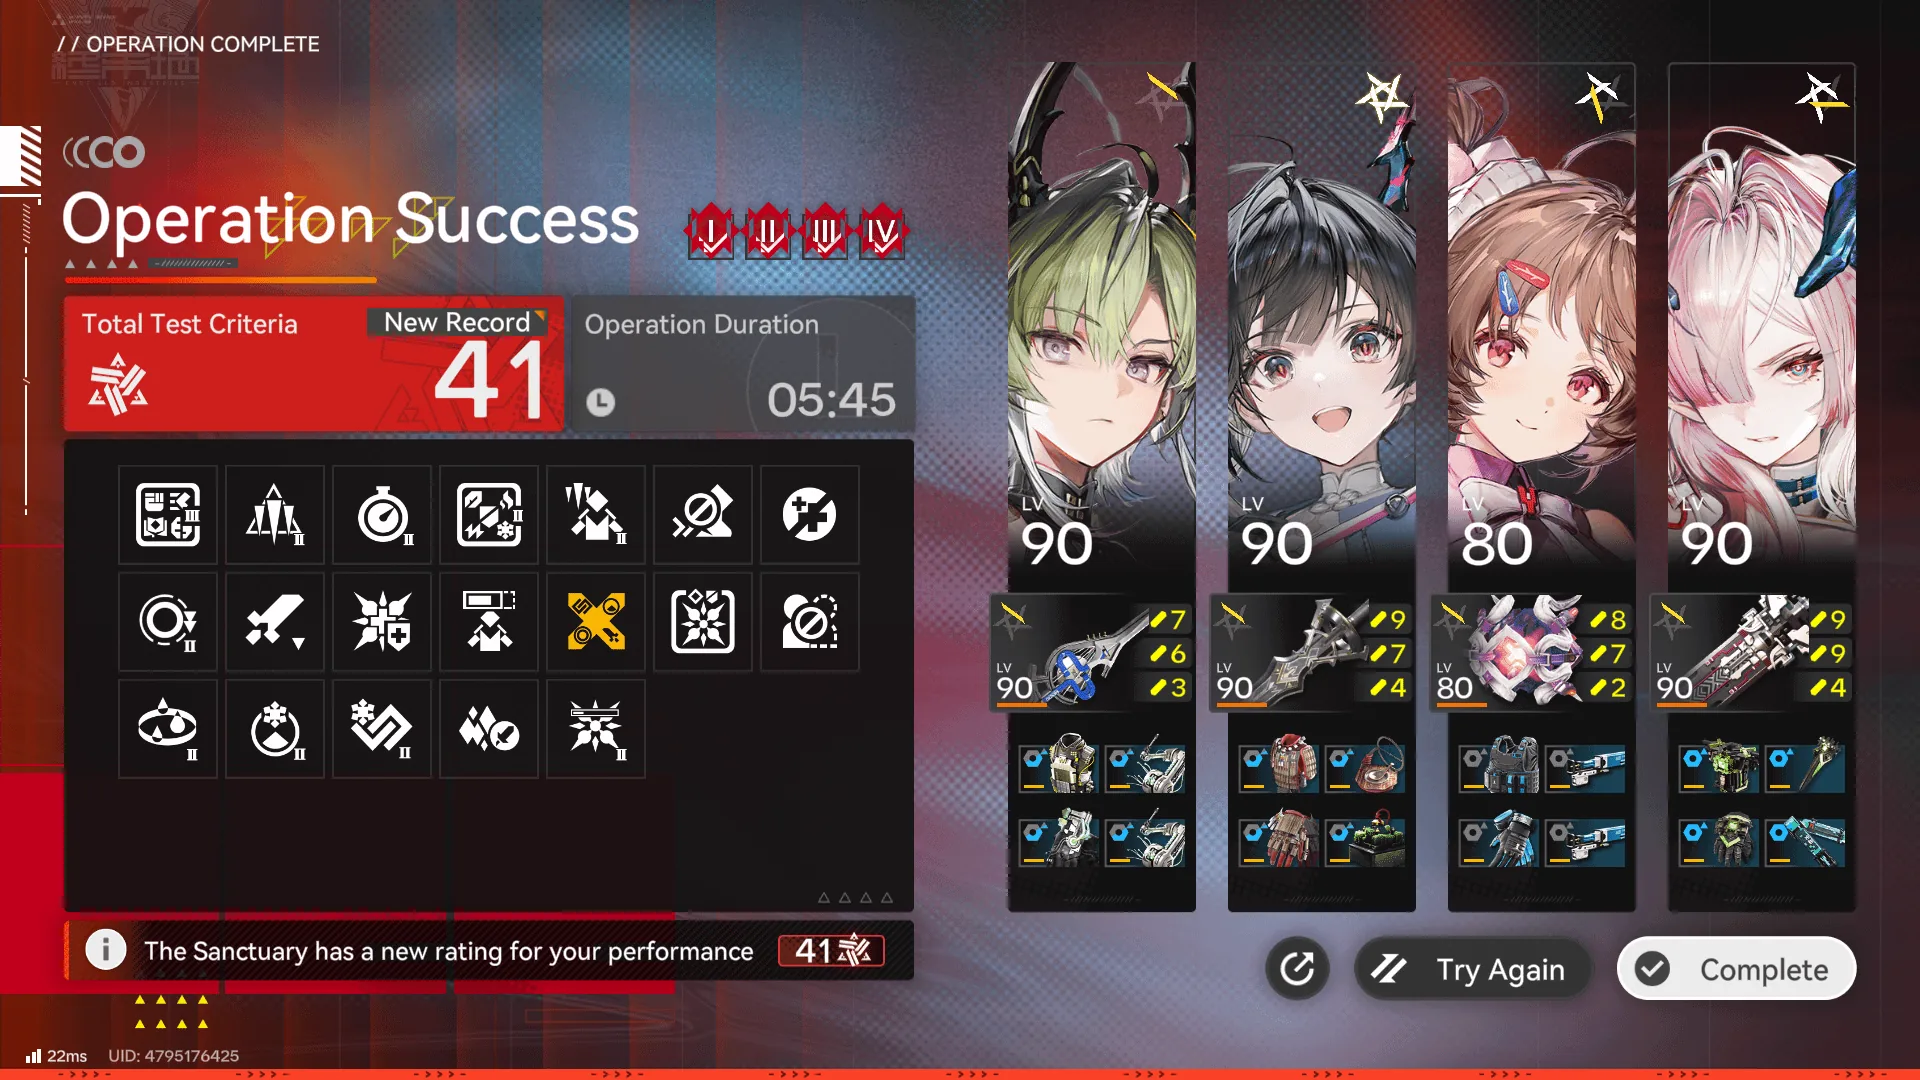 Lv 41
Lv 41Risk 50-60 - Ceiling
 Lv 52
Lv 52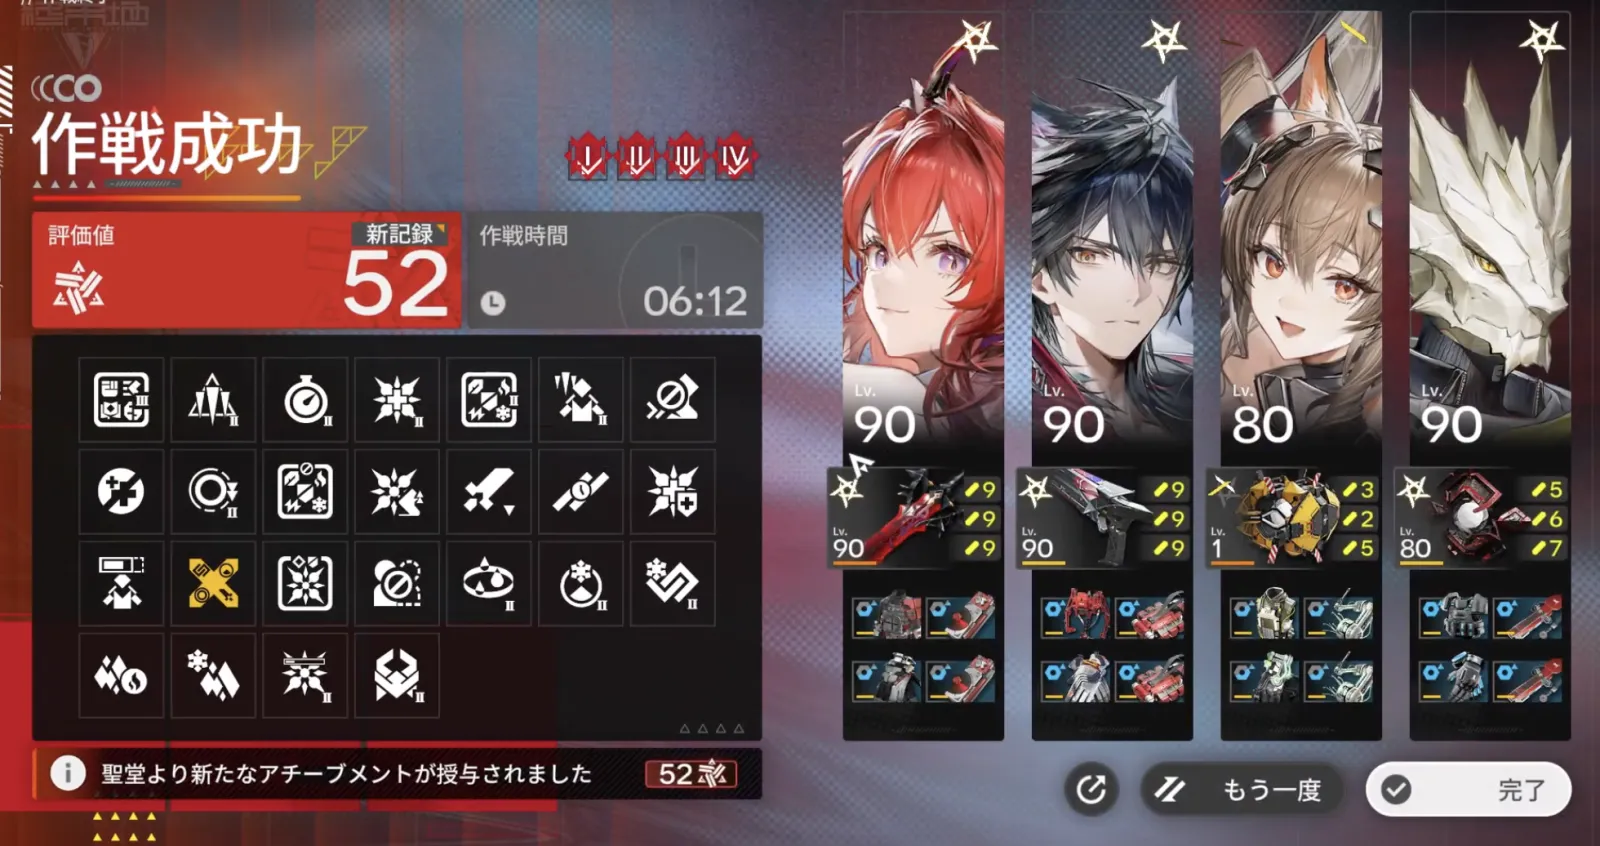 Lv 52
Lv 52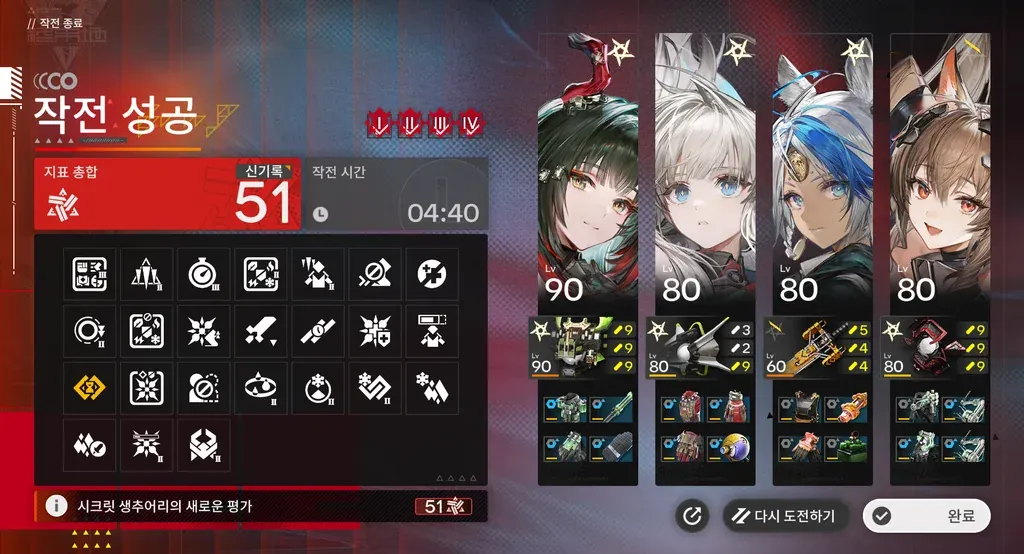 Lv 51
Lv 51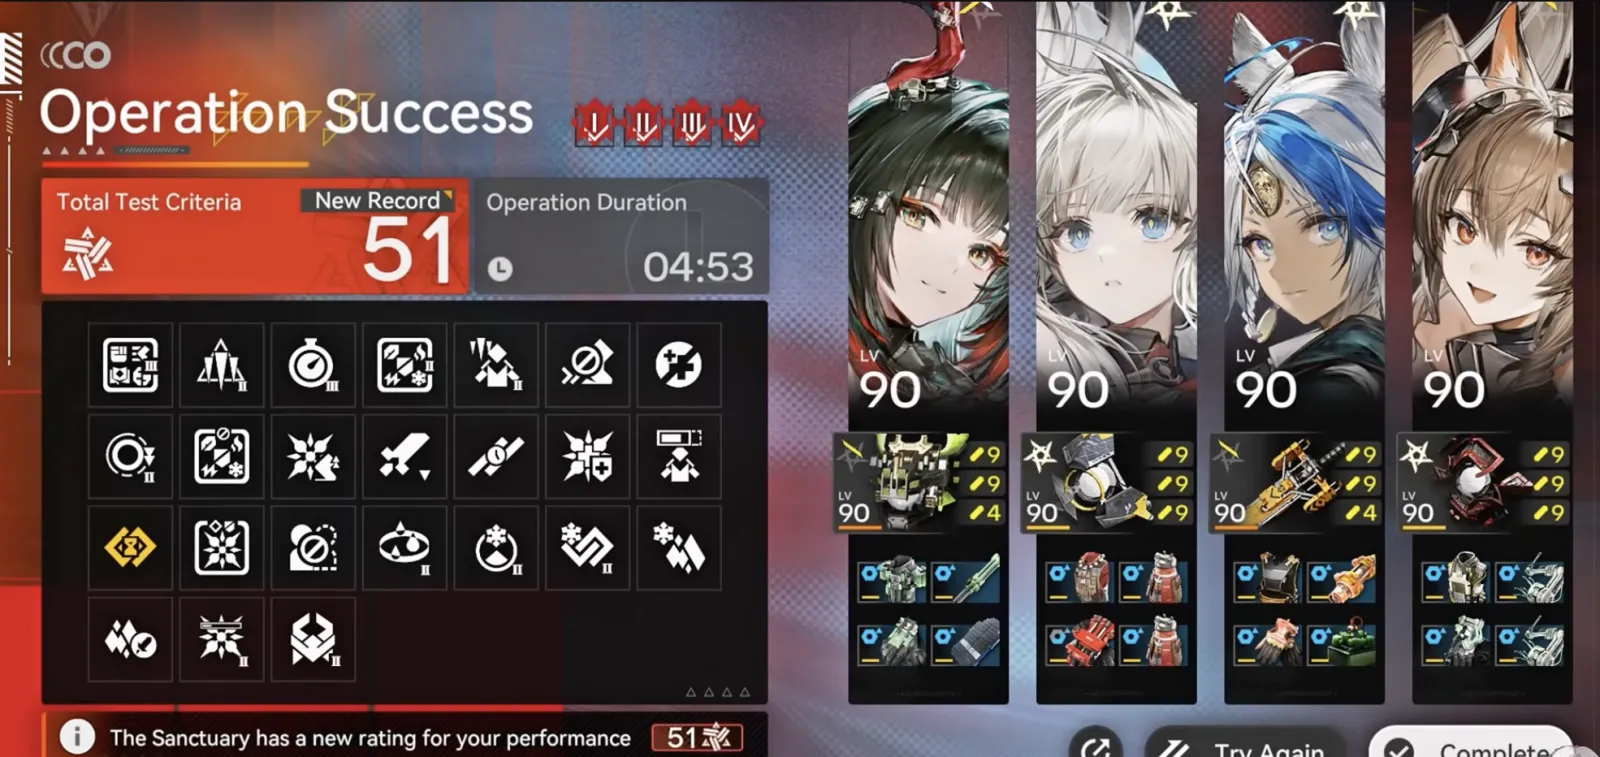 Lv 51
Lv 51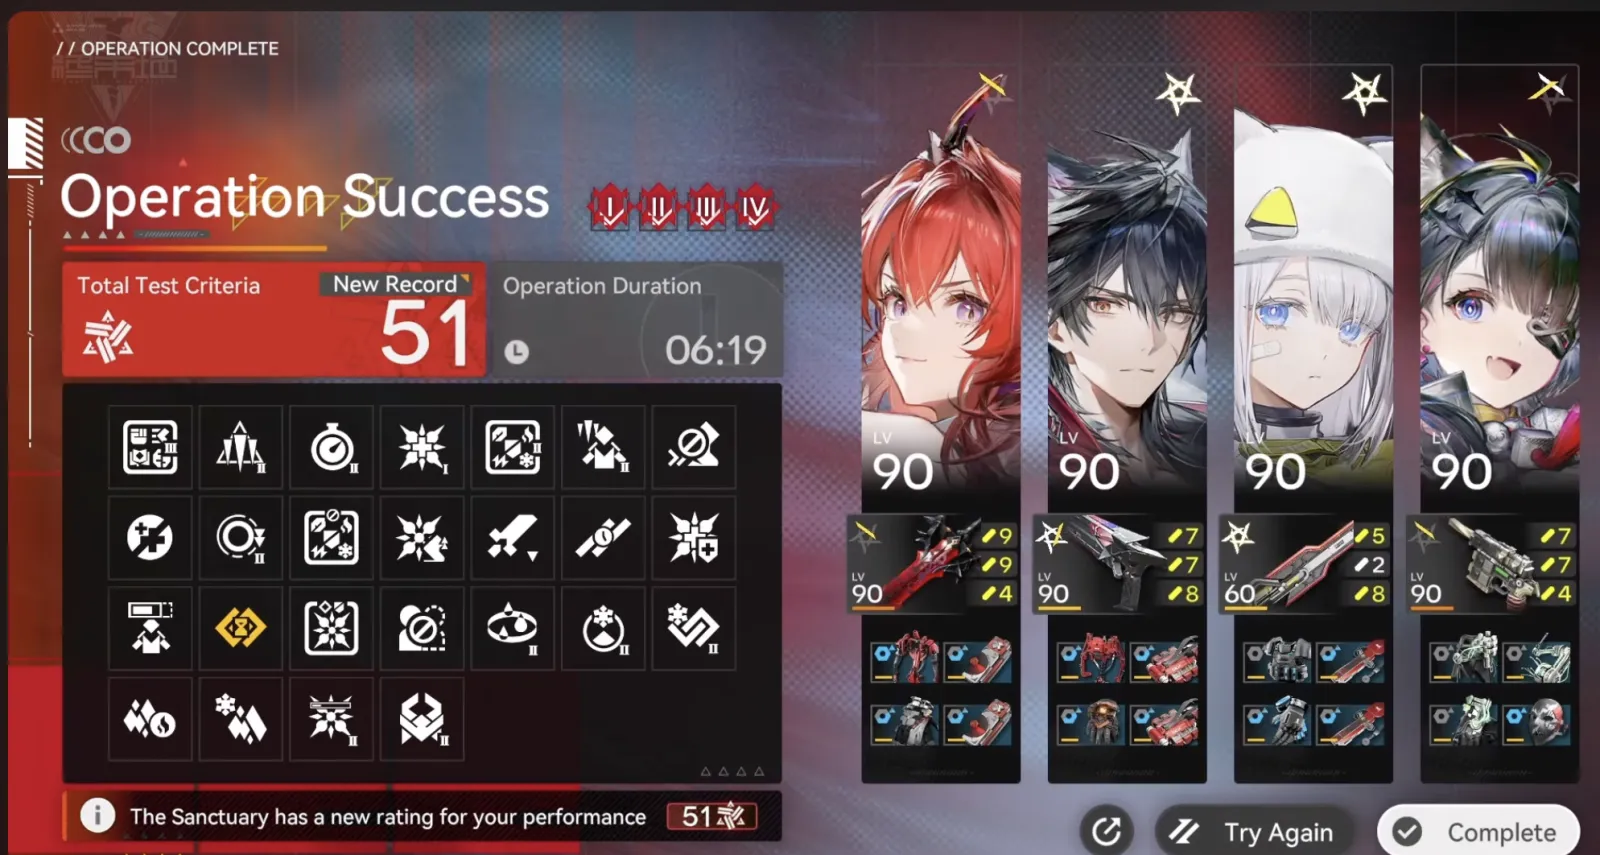 Lv 51
Lv 51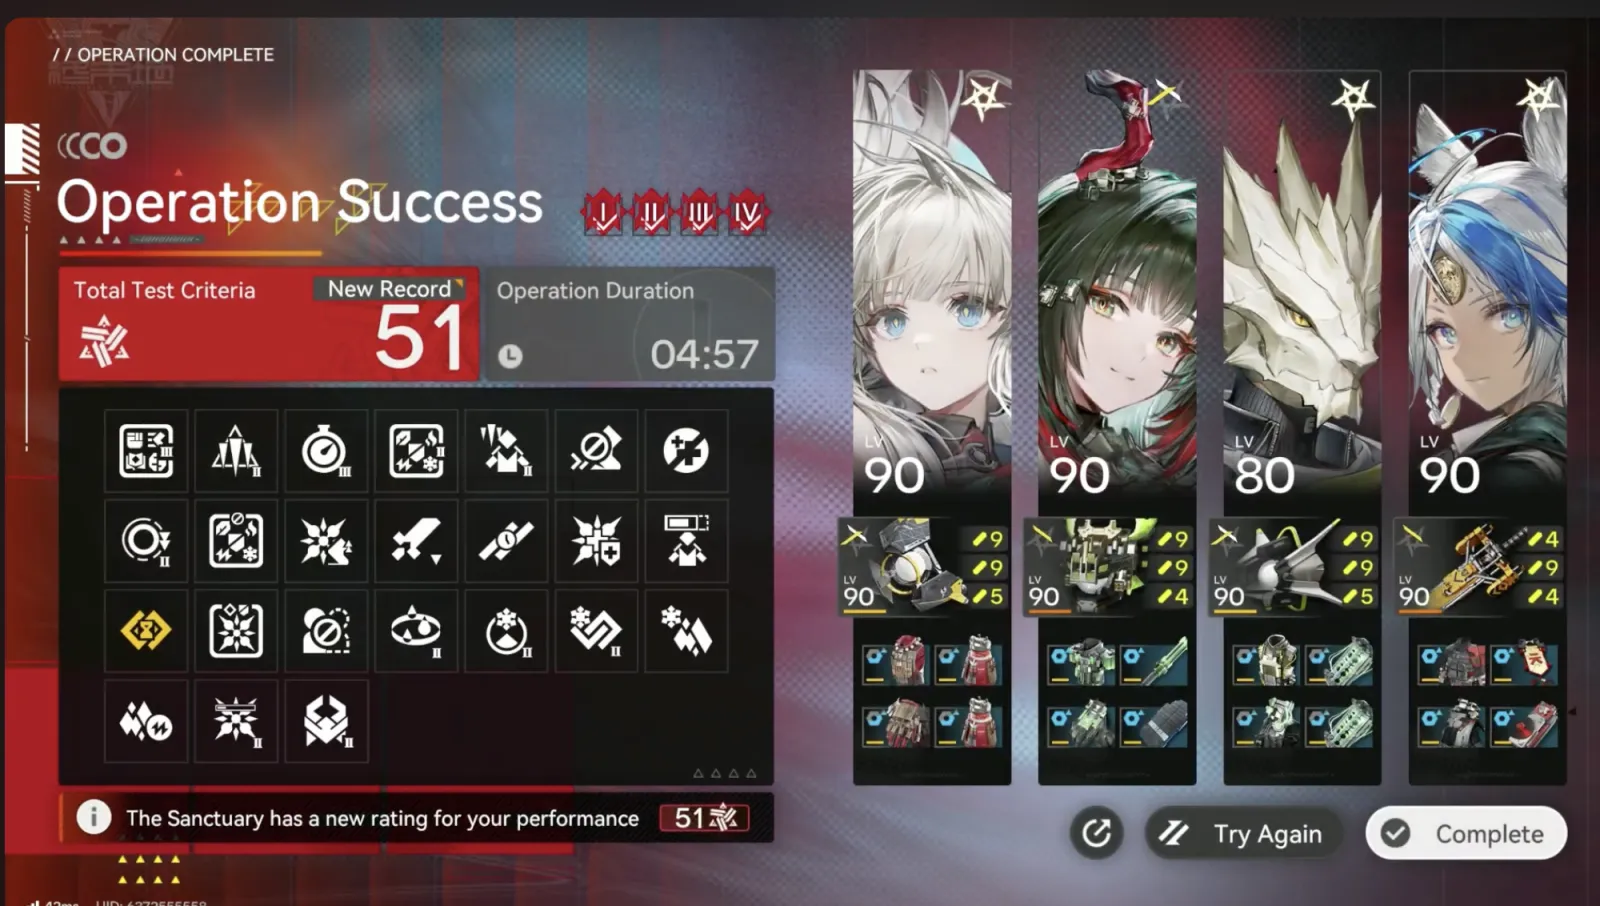 Lv 51
Lv 51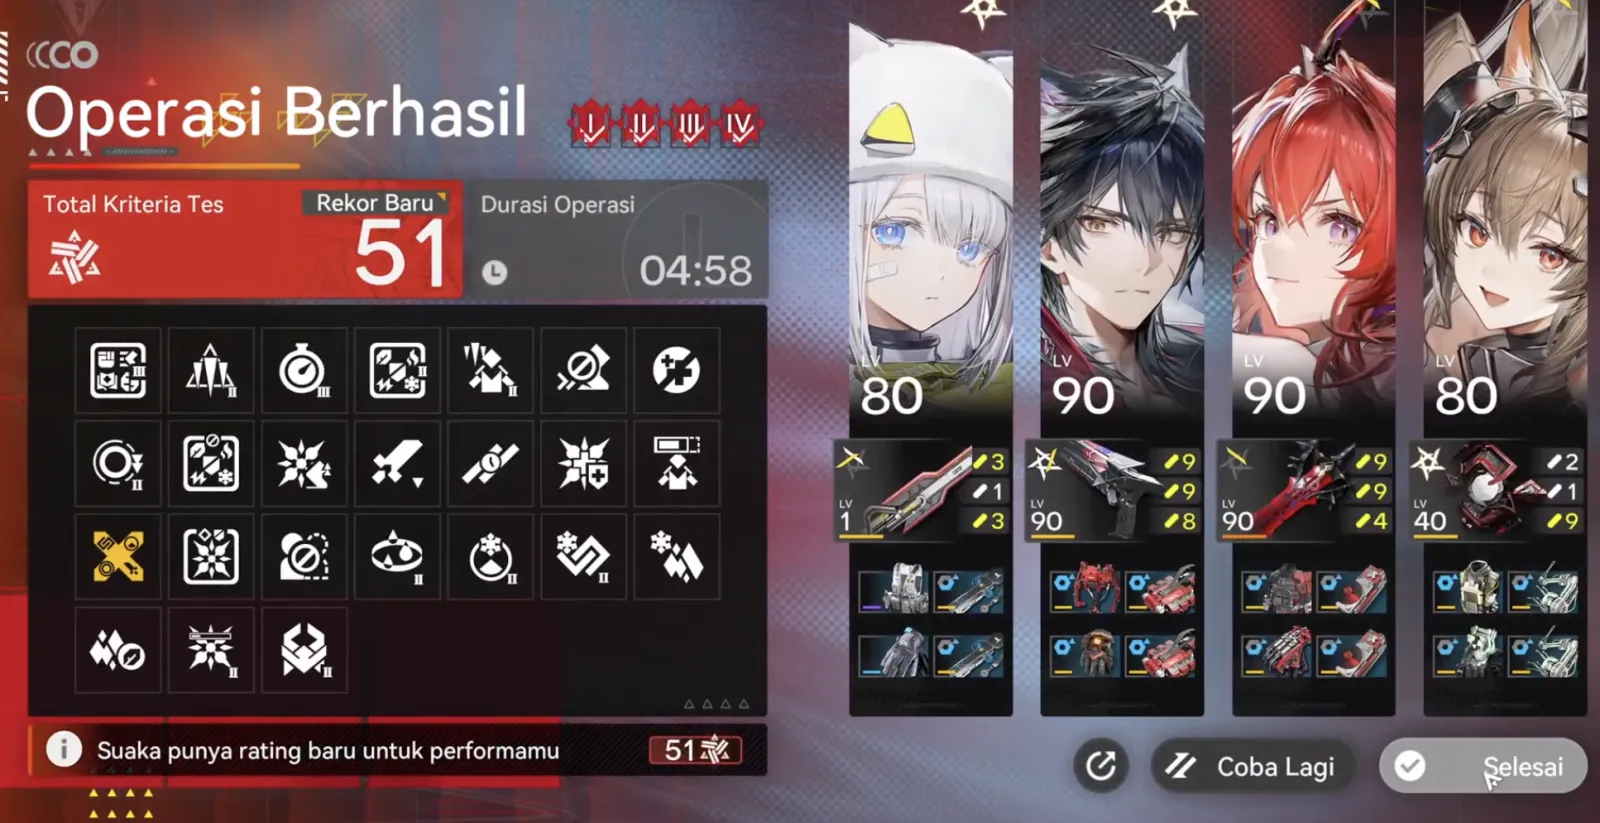 Lv 51
Lv 51Solo Clears - 1 Operator
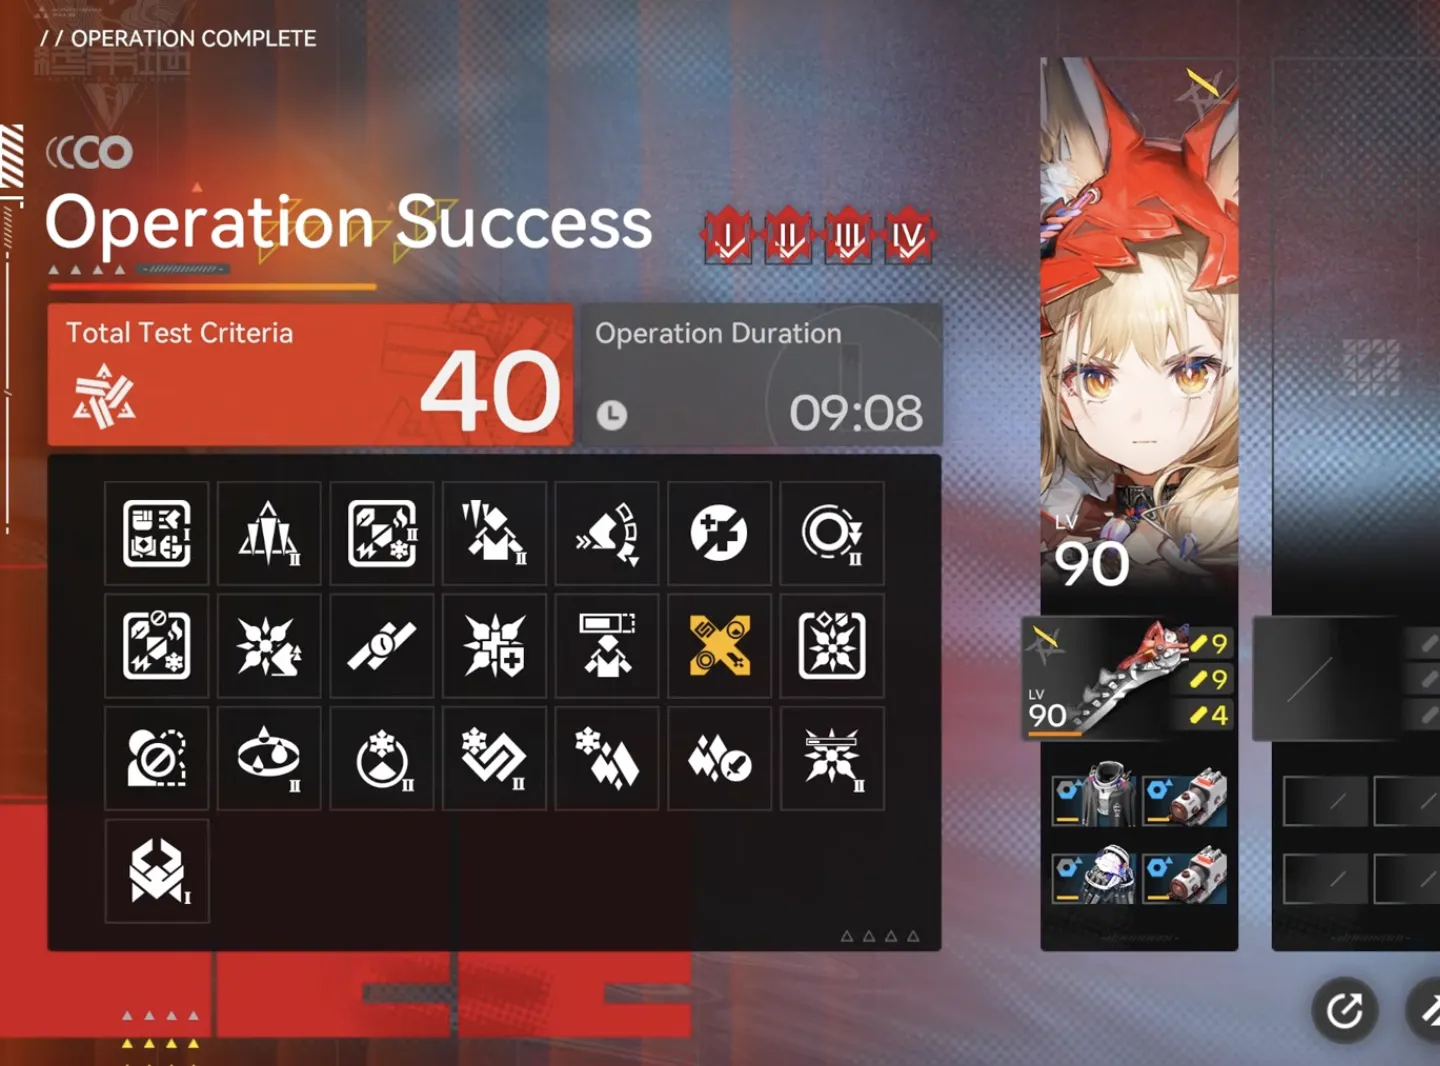 Lv 40
Lv 40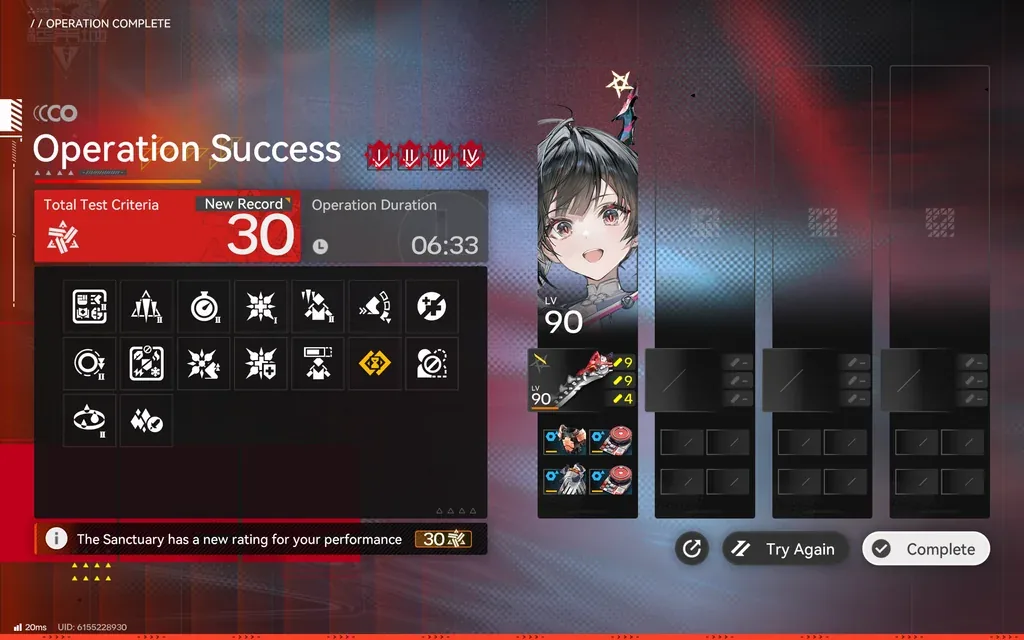 Lv 30
Lv 30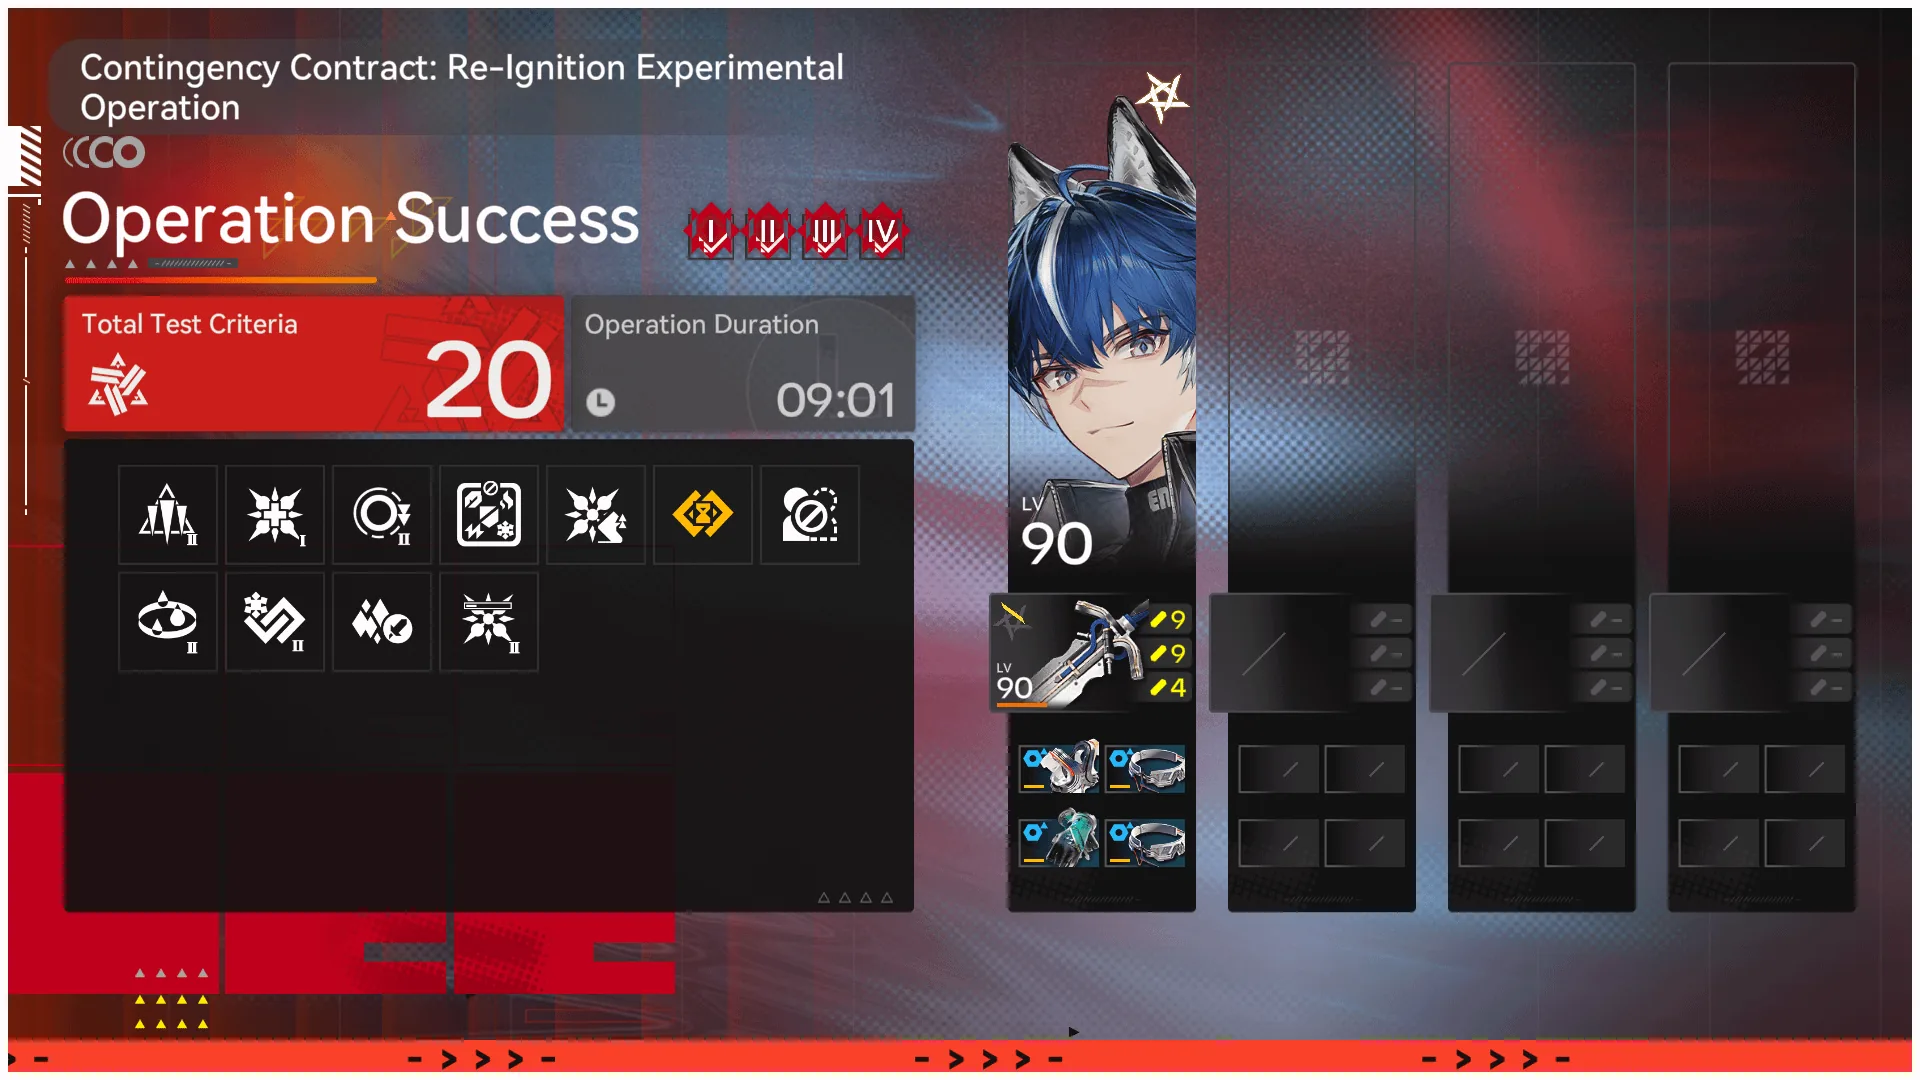 Lv 20
Lv 20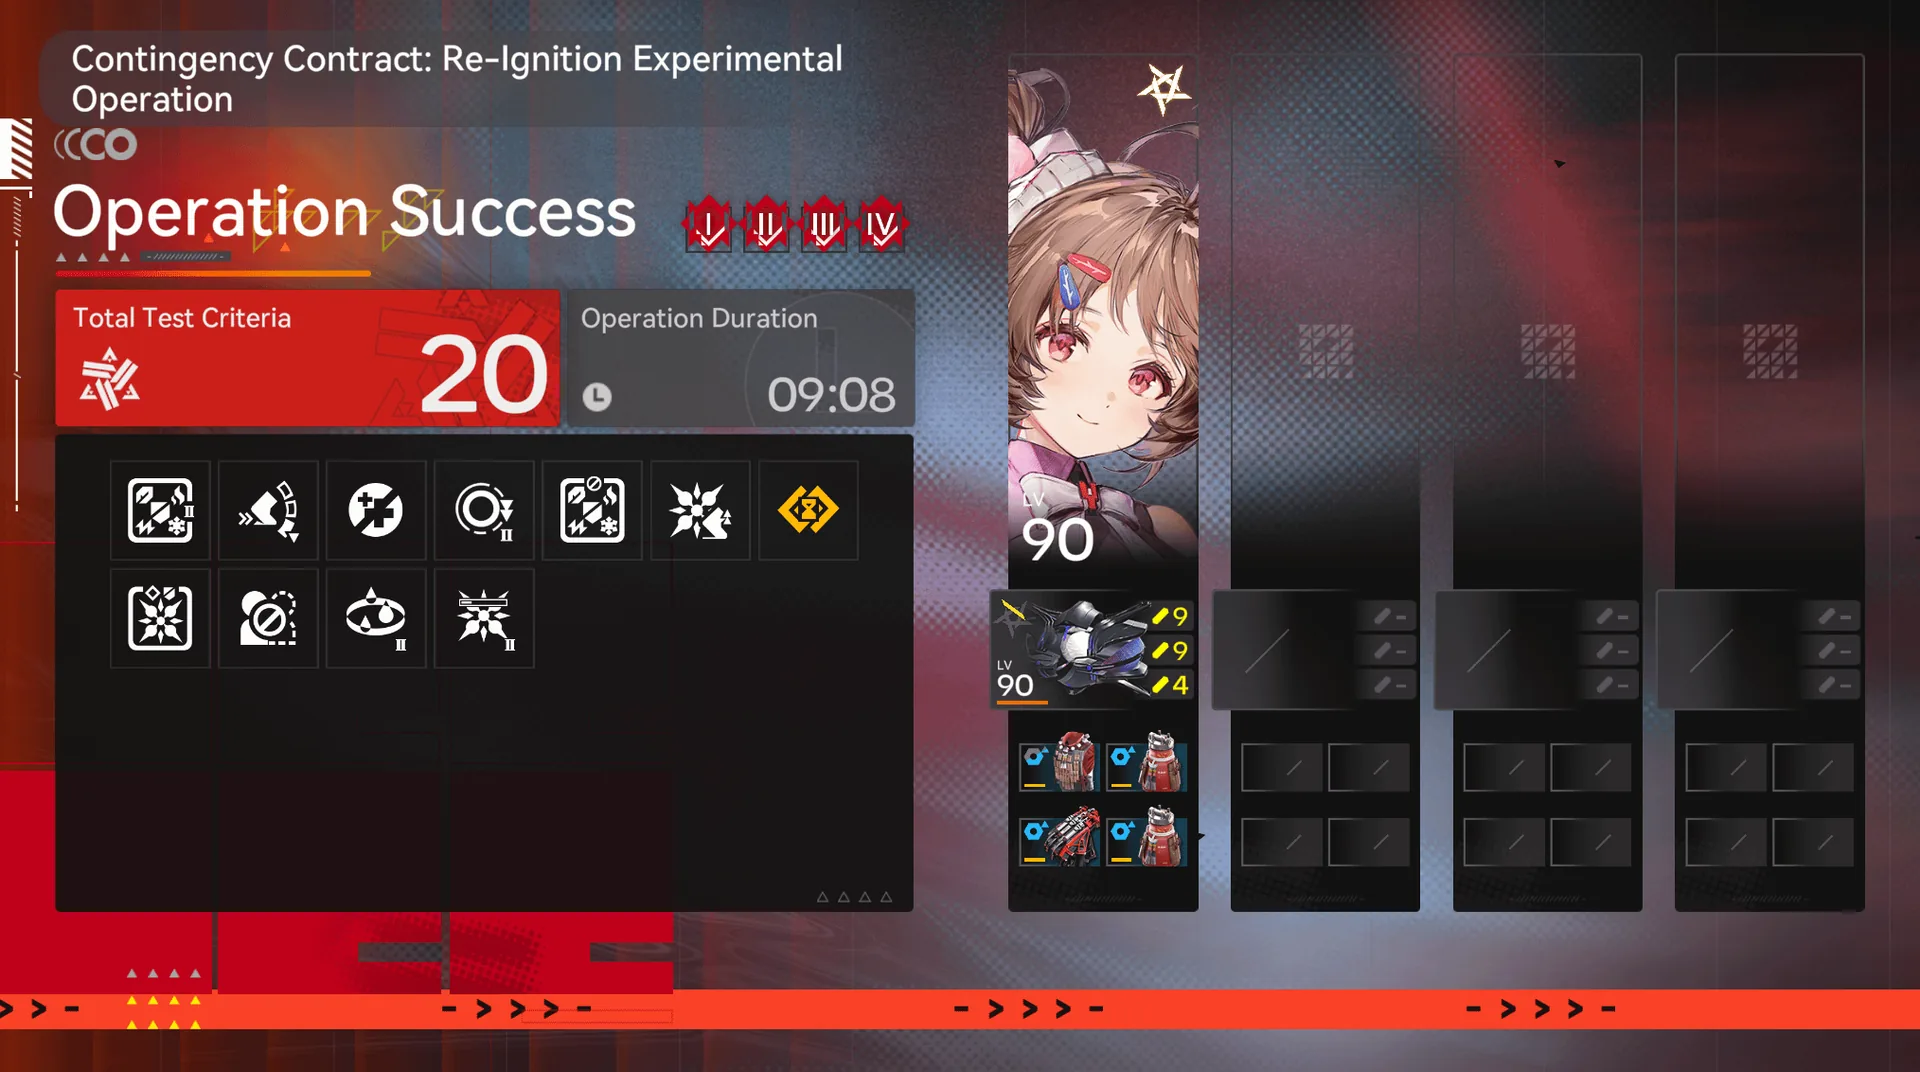 Lv 20
Lv 20Chen Qianyu Solo Clear (Risk 20-35)
A community player documented a full solo of Risk 20 with nothing but a maxed Chen Qianyu, no support operators at all. It is a striking result: a single melee carry clearing the reward cap that usually asks for a full four-operator Arts squad, and the run shown above finishes in around five minutes. The player only stumbled onto it after their main team got wiped by the Stage 2 squid and Chen was the last one standing, then slashed through Stages 3 and 4 alone. This is an execution-heavy run rather than a gear flex, and it leans on Chen's combo-skill dashes for both damage and survival. Here is the stage-by-stage plan they used.
- Phase 1: Fight and dodge as normal, building your buffs and SP.
- Phase 2: Play it like Phase 1, but when the large squid arrives, have 5 attack-buff stacks and 3 Glorious Memories stacks ready so you can ult it immediately. The squid is left at very low HP, which one attack sequence plus a battle skill and a combo skill finishes.
- Phase 3: Stack the two Agloi together and chain-CC them to death. When the big enemy appears, land at least one Final Strike, two battle skills, and two combo skills before you ult it.
- Phase 4: Same idea as Phase 3, but the giant squid is harmless for the first eight seconds, so dump everything into it in that window. Open with an ult, follow with three battle skills and three combo skills, then finish with a second ult.
Solo Run Video Walkthroughs
Source:YouTube (Risk 20)
Source:YouTube (Risk 35)
A few combat habits make the solo far more consistent:
- Chen's diving attack hits much harder than the first three hits of her attack sequence. Do one attack sequence, then immediately jump and dive to squeeze in extra damage.
- Her combo skill dashes a long way, so use it to dodge instead of rolling.
- Her combo skill also takes priority over the Agloi ramming attack. Pre-place a Vulnerability stack and you can lift them out of the ram with her combo skill, interrupting it.
- Keep her on her physical and Crush setup. Do not put a water (Hydro) element weapon on her.
Player-shared Test Criteria codes for Chen solo clears:00100011642A02H (Risk 20),001000916M0A02M (Risk 26).
The solo ceiling has been pushed well beyond the initial Risk 20 documentation. A community player cleared Risk 26 with a Chen-only setup (sharing code above), and the record now stands at Risk 35, documented in the video walkthrough below. The jump from 20 to 35 is mostly about tighter execution windows rather than a different strategy, since the core loop of building buffs, stacking Glorious Memories, and chaining ults stays the same across risk levels.
Two notes on flexibility. A P5 Chen running the Box Cutter still clears, but since most of your boss damage comes from ultimates and the Box Cutter contributes less ult damage, expect the run to stretch to roughly seven or eight minutes. The solo also relies on precise aiming angles that are realistic on PC: on mobile, players reported clearing Risk 20 with a Chen support team instead, pairing her with Endmin, Pog, and Catcher rather than going fully solo.
Risk 45-52 Full Runs (Highest Documented)
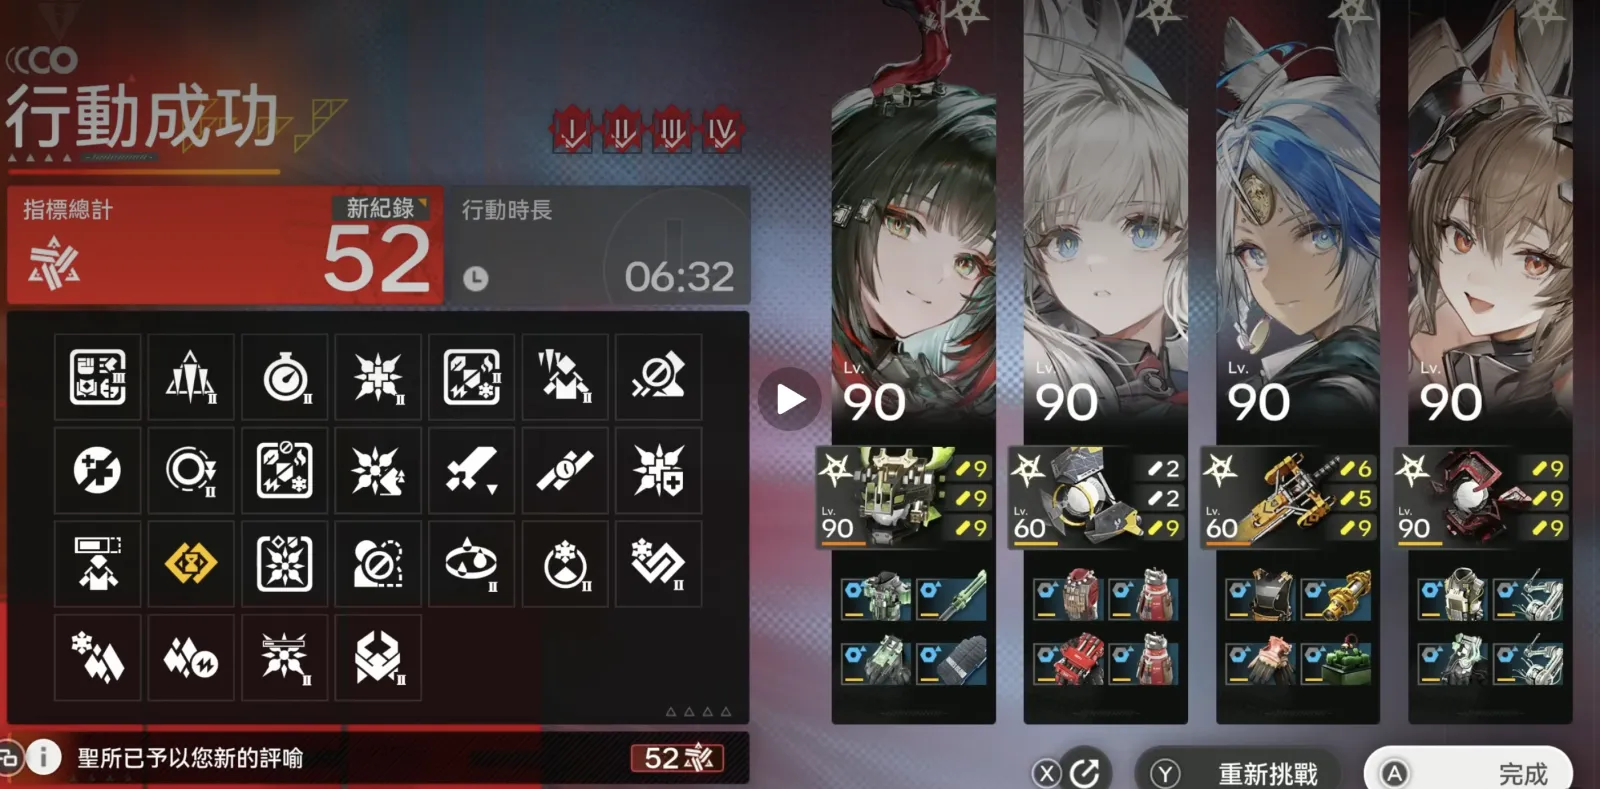
A Risk 52 clear is now the top of the documented runs, sitting above the Risk 50, 48, and 47 attempts below it. The jump past 47 is not someone finally out-damaging the old dupe wall, it is the Phase 2 update: the five new Test Criteria added enough cheap risk points that an existing high-risk comp can stack its way up. This is still the bracket where the timer reduction stacked on top of the harshest stat criteria turns a clean run into a luck-and-execution check. None of it is a casual push: the very top demands a specific comp, near-maxed investment, and a route that plays around the worst modifiers rather than tanking through them. Several community players have posted full Risk 45 through 52 attempts, including one paired with a complete build and gear breakdown, and all of them are collected in the video walkthroughs section below. Documented Risk 48 and Risk 50 clears now bridge the gap between 47 and the top, including an Estella team and a P0 (un-duplicated) Mi Fu and Rossi run, which is consistent with the Phase 2 framing: the extra points come from the new cheap criteria rather than from out-damaging the Risk 47 enemy-HP wall. Watching them back to back shows which boss windows and burst timings hold up across different players rather than in a single lucky attempt.
Zhuang Fangyi Electric Strategy (Risk 52)
The current ceiling is a Risk 52 clear built on the electric Zhuang Fangyi core: Zhuang Fangyi as the damage carry, with Arclight, Perlica, and Gilberta. This is exactly the swap the Risk 50 player anticipated would be needed to climb higher: you drop the Estella and Fluorite comfort package for an electric reaction core that scales past where guaranteed infliction tops out. It runs the same Electrification routing as the Risk 47 electric clear detailed below, with Perlica enabling the reaction loop in place of Alesh, and leans on the cheap Phase 2 criteria to bank the extra points over the Risk 50 combustion run. The full clear is in the video walkthroughs section below.
Estella Combustion Strategy (Risk 50)
Just below the electric ceiling, a Risk 50 clear pushes the same Estella crutch all the way to Risk 50, finishing in 6 minutes 38 seconds with a squad that is not even fully invested (one operator sits at level 81 on a level 1 weapon). It only became reachable after the Phase 2 criteria went live, since the extra +6 from Re-Construct II, Flash Freeze, and Encumbered is what carries an existing Risk 44 comp the rest of the way. The team is Estella in the controlled slot, Fluorite, Wulfgard, and Gilberta, a combustion comp that ignores the early cryo waves and then hits the Heat-weak final boss where it is softest.
The kill comes from a single Combustion IV burst on each boss. When the boss spawns, the rotation is Wulfgard ult plus Gilberta skill, a second Gilberta skill, then Fluorite's combo skill, Fluorite's ult, and finally Wulfgard's combo skill to detonate Combustion IV, which deletes the boss outright. Fluorite is the reason this is consistent: her combo skill and ultimate each apply one extra nature infliction with no SP cost, and unlike Gilberta's skill (which mobile enemies can walk out of) Fluorite's application tags the target and detonates with roughly a 99 percent hit rate, which matters a lot against the constantly-moving enemies this CC throws at you. The one trap is firing too early, since arts infliction is capped at one application per five seconds, so let the reaction set up before you commit the detonator.
Fluorite is normally a weak pick (no buffs, long cooldowns) and is only worth a slot here because she is used purely on bosses for that free, guaranteed infliction and because her skills cost no SP, which keeps the rest of the team's economy intact. She runs no gear set, just whatever maximises ult gain efficiency (a Redeemer chest and Redeemer seals), and even a level 1 OBJ gun works fine at around 12 percent ult gain since she is not there for damage. Estella still carries the controlled slot cleanly at Risk 50; the player notes that pushing higher would likely mean dropping Estella and Fluorite for Arclight and Perlica, which trades the comfort of guaranteed infliction for a reliance on Arclight's RNG talent. That is exactly what the documented Risk 52 electric clear above does.
Xaihi Controlled Strategy (Risk 50)
A community clear at Risk 50 runs Xaihi as the controlled operator instead of Estella, built around a team of Xaihi, Tangtang, Laevatain, and Wulfgard. The player favors this over the Estella comp because Estella being melee creates visibility problems when too much is happening on screen, making it hard to see when attacks land. With Xaihi at range, the visual clutter is far more manageable, and the risk that requires periodic Final Strikes to keep SP regen going is easier to maintain without being in the thick of it.
The sharing code is 08G06J9R7X5284M, and the clear runs every risk except the HP-up nodes (risk 1 to 3) and the time reduction (risk 3). Heat skill as cleanse. Some tips from the player:
- Use Xaihi as your controlled operator. Remember to use her ult whenever you have 2 stacks of infliction, not 3, so you can cleanse before you get frozen.
- Do not use Xaihi's skill unless it is on fresh enemies at full HP and you need the healing. Your healing heals the enemies too, so do not forget that.
- Similar to Xaihi's skill, only use Tangtang's ultimate at full HP enemies. CC'd enemies heal for them as well. Use it at the start of a new wave to secure the final strike before they start moving to get your SP regen going.
- Use Laevatain's skill whenever Wulfgard's combo is on cooldown or you need Combustion as soon as possible.
- Do not forget to use Laevatain's ult as an emergency cleanse if you get frozen (it will not switch control to her).
How the Risk 47 Electric Clear Works
The Risk 47 clear was pulled off on a heavily whaled (P5) account and, remarkably, on mobile with around thirty seconds left on the timer. Set expectations before you try to copy it: the community read is that whaling is what makes Risk 47 possible at all, not easy, and the execution is still brutal enough that one mistimed step is a full reset. Treat it as a medal chase, not a route you grind for rewards.
The team is a pure Electric comp built around Zhuang Fangyi as the damage core, with Arclight, Gilberta, and Alesh. The whole plan is about threading the nastiest criteria so the penalties land on the operators that can absorb them instead of on your carry. The community breakdown of the clear runs like this:
- Take Ambient: Overclock to slash Arclight's combo skill cooldown, and pair it with Ambient: Physicolysis so a physical skill instantly clears Solidification, which is what you use to unfreeze Gilberta.
- Route the damage penalty onto Arclight, not Zhuang. Arclight's ult inflicts Electrification first, then Zhuang Fangyi applies electric damage that slips past Team: Restraint II (-90% damage). Because Edit: Effect Barrier blocks re-applying the same negative status within 5 seconds, Zhuang cannot re-inflict Electrification, so the Restraint penalty sticks to Arclight alone and Zhuang's damage stays intact.
- Ignore Edit: Regeneration II. Just crowd-control the enemies and kill them at full HP. Zhuang needs time to stack Sunderblades anyway, so Gilberta topping enemies back up does not actually cost you the run here.
- Slot Lynx Detectors on Gilberta to soak enemy damage and keep her standing.
- One extra wrinkle from the clearer: use Alesh's ult to inflict Cryo so that Zhuang Fangyi's ult battle skill inflicts Electrification instead, keeping the reaction chain on script.
The load-bearing step is the second one. Players who have attempted it report that managing the Electrification order while also watching the mob and the freeze counter is where almost every run dies, so that timing is the part to drill rather than the gear check. The full attempt is in the video walkthroughs section below.
If Risk 45, 46, and 47 are out of reach for your current roster, that is expected. Remember that Risk 20 unlocks every reward in the shop, and everything above it is purely for the max-risk number next to your username. For a strategy that takes a more forgiving path to the high brackets, see the How to Clear Risk 40 section below.
Is Risk 47 Pay-to-Win? The Whale Debate
The loudest take around the top brackets is that Risk 47 is simply bought: whales pay, whales clear, end of story. That framing borrows expectations from Hoyo and Wuthering Waves style endgames, where dupes can multiply a character's damage anywhere from two to thirteen times and a maxed account brute-forces content a free account mathematically cannot. Endfield's Contingency Contract runs on a different lineage. It descends from the original Arknights CC, a community-driven, self-imposed challenge where every reward caps at Risk 20 and everything above is bragging rights, route discovery, and collaborative theory-crafting. In the original game, whales would even lend out their maxed accounts to skilled players just to test whether a clear was theoretically possible at all. The number next to your username is a leaderboard flex, not a power gate on your account.
The practical ladder most clears bear out: Risk 45 is the realistic free-to-play skill ceiling, clearable on un-duplicated (P0) limited six-stars with sharp execution. Risk 46 is achievable the same way with good play. Risk 47 is where dupes become a genuine requirement rather than a convenience. That jump is not a balance failure, it is the design working as intended: the reward-bearing content sits far below, and the ceiling is left deliberately punishing for the players who want to chase it.
The wall between Risk 46 and Risk 47 is one specific tag: a +100% enemy maximum HP criterion (community testing suggests it can function closer to +200% total once it stacks with the other Vitality nodes). That single criterion converts Risk 47 into a pure damage-per-second versus timer check, and a P0 account cannot mathematically out-damage the inflated health pools inside the time limit no matter how clean the route is. It is the same lesson as the rest of the mode written large: the enemy-HP (Vitality) criteria are the only genuinely investment-gated risks, and almost everything else is a skill and team-building problem.
Even the dupe advantage is more modest than the pay-to-win framing implies. Potential and signature-weapon upgrades in Endfield land in the rough neighbourhood of a thirty to seventy percent damage uplift, meaningful but a world away from the multiplicative dupe scaling of other gacha games. A widely repeated sixty to one hundred percent figure traces back to a single guide author and is disputed by the math others have run, so treat it with caution. Just as importantly, a large share of the high-risk criteria reduce your own output rather than buffing the enemy (the cap on how much HP a target can lose at once, the penalty on a second ultimate cast, and so on), so the top brackets reward sequencing and strategy at least as much as raw stats.
Sourcing note: a screenshot circulating as an Estella combustion clear of Risk 47 is widely disputed as doctored, and no verified Estella Risk 47 clear exists on YouTube or Bilibili. Estella and combustion comps top out around Risk 46 and are considered a damage loss at 47, so we have not listed an Estella Risk 47 strategy here. The documented Risk 47 clears use neither Estella nor Wulfgard: the electric Zhuang Fangyi route detailed above is one, and another is built around Mi Fu.
How to Clear Risk 40 Contingency Contract
Risk 40 is the ceiling of Contingency Contract, the point where stacked test criteria turn every wave into a survival test and a damage check at the same time. Clearing it is less about owning one broken team and more about running a plan that sidesteps the modifiers punishing you hardest. The guides below collect the approaches pioneers have used to push a Total Test Criteria of 40 to a clean Operation Success, and each one is written to be adapted to the roster you already own.
None of this is beginner territory. By the time you are stacking risk this high you need operators near level 90, weapons leveled, and gear slotted, because the timer and the inflated enemy health pools leave no room for an under-invested squad. If you are still deciding which modifiers to stack, read the test criteria meta breakdown first, and if you want the lower brackets, the Sharing Codes section above has importable teams from Risk 20 up to 40.
Estella Control Strategy (Risk 40)
The simplest Risk 40 clear leans on Estella as your controlled operator paired with a kiting game plan that ignores most of what the stage throws at you. The idea is to keep your character moving the entire fight, hold distance from enemies, and only commit when your other three operators have the SP to dump their battle skills. As long as you keep running and stay at range, the bulk of enemy attacks miss or never connect, which quietly defuses several survival-based test criteria at once.
That movement-first approach is what makes the comp forgiving even at the hardest bracket. You are not racing to out-tank incoming damage, you are simply refusing to be where the damage lands. The screenshot below shows the target outcome.
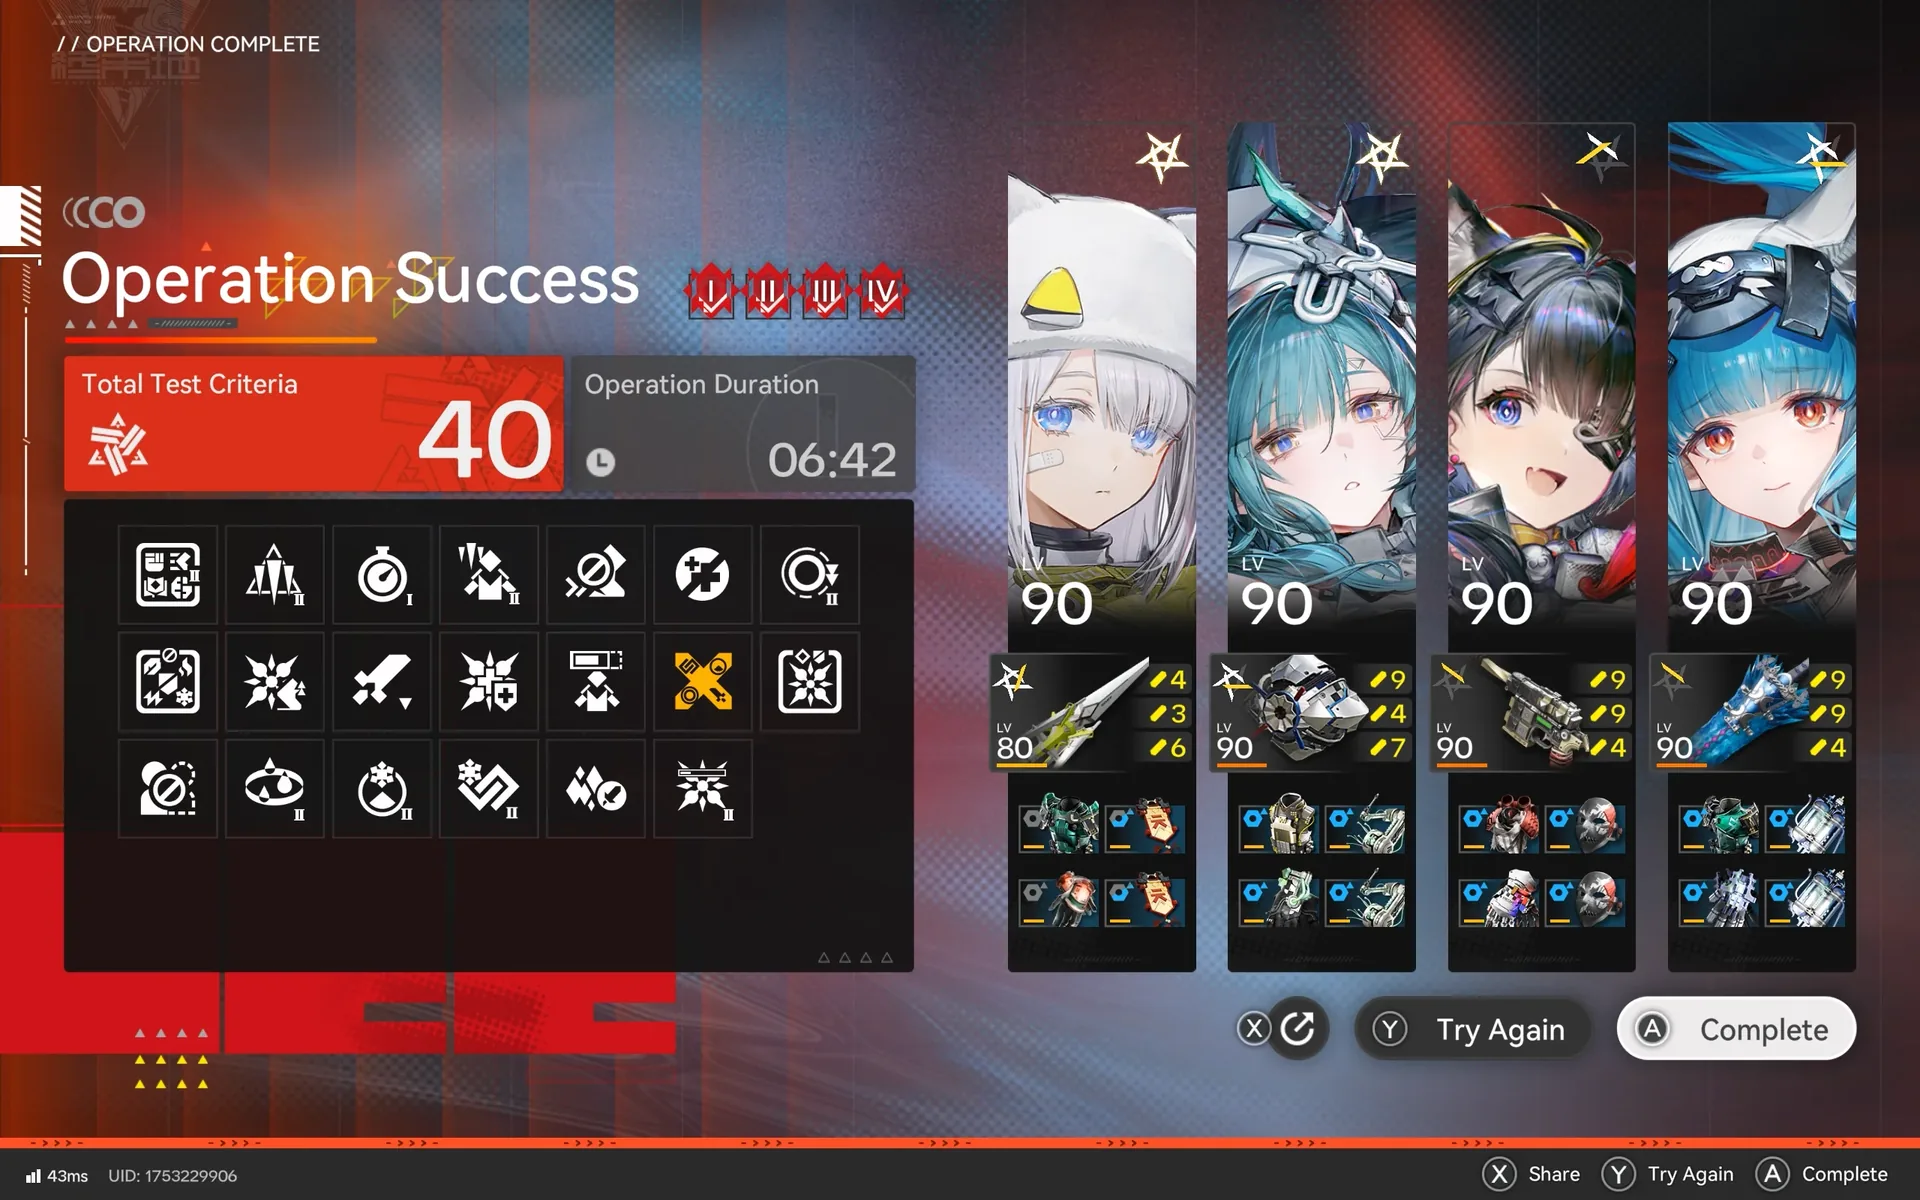
That is Operation Success at a Total Test Criteria of 40, cleared in six minutes and forty-two seconds with a level 90 squad. The clear time is the part that matters most, because Risk 40 is ultimately a damage check. Kiting keeps you alive indefinitely, but you still have to out-pace the timer, which is why the three supporting operators need real investment rather than just a durable frontline.
How the Run Works
Set Estella as the operator you directly control, then treat the fight like a track meet. Circle the arena, bait attacks out, and weave in your squad's battle skills on cooldown so your damage output never stalls while you reposition. Most trash waves cannot land a hit on a target that never stops moving, so your attention goes to routing the map rather than dodging individual telegraphs.
The two moments that demand real caution are the Stage 2 and Stage 4 bosses. Several of their attacks track your position instead of firing where you used to be, so the run-and-gun pattern that trivializes everything else will clip you if you hold a straight line. Break your movement with hard turns when those bosses wind up, then settle back into the kiting loop once the tracking attack resolves.
Why Estella Is the Pick
Estella earns the slot through her second talent, Laziness Pays Off Now, which makes her ignore cryo infliction taken. At Risk 40 the nastiest modifiers pile cryo onto your controlled operator, including the criterion that applies cryo every single time any operator casts a battle or combo skill. On a normal controlled operator that means near-constant freeze threat, landing at the exact moments you most need to keep moving.
Because Estella shrugs that cryo off, those criteria stop mattering and you are free to spam skills without ever watching a freeze meter. You can run the same kiting plan with any controlled operator, but the moment you drop Estella you add freeze management back into a fight that is already a survival puzzle. The cryo immunity is also why the comp holds up against Tidalkast on the final wave, where incoming cryo pressure spikes hardest.
Team and Build
Estella herself needs almost nothing beyond that second talent to function as the controlled operator, but leveling her and slotting the Redeemer Tag gives a tankier health pool that covers the occasional tracking hit you cannot fully dodge. The other three slots are open to whoever on your roster deals the most damage, since their only job is to convert your kiting windows into burst.
One clear that works leans on Tangtang spamming her battle skill to stack cryo inflictions and Last Rite firing her combo skill whenever it comes up, while Xaihi contributes little in this particular setup. Swap freely based on what you own, because the plan is agnostic to the exact damage dealers as long as they hit hard enough to beat the timer. If you want to understand which inflictions and reactions your dealers are leaning on, the reaction teams writeup breaks the pairings down in detail.
Amber Pure Physical Strategy (Risk 44)
For anyone pushing past the standard ceiling, there is a Total Test Criteria 44 clear built around a pure physical damage party led by Amber. Where the Estella plan defuses cryo with talent immunity, this approach sidesteps the elemental test criteria entirely by leaning on raw physical output, so the modifiers that punish specific reactions never get a hold on the team. It is a higher bar than Risk 40 and assumes a fully invested squad, but it shows that the bracket is beatable without a control-heavy comp.
The single-element identity is the whole point. By stacking physical dealers behind Amber instead of mixing infliction types, you keep your damage profile clean and predictable, which makes the burst windows easier to plan and removes the reaction management that slows down most reaction comps. The full Risk 44 run is collected in the video walkthroughs section below, where you can watch the rotation and positioning the player uses to keep the timer in check at 44 points.
In that run, the player sequences the physical dealers to keep pressure on through every wave rather than front-loading a single burst, and nothing here depends on a specific reaction landing. If you want to understand how single-element teams stack up against the reaction-based comps, the reaction teams writeup covers the trade-offs in detail.
Contingency Contract Video Walkthroughs
If you would rather watch a clear play out than read the route, the walkthroughs below run full attempts from the first wave to Operation Success, sorted from the Risk 40 reference clear up to the highest documented Risk 52 run. Seeing the movement, spacing, and skill timing live makes the rhythm far easier to copy than any written description, especially the distance players hold against the boss waves. Pair what you see with the written strategies above.
Risk 30-40 - Endgame
Risk 40-50 - Apex
Estella combustion comp full clear, 06:38 (by Anotatsu)
Risk 50 clear with no 6-star operators
Estella team full clear (by Dokutah Swift)
P0 Mi Fu and Rossi clear, week 2 (by Elizasleyn)
Risk 47 full run, top clear before the Phase 2 update
Electro1: Arclight, Gilberta, Perlica, Zhuang Fangyi (by 叶穗乃花)
PhysicFire1: Rossi, Mi Fu, Wulfgard, Gilberta (by Alice-0304)
Burn1: Ardelia, Wulfgard, Gilberta, Laevatain (by 金乌___)
Burn2: Antal, Laevatain, Wulfgard, Gilberta (by YZ-月咒)
Electro2: Alesh, Zhuang Fangyi, Perlica, Gilberta (by 让你爱上学习)
Burn3 (with Rossi): Rossi, Wulfgard, Ardelia, Gilberta (by KS-ION)
LaevatainCombo1: Ardelia, Tangtang, Wulfgard, Laevatain (by AoYi嫕)
LaevatainCombo2: Laevatain, Tangtang, Wulfgard, Gilberta (by 潮涌攻略组)
Ice1: Ardelia, Gilberta, Yvonne, Xaihi (by _红鲱鱼_, 06:25 record)
Re-Ignition full run
Second Risk 46 full clear
Combustion team clear
Full run with build and gear breakdown
Re-Ignition full run, second reference clear
Amber pure physical party clear
No Dodge? No Problem for Snowshine! feat. Arclight DPS
All 4-star team clear, Z7 action combo, official PV team comp
Risk 50-60 - Ceiling
Highest documented clear, Zhuang Fangyi electric comp: Zhuang Fangyi, Arclight, Perlica, Gilberta (by Crow)
Zhuang Fangyi 52-constraint Re-Ignition run (by 엔맨)
Combustion team Risk 52 clear (by HaengJa)
Risk 52 full run (by Kyara)
Risk 52 clear (by oilyam)
Low Potential clear, Re-Ignition (by Jyura)
If you are still building toward a high-risk roster, the endgame prep guide covers the leveling and gear priorities that make any of these clears possible, and the reaction teams writeup breaks down how single-element and reaction comps compare at the ceiling.
Best Contingency Contract Team Comps (Day 1 Meta)
Contingency Contract Re-Ignition Experimental Operation is the first run of the mode in Endfield, and unlike the original game this is a third-person action mode rather than tower defense, so almost everything you knew about stacking risks needs relearning from scratch. This section collects the teams carrying clears in the first 24 hours, plus the build and risk knowledge that makes them work. There are no tier rankings here, just comps that work and how to play them. If you want a full first-session walkthrough, the launch-day strategy covers the Sanctuary Rating and reward order.
| Operator | Damage type | Role | Best risk node |
|---|---|---|---|
| Estella | Cryo | Survivability crutch, controlled operator | Cryo-on-skill criteria (immune via talent) |
| Wulfgard | Heat (Combustion) | Breakout carry | Reaction / Arts damage buff |
| Rossi | Physical / Heat | Nuke / boss deleter | Arts amp; avoid timer cuts |
| Ardelia | Nature | Solo carry | Avoid -basic and attribute cuts |
| Fangyi | Electric | Ranged powerhouse | Combo cooldown reduction |
| Mi Fu | Physical (Crush) | Crush engine | -60% battle skill / -60% combo cd |
| Perlica | Electric | Reaction enabler | -60% combo cooldown |
| Tangtang | Cryo | Reaction enabler / Final-Strike ult battery | -60% combo cooldown |
| Chen Qianyu | Physical (Crush) | Utility core | Crush-focused nodes |
| Amber | Physical | Pure physical carry (Risk 44) | Sidesteps elemental criteria |
Is Risk 20 the Reward Cap?
Yes. Read this part even if you skip everything else. You only need to reach Risk 20 to earn every reward in the shop. You do not need to push to 30, 40, or anywhere near the ceiling to fully clear the mode. Everything above Risk 20 is purely for bragging rights, your max risk gets displayed next to your username, and that is the real prize at the top end. There is no pull currency gated behind hardcore clears.
The practical reward plan is short. Hit Risk 20 once with whatever combination of risks your team can handle to grab the first-clear rewards. Clear each tag once for its individual first-clear coin bonus, since every uncleared tag shows a small gift icon on the selection screen. Then check Cycle Missions (the button above the shop on the event overview) for extra coins, because new ones are added every few days. If you are after the cosmetic rewards (the profile picture and profile decoration), note they sit behind a large Vitrified Coin total, around 8,500, that you cannot buy out from a single clear. You top it up by clearing each uncleared tag once for its first-clear coins and by the one Cycle Mission that keeps refreshing for 500 coins every couple of days, so the cosmetics are a slow grind across the event window rather than a one-session purchase. One detail saves a ton of grinding: higher-level criteria automatically clear the lower tiers of the same risk, so clearing the 40% stat-cut version also counts the 10% and 20% versions as done. You will vary your criteria across runs to unlock everything, but you never have to go above Risk 20 to do it.
One accessibility note if you are not confident dodging: bring a dedicated sustain unit and play the long game. Ember is the standout and makes a Risk 20 clear comfortable on her own, with Snowshine a strong 5-star alternative. At Risk 20 the timer is forgiving as long as you avoid the enemy-HP and damage-reduction nodes, so a sustain unit quietly covers a lot of mistakes.
How Do You Read Risks and Test Criteria?
The single most useful mental model is that gimmick risks are almost always easier than raw stat risks. Modifiers that change how the fight works are far more manageable than ones that just crank enemy numbers or shred your own. The table below sorts the common nodes by how punishing they are.
Every Test Criterion falls into one of three categories, which is a quick way to gauge what a node will do before you read the fine print:
| Category | What it changes | Example |
|---|---|---|
| Team | Weakens your operators | Operator attributes -40%; Ultimate DMG -100% after the first cast |
| Edit | Strengthens the enemies | Enemy HP +200%; enemy movement speed +100% |
| Ambient | Changes the environment or core rules | Timer reductions; can't dodge; can't switch operators |
For the full list of all Test Criteria with exact risk values and effects grouped by category, see the Test Criteria list in the Modifier Dashboard. The difficulty table below instead sorts the common nodes by how punishing they are in practice.
| Risk type | Difficulty | What to do |
|---|---|---|
| Gimmick risks (can't switch operators, no heals between waves) | Low / cheap | Take these first for the minimum risk points |
| +100% damage, not basic/skill/combo/ult | Free if reaction-based | Buffs Arts Reactions and Bursts, not raw skill output |
| Enemy +HP | High | Deprioritize, it inflates fight length into the timer |
| Attack reduction stacked with +HP | Highest | Avoid unless pushing the ceiling |
| Damage cap (max ~25% HP lost per split second) | Build-dependent | Guts one-shot Crush and burst teams; near-free for sustained DPS |
| Regeneration (crowd control / your heals also heal enemies) | Build-dependent | Shelve CC ults and team-heal combos while it is active |
| Timer reduction (with No Dodge) | Final gate | Drop first if not going for absolute max risk |
When you open the mode you are hit with a wall of around 46 selectable options. "Can't switch operators" is about the freest risk available if you only need the minimum, and "no heals between waves" is similarly cheap if you are not relying on between-wave topping up. On the punishing end, the risks that increase enemy HP are some of the worst, especially stacked with attack-reduction risks, because they massively inflate how long each fight takes and run you into the timer. Deprioritize the enemy +HP node when you are choosing what to take.
The "+100% damage but NOT basic, skill, combo, or ult" criterion confuses everybody. It reads like it excludes every damage source in the game, but what it actually buffs are Arts Reactions (Combustion, Shatter, Crush) and Arts Bursts (stacking the same element). The wording lists the exclusions because it is shorter than listing every reaction it boosts. So if your team's damage comes from reactions, this is close to a free 100% damage node. If your damage is mostly raw skill output, it does nothing for you.
That node is the headline example of a broader pattern: the yellow stat-buff/self-nerf criteria that unlock the additional sets are often a blessing in disguise for the right team, because they heavily buff one aspect of your operators in exchange for nerfing one you may not even use. The criterion that doubles all non-skill damage (Crush, Arts Reactions, and so on) in exchange for greatly reduced Battle Skill damage is a huge net gain for a crush or reaction team that does little battle-skill damage to begin with, and a real Risk 39 physical clear was built on exactly that trade. Enemy-attack and damage-taken buffs are similar: if you know the enemy patterns and can dodge most of what they throw, those tags are close to free risk points. The default rule when a stat tag does not obviously help your team is still to skip it and just kill faster, but scan for the ones your comp barely feels before you write them all off.
Two stat traps deserve their own callout because they invalidate whole strategies rather than just shifting numbers. The first caps how much health an enemy can lose in a split second (no more than roughly a quarter of its HP), which neuters one-shot burst entirely. Crush teams that delete small mobs with a single Mi Fu MOVE3, or chunk bosses with a stacked ultimate, lose most of their identity under it, so burst comps should leave it unchecked while sustained-DPS teams can take it close to free. The second is the regeneration criterion, where crowd control (and in some setups your own healing) tops the enemy back up. It already shows up for lift teams, but the lesson generalizes: with it active, stop pressing crowd-control ultimates like Tangtang's, since freezing or staggering a full-health enemy just heals it, and remember that Ember's combo heal also reaches mobs and bosses, not only your squad. One player shaved a full minute off a clear simply by never using Tangtang's ult once this tag was up.
These two traps compound badly when stacked together. The "heal under CC" risk and the "damage reduction after infliction" risk both inflate fight length, and taking them at the same time pushes you into the timer much faster than either one alone. Avoid pairing them unless you are pushing the absolute ceiling with a fully invested squad. One community player clearing Risk 35 called this out explicitly: they had to dodge both of those risks and focus on gimmick risks (like "can't switch operators" or "no heals between waves") that are far cheaper for the same risk points.
Two more traps worth knowing. One risk extends Solidification to 15 seconds: do not let your main carry's skill be the one that triggers it (or the skill immediately after), and manipulate your combo stacks by firing combos together or delaying them to bank stacks. You can also turn that timer against itself. If you take the cryo-on-skill tags that inflict Solidification when you cast, pair them with the criterion that extends Solidification but instantly ends it when you use a skill of a matching element: an Electric team takes the "Solidification ends after an Electric skill" version, so every skill you cast both inflicts and immediately clears the freeze. Whatever you run, keep at least 1 SP banked at all times so you can dispel Solidification on demand if the timing slips. There is also a forced-control ult trap: with "can't switch operators" active, a unit whose ult takes camera control can have its AI flop if you are not the one in control. The workaround is to switch to the character you want before you activate the enemies, since the forced-control swap does not trigger if you handle switching during prep.
The Phase 2 Update: 5 New Test Criteria
A mid-event update added five new Test Criteria, bumping the selectable pool from 41 to 46 and the risk ceiling along with it. Together they are worth up to +11 risk, though Re-Construct I and II share a group (the higher tier auto-clears the lower), so the most you can stack at once is +9. The cheap trio of Re-Construct II (+3), Flash Freeze (+2), and Encumbered (+1) adds a clean +6, which is exactly what lets an existing Risk 44 comp clear Risk 50 without changing the team. Browse them with full numbers in the Modifier Dashboard.
| Criterion | Category | Risk | Effect |
|---|---|---|---|
| Time Limit III | Ambient | +3 | Cuts the timer by another 300 seconds, on top of Time Limit I and II. The harshest of the new tags and usually the last one you add. |
| Flash Freeze | Edit | +2 | Cryo Infliction enemies apply to your controlled operator converts straight to Solidification (freeze) instead of stacking the meter. |
| Re-Construct I | Ambient | +2 | Final-wave Heavy Ram and Heavy Sting enemies are swapped for tougher Heavy Ram and Heavy Sting alpha variants. |
| Re-Construct II | Ambient | +3 | Waves 3 and 4 Heavy Ram and Heavy Sting enemies become alpha variants. Auto-clears Re-Construct I, so you only pick one. |
| Encumbered | Team | +1 | Natural SP recovery pauses whenever your controlled operator has not landed a Final Strike in the last 12 seconds. |
Two of these specifically punish the popular Estella kite-and-cryo-immunity crutch. Encumbered starves your SP if you only run in circles, since the timer resets every time the controlled operator lands a Final Strike, so you have to weave basic attacks into the kiting loop rather than purely dodging. Flash Freeze is the harsher counter: Estella's talent ignores cryo infliction, but Flash Freeze converts that incoming cryo straight into Solidification, which is a freeze her talent does not stop, so banking 1 SP to dispel on demand matters again. Re-Construct I and II just make the late-wave Heavy Ram and Heavy Sting enemies hit harder, which is mostly a damage and survival check, while Time Limit III is the same timer gate as before, only steeper. For how these combine into a Risk 50 clear, see the Estella Combustion Strategy above.
Estella, the Easy-Mode Pick
Estella is the standout for low-effort clears and reigns over a lot of the higher boards too. Her talent is doing absurd work here, several of the criteria simply do not affect her, and she is extremely comfortable to play. If you just want your Risk 20 reward clear with minimal stress, build Estella, run around staying alive, and let the rest of your team mop up. Near max risk she may have to be dropped for a real damage teammate and you will have to sweat the dispel timings, but for the reward cap and even fairly high pushes she is a god-tier crutch. The popular Estella plus Wulfgard cheese is doing a lot of the heavy lifting on the leaderboards.
Estella also pairs naturally with Mi Fu. Because Estella's second talent ignores cryo infliction, Mi Fu can spam her 3rd skill, the Crush nuke that deletes entire chunks of the HP bar, without worrying about freeze accumulation. Community players report that adding Ardelia as a third slot covers between-wave healing for any mistakes that stack up, which matters more than it sounds at higher risk where chip damage adds up fast.
Wulfgard, the Breakout Carry
Wulfgard is stupidly strong this CC. Multiple players report he trivializes clears that took hours with other teams, with one getting Risk 40 in a single attempt after spending two hours on the same risk with a different comp. His combustion damage is the engine, so gear him for Arts intensity. If you have him even slightly built, this is your fast track.
His standout cheese pairs him with Gilberta and Estella: build stacks on Gilberta, then detonate a single huge Wulfgard combustion nuke, while Estella sits in the controlled slot and shrugs off the cryo the high-risk debuffs pile on. It is one of the cleanest ways to skip the boss damage races entirely.
Combustion Payouts: Wulfgard, Akekuri, and Camille
Wulfgard is not the only operator who can be the Combustion trigger, and understanding how the payout works opens up off-meta teams. One player ran Akekuri as the Combustion detonator and cleared with it, calling it a proof of concept they stumbled onto while testing wildly different ideas in the Trial of Swordmancy. The lesson that came out of it: Wulfgard actually has the stronger Combustion gear of the two even without White Night Nova, so if you own him, he is the better home for the same strategy. That said, White Night Nova essence is absurdly good on Akekuri specifically, and the arts infliction cooldown risk forces a calmer pace that suits his detonation timing.
The execution detail that trips people up is which skill pulls the trigger. Wulfgard's Combustion fires off his combo skill, so be a little patient and let the reaction set up before you detonate. Do not use his battle skill in the middle of the burn: it consumes the reaction and stops the damage-over-time outright, which throws away most of your damage. The only time to weave the battle skill in is on the last couple of damage ticks, when there is little DoT left to lose. Looking ahead, Camille (no page on the site yet) looks like the finished version of this idea: he runs on Agility instead of Arts intensity, and his skill spreads the Combustion to nearby enemies after a target dies, which is exactly the chain-reaction behavior a Combustion payout wants.
Rossi Burst Team
A heavily invested Rossi turns Contingency Contract into a boss-deletion exercise. The community comp is Rossi, Endmin, Gilberta, and Ember, and the trick is that Gilberta and Rossi ults stacked together one-shot the stage bosses, so you skip most of the boss mechanics outright. One player cleared Risk 25 first try with it. It leans hard on a near-maxed Rossi, so treat it as a payoff for investment rather than a budget option, and stack Arts amplification rather than chasing the timer-reduction node.
Ardelia and Catcher, Solo Carries
Ardelia can solo high risk on her own. Lean into her doing damage through her basic and skills, avoid any modifier that weakens that (specifically the -70% basic and the attribute-reduction risks), and use her Talent 2 plus her ult to spawn sheep for sustain. It is a lot of sheep spam and self-healing, but it works and it is resilient because you are not fighting damage-reduction risks. Catcher can also go solo and benefits from new buffs that act as basically free risk points, making her a strong off-meta option for racking up risk cheaply. She doubles as a defensive anchor when she is your controlled operator: her battle skill blocks and counters the big enemies, and her combo skill is excellent at interrupting them, which the -60% combo cooldown node turns into near-permanent crowd control. Built defensively she can outlast a whole run on her own bulk, which quietly defuses the "no heals between waves" tag, and players report cleaner records once they stop over-stacking the enemy-HP nodes that drag her fights into the timer.
Fangyi Ranged Powerhouse
Ranged teams are having an easier time than melee overall, and Fangyi squads are putting up strong numbers. A common comp is Fangyi, Perlica, Arclight, and Gilberta. The big caveat for Fangyi mains: both of the locked conditional criteria reduce skill damage by 60%, which effectively locks her out of those criteria since her damage craters without skill output. You will work around those nodes rather than through them.
Community-reported rotation notes for the Fangyi, Perlica, Arclight, Gilberta build: do not use Gilberta's combo unless the enemy is a Tidewalker, effigy, or the final boss, since un-liftable enemies cannot be lifted and so cannot heal off the "enemy heals on stun" tag (you will occasionally sacrifice an Arclight combo skill for this). If you took the "combo skill applies self cryo infliction" criterion, do a normal Fangyi combo when below 3 stacks of cryo infliction (Perlica BS, FS, Fangyi CS plus Perlica CS, Fangyi BS), and at 3 stacks run FS, Perlica CS, Perlica BS, FS, Fangyi CS, Fangyi BS. Use Arclight's ult as a free Perlica BS, and minimize dodge-cancelling so your stamina goes to kiting.
Those rotations are player-tested, not from official notes, so treat them as a strong starting point rather than gospel and adjust to your own gear levels.
If you have invested heavily, there is a higher-ceiling six-sword rotation for the Fangyi, Perlica, Arclight setup. With both Fangyi's and Perlica's combo skills at M3 (and Perlica on the Qingbo set) the combo cooldown drops to about 17 seconds, which sustains: Perlica battle skill, basic-attack finisher, Perlica combo, Fangyi combo, Arclight combo, wait about 3 seconds, Fangyi battle skill, Arclight combo. The load-bearing detail is order. Fangyi's combo only fires when the target already has electric infliction stacks, so Perlica's combo has to land before Fangyi's, otherwise you overwrite to level 1 electrification instead of level 2. The short pause lets Arclight's combo come back up twice for extra SP. Track each combo cooldown on the operator portraits, the gray bar near the HP (bottom-left on PC, top-right on mobile).
Mi Fu, Crush Damage Engine
Mi Fu shines because her BS3 deals Crush damage rather than battle-skill damage, which means the "-60% combo cooldown / -60% battle skill damage" node is insanely good for her: you eat the battle skill penalty for nearly nothing while gaining the cooldown reduction. Line enemies up for that BS3 and you can clear Risk 20 comfortably. Her 3rd skill in particular is what players describe as "deleting entire chunks of the HP bar," especially on bosses where the Crush damage lands in a single massive hit. Common partners are Pog, Chen, Ember, and Li Feng.
The full Crush rotation chains her three battle skill moves. MOVE1 grapples smaller enemies and pulls them together briefly, which lets you stack Vulnerability across several of them at once. MOVE2 (Crush) then consumes those stacks, and once you have fed enough in, MOVE3 hits everything in a straight line and frequently one-shots, which speeds the fight up and clears threats before they group up on you. Pair her with Chen and the reduced combo cooldowns become a Solidification escape hatch: with both combo skills coming back fast you can time an attack to break out of Solidification on demand, as long as Mi Fu is the last operator in your combo-skill rotation. That ordering is the reason to keep her in the fourth slot as your controlled operator rather than earlier in the rotation.
The Electric / Perlica Comp
An electric team of Perlica, Avywenna, Zhuang, and Arclight looks genuinely insane this CC, mostly thanks to the -60% combo cooldown node. With combos coming back that fast, Perlica applies Electrification constantly, Avywenna places nearly double her usual spears, Zhuang triggers Electrification a ton, and Arclight basically always has combo skill up off all the electrification and consumption. It is a comp where one risk node lifts the entire team at once.
Tangtang Reaction Team
A reaction-focused comp of Tangtang, Perlica, Endmin, and Gilberta packs as many element reactions as possible into one team and makes for one of the lowest-stress guaranteed Risk 20 clears. Tangtang's high attack speed means she lands a lot of Final Strikes, which also charges ultimates faster, and the -60% combo cooldown node lets Perlica keep Electrification up almost constantly. Endmin supplies Shatter and a chunk of burst damage, while Gilberta handles lifting and damage amplification. With everything reacting off everything else, this team tends to produce quick, clean runs rather than grindy ones.
If you want more Risk 20 reaction options to experiment with, a Laevatain combo-spam team and a Last Rite cryo-stack team both clear the reward cap as well, leaning on the same combo-cooldown reduction to keep their skills flowing.
Chen and the Crush Core
Chen is a fantastic utility and lift unit, lifting small mobs and finishing off leftover HP while your crush source (Mi Fu, or an Endmin plus Chen pairing) does the heavy work. The Endmin, Chen, Pog, Li Feng core with Crush focus is a reliable Risk 20 setup.
A Catcher variant of that crush core also clears Risk 20: Chen, Endmin, Catcher, and Pog. Catcher's ult counts as AoE, which helps start Vulnerability stacks for your crush source and feed Pog, and you want to play as Chen so you control the stagger.
A quick word on Tangtang: her ult heals enemies, so it is not spammable, but it is still useful on full-health enemies. Pre-cast it before they appear, then plunge-attack to apply Cryo, which saves an SP bar versus casting her battle skill every time.
Gear and Build Tips That Move the Needle
This CC rewards crafting and artificing gear to solve for specific risks rather than slapping on your generic best-in-slot. A few proven setups from early clears: Arts intensity gear on Wulfgard to push his combustion damage, combo skill damage gear on Tangtang since her ult is not spammable, two Redeemer Tags on Estella that stack to around 39% damage reduction together (a player-reported figure, but the principle is solid even if your exact number varies with investment), and Fortmaker on Pog if you have it. Be prepared to burn catalysts experimenting, since the only real cost of theory-crafting is your gear-crafting materials.
To gear the carries in these comps, start from our best gear sets by operator guide, which lists the optimal set (and mixed builds) for every operator, then plan the exact pieces and substats with the artificing planner. That pairing lets you build a full Contingency Contract team around the risks you plan to take rather than a generic loadout.
Two weapon notes from the early clears. On Wulfgard, his signature Clannibal is not always the pick. In Laevatain teams and the Gilberta cheese nuke he never gets to fire his battle skill into an already-combusting enemy without sacrificing the Heat Infliction his carry wants, so Clannibal's Arts-damage-taken passive sits dead and a 5-star like Rationale Farewell (around 44% flat ATK) out-damages it. Run the signature only when Wulfgard is the one consuming Combustion himself. More broadly, crit is not worth chasing in Endfield unless an operator's kit is built around it, so favor ATK and Arts intensity over crit substats.
Boss and Mechanic Notes
One mechanic catches people off guard: the first blue Agloi boss will not take damage while there is a small add channeling into it. If your hits are bouncing off and you have no idea why, look for the little thing feeding it and kill that first. At higher risk you also cannot just camp with a survivability unit and wait for your team's AI to kill everything, or you will lose to the timer. You have to actively weave basic combos in to build stagger and recover SP, because the fights get long and the clock is real.
One element note that shapes team building: the final boss is weak to Heat. That is a big part of why the Estella plus Wulfgard pairing and the Combustion payouts above feel made for this season's first set of tags, since they ignore the cryo stacks the early waves pile on and then hit the last fight where it is softest. If your roster has a Heat or Combustion option, save its biggest burst for the final wave.
Advanced Tech and Movement Tricks
Beyond team building, a stack of movement and timing tricks the community has compiled quietly raises your effective risk ceiling. The biggest one: every attack in the current Contingency Contract can be avoided by running or jumping, including the hits that look undodgeable like the effigy slam and the Tidalkast swipe. That matters most under the No Dodge nodes, where sprinting to reposition and jumping over sweeps replaces the roll outright. You can also jump straight out of an attack animation the same way a dash cancels it, which is the cleanest way to reposition mid-combo without eating the recovery frames.
Two invulnerability windows are worth banking. Ultimates grant iframes right after the cast animation, and finishers stay invulnerable for their entire attack animation, so you can deliberately time either one to eat a telegraphed hit instead of dodging it. On the survival side, the first effigy's grab attack looks lethal but cannot actually kill you: it leaves you sitting at 1 HP, so do not panic-burn a heal or revive when the grab connects.
For crowd control without spending skills, basic attacks shove enemies together so a small-radius skill catches the whole pack, and standing in a corner of the arena pulls your AI teammates to you, which forces the enemies to path into a single lane. Doing that just before a wave spawns (the start of wave 2 especially) groups everything up for an opening burst.
A few infliction quirks change which risks actually hurt. The cryo-stacking criteria run on a 3 second cooldown, so firing two combo skills back to back only adds one cryo stack rather than two, which lets you bank casts inside that window without freezing yourself. The cryo infliction meter on your own operator (the count toward 4, not the frozen state itself) also decays on its own over time, unlike Combustion or Electrification, so if you are parked at 3 stacks and low on SP you can simply wait for it to tick back down. And the often-skipped Bent Edges criterion only cuts the damage of the ultimate itself: empowered follow-up hits (Laevatain's and Zhuang Fangyi's enhanced attacks) and added hits (Tangtang's waterspouts, Yvonne's extra attacks) still land at full damage, so reaction and empowered-attack carries barely feel it.
Two acid-puddle tricks round it out. During a rest phase you can step on an acid puddle to chip your own HP and proc your operators' on-damage healing passives without triggering the Synced Growth penalty, which is especially handy on Snowshine. And Mi Fu's first battle skill move can pull enemies out of acid puddles when they try to camp in them. Finally, a team-order habit that saves high-risk runs: slot your two main damage dealers in positions 2 and 3 so losing an operator or two still leaves a carry alive, and remember that time spent running or holding skills is not wasted as long as your SP is recharging.
Movement and infliction tech compiled from an Arknights: Endfield community discussion (credit: compoundcomplex and commenters on the Endfield subreddit).
Beating the No Dodge Nodes
Two separate criteria attack your dodge. The milder one removes your perfect-dodge iframes; the harsher one removes dodging entirely, both the iframes and the dodge movement. Neither makes a run impossible, it just changes how you avoid damage. Sprint to reposition instead of rolling, and use jump attacks to gain height over ground sweeps: the Stage 2 boss double tentacle swipe tracks hard and looks undodgeable, but a jump attack lifts you clean over it. The other escape valve is to kill the threat before it acts, which is where Tangtang's ult shines, freeze the boss and burst it down so there is nothing to dodge. Thanks to the jump tech the No Dodge node is far less of a wall than it first looks, though it still pairs brutally with the timer reduction.
Pushing for High Risk
If you are chasing a fat number, Risk 40 is achievable on day one with a properly built team, whether that is Wulfgard, a Fangyi comp, or a crush team. The timer risk is the final gate to max risk, and combined with No Dodge it turns a hard run into a luck-and-execution check even with maxed potentials, so drop the timer reduction first if you are not going for the absolute ceiling. There are two timer-reduction tags, and leaving the second one off buys back enough time to fight the final enemy patiently: instead of racing its HP, you can wait for interrupt openings to wear down its toughness bar and only go all out once it is staggered. Melee is harder than ranged, and the very top (Risk 45+) is brutal and demands a very specific comp. The general philosophy that keeps working is to minimize the enemy-HP and your-damage-reduction risks and lean into the risks you can play around. For a strategy that takes this all the way, see the How to Clear Risk 40 section above.
If You Are Undergeared or New
Plenty of players are still leveling and cannot access the Risk 10+ tier of modifiers yet, and that is fine. Unlock the upper row of modifiers (the ones requiring a 10+ run) before trying to push 20, because going for 20 without them is pure suffering. If you are hard level-capped, something like Risk 8 may be your feasible ceiling for now, which is a great reason to finally level your operators. Remember that Risk 20 gets you everything, and you have the whole event window to get there. For the leveling and gear priorities behind any of these comps, the endgame prep guide walks through the roadmap.
Two encouraging data points for thin rosters. One player cleared Risk 20 with Elite 1 operators at Skill Level 1 and no Trust bonuses, so the reward cap does not demand a maxed account. And a popular budget setup leans entirely on the -60% combo cooldown node with Estella, Ardelia, Akekuri, and Endmin, where missing weapon potentials are covered by levels, etching, and artificing rather than dupes. That combo-cooldown reduction gives near-constant single-target crowd control through the Ardelia and Endmin combos, which is exactly what tames the two advanced Agloi that open waves 3 and 4, though that lock only holds while the target is clean of Vulnerability and Infliction stacks.