Skip to content
Database Reference

Best Gear Sets by Operator

The optimal gear set for every Arknights: Endfield operator. Each gear set gives one flat Bonus Stat plus a conditional Set Effect at 3 pieces, but you do not always run a full set. Many carries mix pieces from two sets to stack two strong bonus stats instead. Below, every set lists the operators it fits best, followed by a per-operator view of the exact loadout to build.

Gear stats and icons come from the artificing planner; for the full sortable table of every piece and its source, see the gear database. For upgrade priority see the gearing priority guide, and for weapon plus gear builds per operator see operator builds. Building an endgame squad? Use these sets to gear your carries for Contingency Contract.

23
Gear Sets
29
Operators Mapped
26
Mixed Builds
3
Pieces Per Set

How Gear Sets Work in Arknights: Endfield

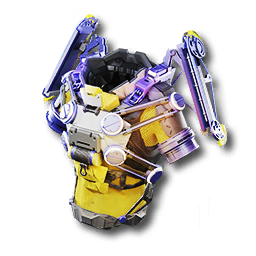
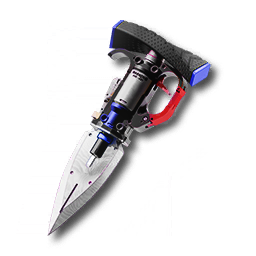
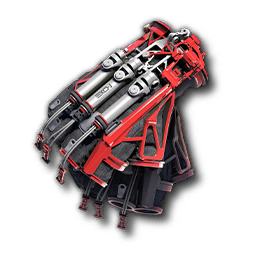
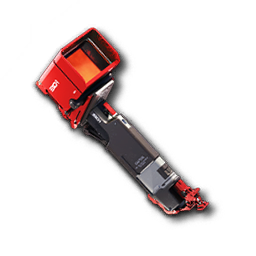
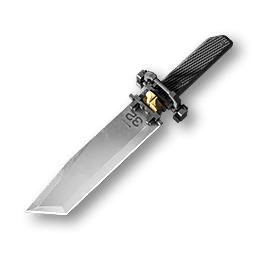
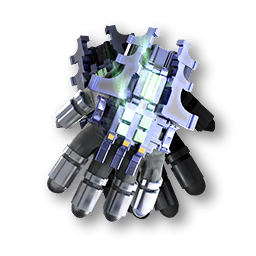
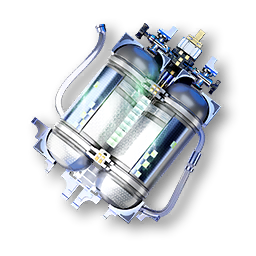
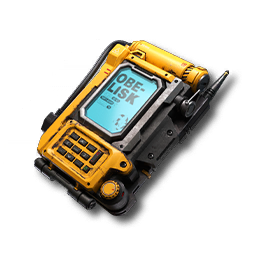
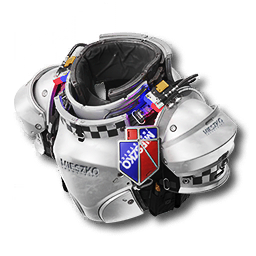
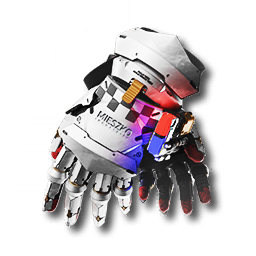
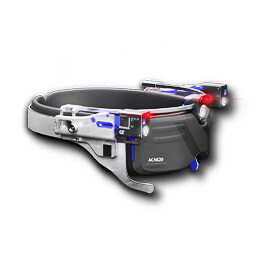
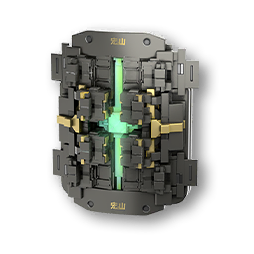
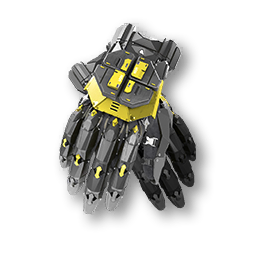
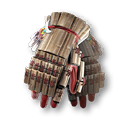
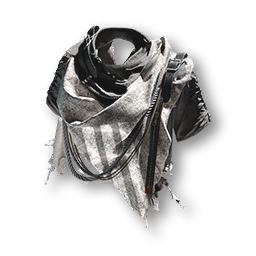
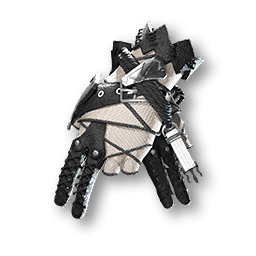
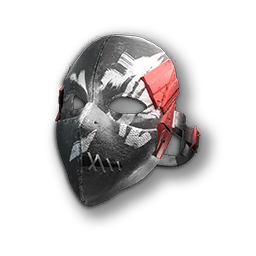
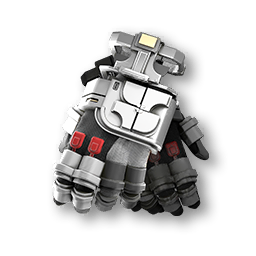
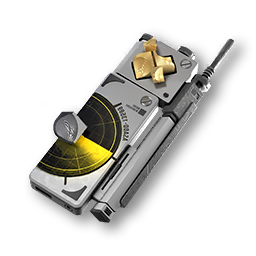
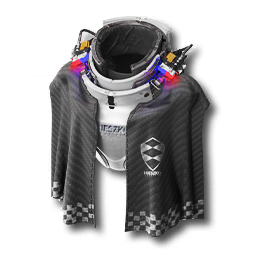
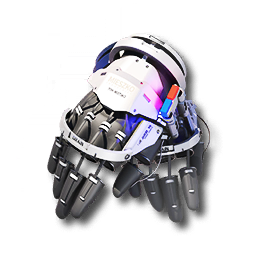
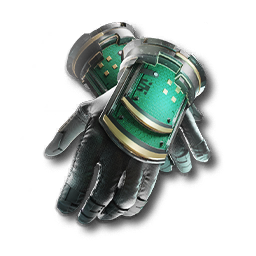
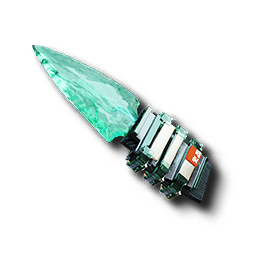
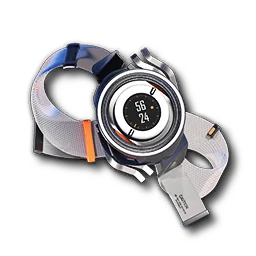
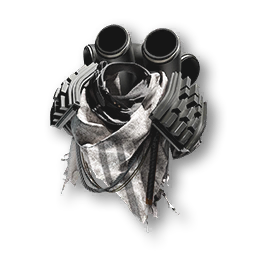
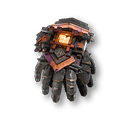
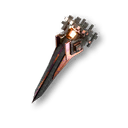
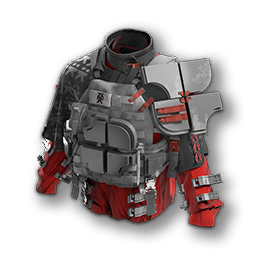
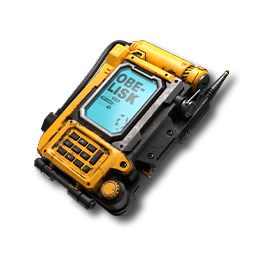
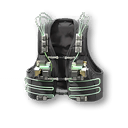
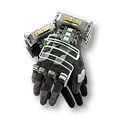
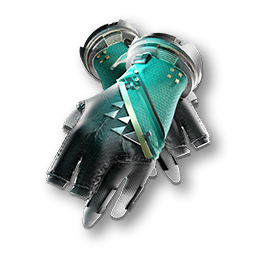
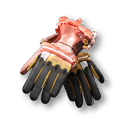
Every operator equips four gear pieces: one Body piece, one pair of Gloves, and two Kits. Any piece can come from any set, so your four slots do not have to belong to a single set.

Each T4 gear set gives two things. A Bonus Stat sits on every piece and is always active (for example Bonekrusha grants ATK +15%). A conditional Set Effect only switches on once you equip three pieces of that set. There is a single 3-piece tier, not the 2-piece and 4-piece tiers some other games use.

Because you hold four slots, the standard optimal shape is a 3+1 split: three pieces of your main set to switch on its Set Effect, plus one off-piece from a second set for its Bonus Stat. A full four-piece set only adds a fourth Bonus Stat, never a second Set Effect, so 3+1 usually wins unless that fourth piece happens to carry the exact stat the operator scales on. A few kits deliberately run 2+2 or four single-set pieces when two Bonus Stats matter more than any Set Effect.

Once the pieces are chosen, their substats are pushed further through artificing, using the Good Match rule to raise enhancement success rates. See the gearing priority guide for the order to invest in weapons, gear, and essences.

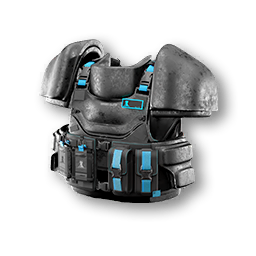
Gear Sets and Who Runs Them

Every named gear set with its Bonus Stat, Set Effect, and the operators whose kit it fits best. A 3-pc tag means the operator runs the full set; a mix tag means they only use some pieces alongside another set.

Eternal Xiranite

Bonus Stat · always active
Wearer's HP +1000
Set Effect · needs 3 pieces

After the wearer applies Amp, Protected, Susceptibility, or Weakened, other teammates also gain DMG Dealt +16% for 15s. This effect cannot stack.

Best on 15 operators
  • Gilberta
    Gilberta3-pc6★ Support · Nature
  • Ardelia
    Ardelia3-pc6★ Support · Nature
  • Camille
    Camille3-pc6★ Support · Heat
  • Xaihi
    Xaihi3-pc5★ Support · Cryo
  • Antal
    Antal3-pc4★ Support · Electric

  • Lifeng
    Lifeng3-pc6★ Sub-DPS · Physical
  • Estella
    Estella3-pc4★ Sub-DPS · Cryo
  • Perlica
    Perlica1-pc mix5★ Support · Electric

  • Arclight
    Arclight1-pc mix5★ Support · Electric
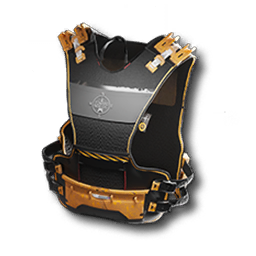
  • Ember
    Ember1-pc mix6★ Tank · Heat
  • Wulfgard
    Wulfgard1-pc mix5★ Support · Heat
  • Akekuri
    Akekuri1-pc mix4★ Support · Heat
  • Alesh
    Alesh1-pc mix5★ Support · Cryo
  • Catcher
    Catcher1-pc mix4★ Tank · Physical
  • Fluorite
    Fluorite1-pc mix4★ Support · Nature
Also fits by kit (by playstyle)
  • Avywenna
    Avywenna 5★ DPS · Electric
    Avywenna self-applies Arts Susceptibility, so Eternal Xiranite is a niche option that hands the whole team, the wearer included, +16% DMG while HP +1000 pads survivability.

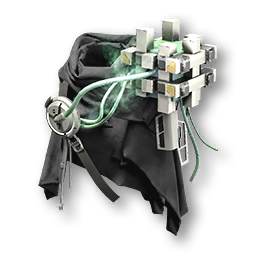
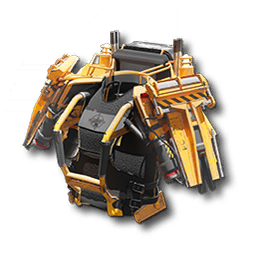
Bonekrusha

Bonus Stat · always active
Wearer's ATK +15%
Set Effect · needs 3 pieces

When the wearer casts a combo skill, gain 1 stack of Bonekrushing Smash that grants the wearer's next battle skill DMG +30%. Bonekrushing Smash can stack 2 time(s).

Best on 7 operators
  • Tangtang
    Tangtang3-pc6★ DPS · Cryo
  • Avywenna
    Avywenna3-pc5★ DPS · Electric
  • Endministrator
    Endministrator3-pc6★ DPS · Physical
  • Ardelia
    Ardelia1-pc mix6★ Support · Nature
  • Pogranichnik
    Pogranichnik1-pc mix6★ Support · Physical
  • Zhuang Fangyi
    Zhuang Fangyi1-pc mix6★ DPS · Electric
  • Chen Qianyu
    Chen Qianyu1-pc mix5★ Sub-DPS · Physical
Also fits by kit (by playstyle)
  • Mi Fu
    Mi Fu 6★ DPS · Physical
    Mi Fu's Qingbo rotation fires a combo before every finisher, so Bonekrushing Smash turns each combo into a bigger battle-skill hit.
  • Da Pan
    Da Pan 5★ DPS · Physical
    Da Pan's combo-into-Crush pattern converts the stacked battle-skill bonus straight into larger Crush burst.

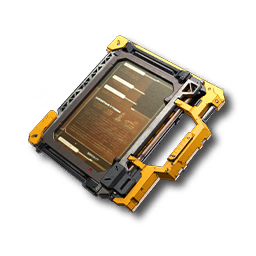
Frontiers

Bonus Stat · always active
Wearer's Combo Skill Cooldown Reduction +15%.
Set Effect · needs 3 pieces

After the wearer recovers SP with a skill, the team gains DMG +16% for 15s. This effect cannot stack.

Best on 7 operators
  • Arclight
    Arclight3-pc5★ Support · Electric

  • Catcher
    Catcher3-pc4★ Tank · Physical
  • Akekuri
    Akekuri2-pc mix4★ Support · Heat
  • Camille
    Camille1-pc mix6★ Support · Heat
  • Xaihi
    Xaihi1-pc mix5★ Support · Cryo
  • Alesh
    Alesh1-pc mix5★ Support · Cryo
  • Fluorite
    Fluorite1-pc mix4★ Support · Nature
Also fits by kit (by playstyle)
  • Pogranichnik
    Pogranichnik 6★ Support · Physical
    A 125 SP-per-cycle economy triggers the team DMG buff constantly, and the combo cooldown reduction speeds the utility.

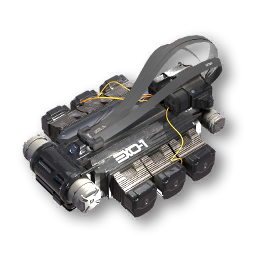
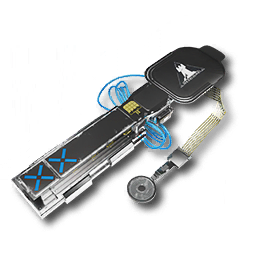
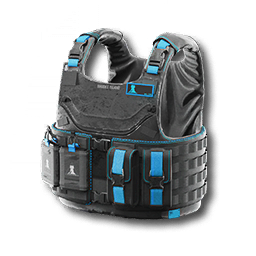
LYNX

Bonus Stat · always active
Wearer's HP Treatment Efficiency +20%
Set Effect · needs 3 pieces

After the wearer gives HP treatment to an allied target, that target also gains 15% DMG Reduction against all types of DMG for 10s. If the said treatment exceeds the target's Max HP, the target gains 30% DMG Reduction against all types of DMG. The aforementioned effects cannot stack.

Best on 6 operators
  • Snowshine
    Snowshine3-pc5★ Tank · Cryo
  • Arcane
    Arcane1-pc mix6★ DPS · Nature
  • Laevatain
    Laevatain1-pc mix6★ DPS · Heat
  • Tangtang
    Tangtang1-pc mix6★ DPS · Cryo
  • Yvonne
    Yvonne1-pc mix6★ DPS · Cryo
  • Wulfgard
    Wulfgard1-pc mix5★ Support · Heat
Also fits by kit (by playstyle)
  • Xaihi
    Xaihi 5★ Support · Cryo
    The mandatory Cryo healer; Treatment Efficiency scales Xaihi's healing and every heal hands the team damage reduction.
  • Ardelia
    Ardelia 6★ Support · Nature
    A universal healer who heals constantly, so the on-heal team DR is up almost permanently.

Swordmancer

Bonus Stat · always active
Wearer's Stagger Efficiency Bonus +20%
Set Effect · needs 3 pieces

After the wearer applies a Physical Status, the wearer also performs 1 hit that deals 250% ATK of Physical DMG and [10 Stagger]. Effect trigger cooldown: 15s.

Best on 6 operators
  • Ember
    Ember3-pc6★ Tank · Heat
  • Chen Qianyu
    Chen Qianyu2-pc mix5★ Sub-DPS · Physical
  • Last Rite
    Last Rite1-pc mix6★ DPS · Cryo
  • Mi Fu
    Mi Fu1-pc mix6★ DPS · Physical
  • Lifeng
    Lifeng1-pc mix6★ Sub-DPS · Physical
  • Da Pan
    Da Pan1-pc mix5★ DPS · Physical
Also fits by kit (by playstyle)
  • Estella
    Estella 4★ Sub-DPS · Cryo
    A lift and Physical Susceptibility setup leans on stagger windows, so faster stagger buildup tightens the loop.
  • Endministrator
    Endministrator 6★ DPS · Physical
    Built-in crowd control and Crush pressure benefit from quicker stagger to lock targets down.

Æthertech

Bonus Stat · always active
Wearer's ATK +8%
Set Effect · needs 3 pieces

After the wearer applies Vulnerability, the wearer gains Physical DMG +8% for 15s. This effect can reach 4 stacks. If the target already has 4 stack(s) of Vulnerability, the wearer gains an additional Physical DMG +16% for 10s. This effect cannot stack.

Best on 5 operators
  • Da Pan
    Da Pan3-pc5★ DPS · Physical
  • Pogranichnik
    Pogranichnik1-pc mix6★ Support · Physical
  • Avywenna
    Avywenna1-pc mix5★ DPS · Electric
  • Endministrator
    Endministrator1-pc mix6★ DPS · Physical
  • Wulfgard
    Wulfgard1-pc mix5★ Support · Heat
Also fits by kit (by playstyle)
  • Lifeng
    Lifeng 6★ Sub-DPS · Physical
    Lifeng generates three Vulnerability stacks on demand, keeping the Physical DMG ramp switched on for the whole team.
  • Mi Fu
    Mi Fu 6★ DPS · Physical
    Stacking Vulnerability is Mi Fu's core loop, holding the Physical DMG bonus near max stacks.

Hot Work

Bonus Stat · always active
Wearer's Arts Intensity +30
Set Effect · needs 3 pieces

After the wearer applies Combustion, Heat DMG +50% for 10s. After the wearer applies Corrosion, Nature DMG +50% for 10s. The aforementioned effects cannot stack.

Best on 3 operators
  • Arcane
    Arcane3-pc6★ DPS · Nature
  • Laevatain
    Laevatain3-pc6★ DPS · Heat
  • Pogranichnik
    Pogranichnik2-pc mix6★ Support · Physical
Also fits by kit (by playstyle)
  • Wulfgard
    Wulfgard 5★ Support · Heat
    Wulfgard solo-stacks Combustion for the Heat team, always applying the Combustion that flips on the Heat DMG bonus.
  • Ardelia
    Ardelia 6★ Support · Nature
    Ardelia's Corrosion application triggers the Nature DMG half of the set while Arts Intensity feeds the hybrid damage.

MI Security

Bonus Stat · always active
Wearer's Critical Rate +5%
Set Effect · needs 3 pieces

After the wearer scores a critical hit, gain ATK +5% for 5s. This effect can reach 5 stacks. At max stacks, grant an additional Critical Rate +5%. This effect cannot stack.

Best on 2 operators
  • Rossi
    Rossi3-pc6★ DPS · Physical
  • Yvonne
    Yvonne3-pc6★ DPS · Cryo
Also fits by kit (by playstyle)
  • Last Rite
    Last Rite 6★ DPS · Cryo
    Last Rite's immense burst multipliers scale hard off crit, so a flat CRIT Rate line lifts the damage ceiling.
  • Endministrator
    Endministrator 6★ DPS · Physical
    The 3000% burst wants every point of crit it can get, making the CRIT Rate bonus close to pure damage.

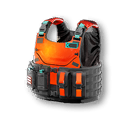
Tide Surge

Bonus Stat · always active
Wearer's Arts Intensity +24
Set Effect · needs 3 pieces

After the wearer applies 2 or more stacks of Arts Infliction on the enemy, the wearer gains Arts DMG Dealt +35% for 15s. This effect cannot stack.

Best on 2 operators
  • Last Rite
    Last Rite3-pc6★ DPS · Cryo
  • Antal
    Antal1-pc mix4★ Support · Electric
Also fits by kit (by playstyle)
  • Tangtang
    Tangtang 6★ DPS · Cryo
    Tangtang blankets enemies in Cryo Infliction, easily clearing the two-stack threshold for the Arts DMG window.
  • Yvonne
    Yvonne 6★ DPS · Cryo
    Yvonne's Cryo Infliction and Solidification loop keeps Arts Inflictions stacked for the damage bonus.

Type 50 Yinglung

Bonus Stat · always active
Wearer's ATK +15%
Set Effect · needs 3 pieces

When any operator in the team casts a battle skill, the wearer gains 1 stack of Yinglung's Edge that gives DMG +20% to the wearer's next combo skill. Yinglung's Edge can stack 3 time(s).

Best on 2 operators
  • Wulfgard
    Wulfgard1-pc mix5★ Support · Heat
  • Estella
    Estella1-pc mix4★ Sub-DPS · Cryo
Also fits by kit (by playstyle)
  • Mi Fu
    Mi Fu 6★ DPS · Physical
    Mi Fu's damage funnels through combo finishers, so the combo DMG payoff after team skills lands squarely on the rotation.
  • Avywenna
    Avywenna 5★ DPS · Electric
    Avywenna's infinite combo chains are the payoff window for the set's combo DMG bonus.

Grizzled Edge

Bonus Stat · always active
Wearer's ATK +8%.
Set Effect · needs 3 pieces

When the wearer applies Crush or Breach, the wearer gains Physical DMG Dealt +[6% × Max number of Vulnerability stacks consumed from one enemy] for 20s. If the target already has Physical Susceptibility, is Staggered, or has attached Originium Crystals, increase the aforementioned buff to 1.5 times. This buff cannot stack.

Best on 1 operator
  • Mi Fu
    Mi Fu3-pc6★ DPS · Physical
Also fits by kit (by playstyle)
  • Chen Qianyu
    Chen Qianyu 5★ Sub-DPS · Physical
    A lift-and-stagger Guard who lives in the physical-status window the set rewards.
  • Endministrator
    Endministrator 6★ DPS · Physical
    Crush and crowd control pile on physical status, feeding the set effect.

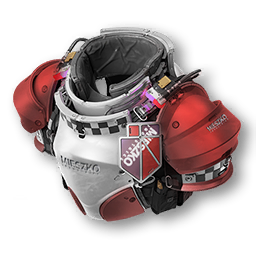
Pulser Labs

Bonus Stat · always active
Wearer's Arts Intensity +30
Set Effect · needs 3 pieces

After the wearer applies Electrification, Electric DMG +50% for 10s. After the wearer applies Solidification, Cryo DMG +50% for 10s. The aforementioned effects cannot stack.

Best on 1 operator
  • Perlica
    Perlica3-pc5★ Support · Electric
Also fits by kit (by playstyle)
  • Avywenna
    Avywenna 5★ DPS · Electric
    An Electric Arts striker whose Electrification reactions are exactly what the set powers, amplified by Arts Intensity.
  • Zhuang Fangyi
    Zhuang Fangyi 6★ DPS · Electric
    Zhuang Fangyi's sustained Electric Thunder Strikes keep Electrification active for the Electric side of the set.

Xiranflow

Set Effect · needs 3 pieces

Bonus Stat: Wearer's ATK +10%. Whenever the wearer consumes Electrification or Corrosion, the wearer gains a number of buff stacks equal to the Status Level of the Arts Reaction consumed, with each buff stack giving Electric DMG Dealt and Nature DMG Dealt +15% for 25s. The number of buff stacks maxes out at 3 stacks. Duration of each stack is counted separately.

Best on 1 operator
  • Zhuang Fangyi
    Zhuang Fangyi3-pc6★ DPS · Electric
Also fits by kit (by playstyle)
  • Avywenna
    Avywenna 5★ DPS · Electric
    An Electric main DPS who takes the Electric DMG half of the set directly.
  • Gilberta
    Gilberta 6★ Support · Nature
    A Nature support and infliction unit for the Nature DMG side, with grouping to spread it.

Aburrey's Legacy

Bonus Stat · always active
Wearer's Skill DMG +24%
Set Effect · needs 3 pieces

When the wearer casts a battle skill, combo skill, or ultimate, gain ATK +5% for 15s. The buff from each of the three skill types is unique and does not stack with itself.

Kit-based fits (by playstyle)
  • Avywenna
    Avywenna 5★ DPS · Electric
    Avywenna cycles battle skills, combo skills, and ultimates in one infinite chain, so all three ATK buffs stay up while Skill DMG +24% amplifies the main carry.
  • Endministrator
    Endministrator 6★ DPS · Physical
    A compact battle-skill, combo, and ultimate rotation keeps every ATK stack refreshed, and the 3000% burst rides the Skill DMG bonus.
  • Estella
    Estella 4★ Sub-DPS · Cryo
    Built to spam skills at high rotation speed with low downtime, Estella holds all three ATK stacks almost permanently.
  • Da Pan
    Da Pan 5★ DPS · Physical
    Da Pan generates and consumes Vulnerability through skills, keeping the on-cast ATK buff live for the Crush windows.

AIC Fieldwork

Set Effect · needs 3 pieces

Set Effect (3 pieces): DMG Dealt +20% for all DMG types, DMG Reduction +10%, and Ultimate Gain Efficiency +10%.

No guide operator currently prioritizes this set, so it stays a situational or defensive option.

AIC Heavy

Bonus Stat · always active
Wearer's HP +500
Set Effect · needs 3 pieces

When the wearer defeats an enemy, restore 100 HP. Effect trigger cooldown: 5s.

Kit-based fits (by playstyle)
  • Ember
    Ember 6★ Tank · Heat
    A sustain defender clearing adds up front, so heal-on-kill refills between shield windows.
  • Catcher
    Catcher 4★ Tank · Physical
    A reliable shield tank who secures kills in hard content; the flat HP and heal add self-sustain the budget kit lacks.
  • Endministrator
    Endministrator 6★ DPS · Physical
    An F2P frontliner with built-in CC clearing packs, so the on-kill healing offsets running without a dedicated healer.

AIC Light

Bonus Stat · always active
Wearer's HP +500
Set Effect · needs 3 pieces

When the wearer defeats an enemy, ATK +20 for 5s.

Kit-based fits (by playstyle)
  • Rossi
    Rossi 6★ DPS · Physical
    Rossi's AoE damage chains kills across a pack, snowballing the on-kill ATK while the HP cushion keeps the frontline safe.
  • Laevatain
    Laevatain 6★ DPS · Heat
    The best mob-clearer in the game keeps kills flowing wave to wave, so the ATK buff never drops during the AoE.
  • Tangtang
    Tangtang 6★ DPS · Cryo
    Tangtang's persistent Cryo field kills frozen mobs continuously, holding the on-kill ATK stacked through the fight.

Armored MSGR

Bonus Stat · always active
Wearer's Strength +50
Set Effect · needs 3 pieces

When the wearer's HP is below 50%, the wearer gains 30% DMG Reduction against all types of DMG.

Kit-based fits (by playstyle)
  • Endministrator
    Endministrator 6★ DPS · Physical
    A melee Guard trading blows in the pack; Strength scales the Physical burst and the below-50% DR is a built-in panic button.
  • Da Pan
    Da Pan 5★ DPS · Physical
    Diving in to generate and consume Vulnerability, Da Pan uses the emergency DR to cover the risk of fighting at melee.
  • Chen Qianyu
    Chen Qianyu 5★ Sub-DPS · Physical
    A universal Physical Guard with high ultimate multipliers; Strength feeds the damage and the DR steadies rough rotations.

Catastrophe

Bonus Stat · always active
Wearer's Ultimate Gain Efficiency +20%.
Set Effect · needs 3 pieces

At the start of battle, the wearer immediately recovers 50 SP.

Kit-based fits (by playstyle)
  • Laevatain
    Laevatain 6★ DPS · Heat
    Laevatain does almost nothing without the Ultimate, so the 50 SP opener and faster ult cadence front-load and sustain the AoE.
  • Yvonne
    Yvonne 6★ DPS · Cryo
    Yvonne's single-target burst hinges on ultimate windows, and the fast SP start brings the Solidification payoff online sooner.
  • Last Rite
    Last Rite 6★ DPS · Cryo
    A boss killer who lives on burst windows, so more frequent ultimates mean more full burst rotations per fight.
  • Rossi
    Rossi 6★ DPS · Physical
    Rossi's team-wide Haste and ATK ride on the Ultimate, which wants to be up early and often.

Mordvolt Insulation

Bonus Stat · always active
Wearer's Intellect +50
Set Effect · needs 3 pieces

When the wearer's HP is above 80%, Arts DMG +20%.

Kit-based fits (by playstyle)
  • Avywenna
    Avywenna 5★ DPS · Electric
    An Electric Arts striker fighting through Arts Susceptibility from the backline, so Intellect and the above-80% Arts DMG both scale cleanly.
  • Tangtang
    Tangtang 6★ DPS · Cryo
    A Cryo caster laying a persistent field from range that rarely dips below 80% HP, holding the Arts DMG bonus.
  • Perlica
    Perlica 5★ Support · Electric

    A ranged Electric caster stacking Forced Electrification; Intellect and Arts DMG amplify the output from safety.

Mordvolt Resistant

Bonus Stat · always active
Wearer's Will +50
Set Effect · needs 3 pieces

When the wearer's HP is below 50%, Treatment Effect +30%.

Kit-based fits (by playstyle)
  • Xaihi
    Xaihi 5★ Support · Cryo
    The mandatory Cryo healer; Will plus a 30% treatment spike when the team dips low makes Xaihi a clutch stabilizer.
  • Ardelia
    Ardelia 6★ Support · Nature
    A universal healer whose sustain scales directly with treatment effect, so the low-HP bonus rescues a collapsing team.

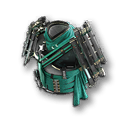
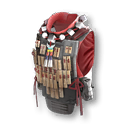
Qingbo

Bonus Stat · always active
Wearer's Combo Skill Cooldown Reduction +15%.
Set Effect · needs 3 pieces

When the wearer casts a combo skill, the wearer gains Skill DMG Dealt +20% (for every skill) for 15s. This effect can reach 2 stacks. Duration of each stack is counted separately.

Kit-based fits (by playstyle)
  • Mi Fu
    Mi Fu 6★ DPS · Physical
    Built entirely around the Qingbo Triplex three-move rotation, Mi Fu turns faster combo cooldowns and stacking Skill DMG into more finisher damage.
  • Perlica
    Perlica 5★ Support · Electric
    The Combo Skill CDR drags Perlica's combo cooldown down far enough to line her combos up with Zhuang Fangyi's combo skill, tightening the Electric team's rotation.
  • Fluorite
    Fluorite 4★ Support · Nature
    Fluorite's biggest weakness is punishing combo-skill cooldowns; the Combo Skill CDR is the most direct fix, finally letting the kit cycle.
  • Chen Qianyu
    Chen Qianyu 5★ Sub-DPS · Physical
    A combo-driven Physical Guard whose already-smooth rotations get smoother with reduced combo cooldowns and the Skill DMG stacks.

Roving MSGR

Bonus Stat · always active
Wearer's Agility +50
Set Effect · needs 3 pieces

When the wearer's HP is above 80%, Physical DMG +20%

Kit-based fits (by playstyle)
  • Rossi
    Rossi 6★ DPS · Physical
    An AoE Physical carry fighting from flexible, safer positioning, so Rossi holds the above-80% Physical DMG bonus while Agility feeds the output.
  • Lifeng
    Lifeng 6★ Sub-DPS · Physical
    A Physical Sub-DPS who groups and debuffs from relative safety, staying topped up for the Physical DMG buff.
  • Chen Qianyu
    Chen Qianyu 5★ Sub-DPS · Physical
    A universal Physical unit with smooth rotations; staying above 80% HP makes the Physical DMG bonus a free damage boost.

Optimal Gear by Operator

The same mapping from the other direction: every operator and the exact gear to build, whether a full set or a mixed loadout that pulls the best pieces from two sets.

Arcane
Arcane
6★ DPS
Nature
Mixed setsHot Work×3LYNX×1
Hot Work Exo-RigBodyHot Work Exo-Rig
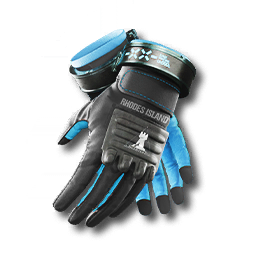
Hot Work Hands PPEGlovesHot Work Hands PPE
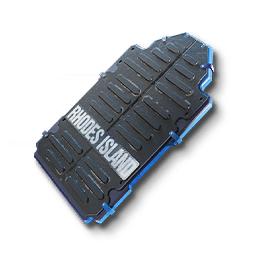
Hot Work Insulation SlabKitHot Work Insulation Slab
LYNX SlabKitLYNX Slab

On-theme solo DPS; Corrosion trigger she supplies herself

Ardelia
Ardelia
6★ Support
Nature
Mixed setsEternal Xiranite×3Bonekrusha×1
Bonekrusha Poncho T1BodyBonekrusha Poncho T1
Eternal Xiranite Gloves T1GlovesEternal Xiranite Gloves T1
×2Eternal Xiranite Auxiliary ArmKit ×2Eternal Xiranite Auxiliary Arm

Team DMG buff on debuff application

Camille
Camille
6★ Support
Heat
Mixed setsEternal Xiranite×3Frontiers×1
Frontiers Protection SuitBodyFrontiers Protection Suit
Eternal Xiranite Gloves T1GlovesEternal Xiranite Gloves T1
×2Eternal Xiranite Auxiliary ArmKit ×2Eternal Xiranite Auxiliary Arm

Fallback - team DMG buff on Susceptibility/Weaken; use only if a teammate already runs Frontiers

Laevatain
Laevatain
6★ DPS
Heat
Mixed setsHot Work×3LYNX×1
Hot Work Exo-RigBodyHot Work Exo-Rig
Hot Work GauntletsGlovesHot Work Gauntlets
Hot Work PyrometerKitHot Work Pyrometer
LYNX SlabKitLYNX Slab

BiS - Heat DMG +50% after applying Combustion. Outperforms Tide Surge.

Last Rite
Last Rite
6★ DPS
Cryo
Mixed setsTide Surge×3Swordmancer×1
Swordmancer Light ArmorBodySwordmancer Light Armor
Tide Surge GauntletsGlovesTide Surge Gauntlets
×2Hanging River O2 TubeKit ×2Hanging River O2 Tube

Skill DMG + Arts DMG after infliction

Mi Fu
Mi Fu
6★ DPS
Physical
Mixed setsGrizzled Edge×3Swordmancer×1
Grizzled Edge ArmorBodyGrizzled Edge Armor
Grizzled Edge GauntletsGlovesGrizzled Edge Gauntlets
Grizzled Edge Push KnifeKitGrizzled Edge Push Knife
Swordmancer NAV BeaconKitSwordmancer NAV Beacon

Best DMG Output, use only if Mi Fu doesn't require energy in your team (usually when paired with rossi)

Pogranichnik
Pogranichnik
6★ Support
Physical
Mixed setsHot Work×2Æthertech×1Bonekrusha×1
Bonekrusha Poncho T1BodyBonekrusha Poncho T1
Æthertech GlovesGlovesÆthertech Gloves
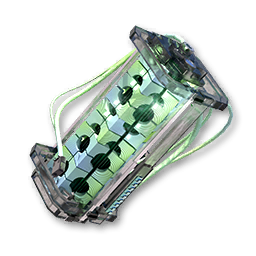
×2Hot Work Power CartridgeKit ×2Hot Work Power Cartridge

DPS/Debuff Focus - Increases Physical DMG when applying Vulnerability

Rossi
Rossi
6★ DPS
Physical
Full 3-pc setMI Security×3
MI Security Armor T1BodyMI Security Armor T1
Redeemer GlovesGlovesRedeemer Gloves
×2MI Security Scope T1Kit ×2MI Security Scope T1

General and Overall Safe Build, Max CR%

Tangtang
Tangtang
6★ DPS
Cryo
Mixed setsBonekrusha×3LYNX×1
Bonekrusha Heavy Armor T2BodyBonekrusha Heavy Armor T2
Bonekrusha Wristband T1GlovesBonekrusha Wristband T1
Bonekrusha Mask T2KitBonekrusha Mask T2
LYNX SlabKitLYNX Slab

Standard Build for doing damage and playing around stagger for enemy with standard LR and Xaihi builds, generally better for daily/boss content

Xaihi
Xaihi
5★ Support
Cryo
Mixed setsEternal Xiranite×3Frontiers×1
Eternal Xiranite ArmorBodyEternal Xiranite Armor
Eternal Xiranite Gloves T1GlovesEternal Xiranite Gloves T1
Eternal Xiranite Power CoreKitEternal Xiranite Power Core
Frontiers Extra O2 TubeKitFrontiers Extra O2 Tube

Support Focus - Ultimate Gain

Yvonne
Yvonne
6★ DPS
Cryo
Mixed setsMI Security×3LYNX×1
MI Security OverallsBodyMI Security Overalls
MI Security Hands PPEGlovesMI Security Hands PPE
MI Security ToolkitKitMI Security Toolkit
LYNX SlabKitLYNX Slab

Crit Rate & ATK stacking specifically designed for her mechanics

Zhuang Fangyi
Zhuang Fangyi
6★ DPS
Electric
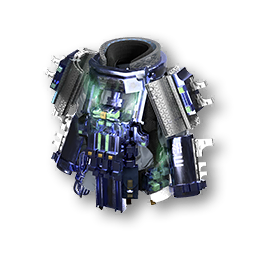
Mixed setsXiranflow×3Bonekrusha×1
Bonekrusha Poncho T1BodyBonekrusha Poncho T1
Xiranflow GlovesGlovesXiranflow Gloves
×2Xiranflow BatonKit ×2Xiranflow Baton

Whenever you can't skill 4 times with her (es: Antal, Ardelia)

Antal
Antal
4★ Support
Electric
Mixed setsEternal Xiranite×3Tide Surge×1
Tide Fall Light ArmorBodyTide Fall Light Armor
Eternal Xiranite GlovesGlovesEternal Xiranite Gloves
×2Eternal Xiranite Power CoreKit ×2Eternal Xiranite Power Core

Maximize Ultimate Gain + Team Buff

Avywenna
Avywenna
5★ DPS
Electric
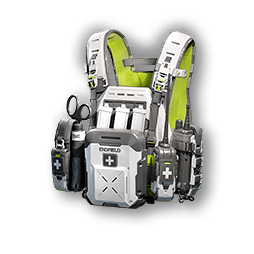
Mixed setsBonekrusha×3Æthertech×1
Bonekrusha Poncho T1BodyBonekrusha Poncho T1
Æthertech Light GlovesGlovesÆthertech Light Gloves
×2Bonekrusha FigurineKit ×2Bonekrusha Figurine

All Attributes buff on skill cast

Chen Qianyu
Chen Qianyu
5★ Sub-DPS
Physical
Mixed setsSwordmancer×2Bonekrusha×1
Swordmancer Heavy ArmorBodySwordmancer Heavy Armor
Swordmancer FlintKitSwordmancer Flint
Bonekrusha MaskKitBonekrusha Mask

Stagger Efficiency + Physical Proc

Endministrator
Endministrator
6★ DPS
Physical
Mixed setsBonekrusha×3Æthertech×1
Bonekrusha Heavy Armor T1BodyBonekrusha Heavy Armor T1
Æthertech GlovesGlovesÆthertech Gloves
×2Bonekrusha MaskKit ×2Bonekrusha Mask

Full Bonekrusha set with a Æthertech off-piece.

Gilberta
Gilberta
6★ Support
Nature
Full 3-pc setEternal Xiranite×4
Eternal Xiranite ArmorBodyEternal Xiranite Armor
Eternal Xiranite Gloves T1GlovesEternal Xiranite Gloves T1
×2Eternal Xiranite Auxiliary ArmKit ×2Eternal Xiranite Auxiliary Arm

Team DMG Buff

Lifeng
Lifeng
6★ Sub-DPS
Physical
Mixed setsEternal Xiranite×3Swordmancer×1
Swordmancer Heavy ArmorBodySwordmancer Heavy Armor
Eternal Xiranite GlovesGlovesEternal Xiranite Gloves
×2Eternal Xiranite Power CoreKit ×2Eternal Xiranite Power Core

Support Build - Ultimate Gain

Perlica
Perlica
5★ Support
Electric
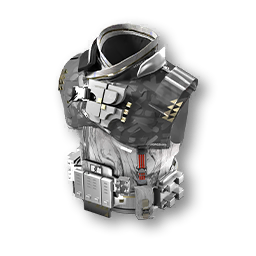
Mixed setsPulser Labs×3Eternal Xiranite×1
Pulser Labs Disruptor SuitBodyPulser Labs Disruptor Suit
Eternal Xiranite GlovesGlovesEternal Xiranite Gloves
×2Pulser Labs CalibratorKit ×2Pulser Labs Calibrator

Electric DMG on Electrification

Arclight
Arclight
5★ Support
Electric
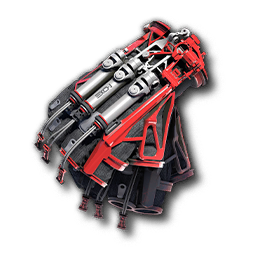
Mixed setsFrontiers×3Eternal Xiranite×1
Frontiers Armor T3BodyFrontiers Armor T3
Eternal Xiranite GlovesGlovesEternal Xiranite Gloves
×2Frontiers Extra O2 TubeKit ×2Frontiers Extra O2 Tube

Team DMG buff on SP recovery

Da Pan
Da Pan
5★ DPS
Physical
Mixed setsÆthertech×3Swordmancer×1
Æthertech PlatingBodyÆthertech Plating
Swordmancer TAC GauntletsGlovesSwordmancer TAC Gauntlets
×2Æthertech StabilizerKit ×2Æthertech Stabilizer

Full Æthertech set with a Swordmancer off-piece.

Ember
Ember
6★ Tank
Heat
Mixed setsSwordmancer×3Eternal Xiranite×1
Swordmancer Heavy ArmorBodySwordmancer Heavy Armor
Swordmancer TAC GauntletsGlovesSwordmancer TAC Gauntlets
Swordmancer FlintKitSwordmancer Flint
Eternal Xiranite Power CoreKitEternal Xiranite Power Core

Switch to lynx if you need heals but stagger build is recommended

Snowshine
Snowshine
5★ Tank
Cryo
Full 3-pc setLYNX×4
LYNX Heavy ArmorBodyLYNX Heavy Armor
LYNX GlovesGlovesLYNX Gloves
×2LYNX Aegis InjectorKit ×2LYNX Aegis Injector

Healing Efficiency

Wulfgard
Wulfgard
5★ Support
Heat
Mixed setsÆthertech×1Eternal Xiranite×1LYNX×1Type 50 Yinglung×1
Type 50 Yinglung Heavy Armor T1BodyType 50 Yinglung Heavy Armor T1
LYNX GlovesGlovesLYNX Gloves
Æthertech WatchKitÆthertech Watch
Eternal Xiranite Power CoreKitEternal Xiranite Power Core

P5 Wulf Required | Use Ult to reset combo CD [Laevatein Team]

Akekuri
Akekuri
4★ Support
Heat
Mixed setsFrontiers×2Eternal Xiranite×1
Frontiers Protection SuitBodyFrontiers Protection Suit
Eternal Xiranite GlovesGlovesEternal Xiranite Gloves
Frontiers Extra O2 TubeKitFrontiers Extra O2 Tube
Redeemer SealKitRedeemer Seal

Maximize Ultimate Gain

Alesh
Alesh
5★ Support
Cryo
Mixed setsEternal Xiranite×1Frontiers×1
Frontiers Armor T3BodyFrontiers Armor T3
Eternal Xiranite GlovesGlovesEternal Xiranite Gloves
×2Redeemer SealKit ×2Redeemer Seal

Team DMG on SP recovery

Catcher
Catcher
4★ Tank
Physical
Mixed setsFrontiers×3Eternal Xiranite×1
Frontiers Armor T3BodyFrontiers Armor T3
Eternal Xiranite Gloves T1GlovesEternal Xiranite Gloves T1
×2Frontiers Extra O2 TubeKit ×2Frontiers Extra O2 Tube

Frontiers 4-piece grants Will, lowers Combo Skill cooldown, and amplifies team damage after SP recovery. Pairs well with Former Finery.

Estella
Estella
4★ Sub-DPS
Cryo
Mixed setsEternal Xiranite×3Type 50 Yinglung×1
Type 50 Yinglung Light ArmorBodyType 50 Yinglung Light Armor
Eternal Xiranite Gloves T1GlovesEternal Xiranite Gloves T1
×2Eternal Xiranite Auxiliary ArmKit ×2Eternal Xiranite Auxiliary Arm

Support Focus

Fluorite
Fluorite
4★ Support
Nature
Mixed setsEternal Xiranite×1Frontiers×1
Frontiers Armor T3BodyFrontiers Armor T3
Eternal Xiranite Gloves T1GlovesEternal Xiranite Gloves T1
×2Redeemer SealKit ×2Redeemer Seal

Standard Fluorite Build in Last Rite Teams | 118% ER Required

Best Gear Sets by Role

Physical DPS and carries

Attacking carries want raw ATK and burst. Bonekrusha (ATK +15%, battle-skill burst) and Æthertech (ATK +8%, Physical DMG after Vulnerability) are the staples, with MI Securityfor crit-scaling units and Type 50 Yinglung for combo-driven kits. Stagger specialists lean on Swordmancer and Grizzled Edge.

Supports and enablers

Team engines prioritise buffs over personal damage. Eternal Xiranite (team DMG after applying a debuff) is the most-equipped set on this page, and Frontiers (Combo Skill cooldown reduction plus team DMG on SP recovery) suits fast-cycling supports.

Healers and tanks

Sustain units take LYNX (HP Treatment Efficiency plus a team-wide damage-reduction effect on heal), which turns healing into a defensive team buff.

Elemental reaction carries

Arts and reaction damage scales off Arts Intensity. Hot Workpowers Heat and Nature (Combustion, Corrosion), Pulser Labspowers Electric and Cryo (Electrification, Solidification), and Tide Surge and Xiranflowreward stacked Arts Inflictions.
How We Choose Each Operator’s Gear

Every loadout above is built from community-tested operator builds, then cross-checked against each set’s Bonus Stat and Set Effect text and the operator’s role, element, and kit. Set bonuses come from the game-data dump; gear stats and icons come from the artificing planner dataset.

We show whatever the community actually runs, whether that is a clean 3-piece set or a mixed 3+1 or 2+2 build. The logic is simple: damage carries favour ATK, crit, and stagger sets; enablers and healers favour team-buff and treatment sets; and elemental reaction carries favour Arts Intensity sets. Where a curated note is thin, the card falls back to a plain description of the set composition rather than inventing a reason.
Recommendations shift as the meta evolves and new operators arrive, so this page is updated regularly. For the full sortable table of every piece with its stats and drop sources, see the gear database; for per-operator weapon plus gear builds, see operator builds.

Gear Sets FAQ

How many gear pieces can an operator equip in Arknights: Endfield?

Four. Each operator equips one Body piece, one pair of Gloves, and two Kits. Every piece can come from any set, so a loadout can pull pieces from more than one set at once.

Do you need a full 3-piece gear set in Arknights: Endfield?

No. A gear set only ever needs 3 pieces for its Set Effect, but many operators run a mixed loadout that combines pieces from two different sets. Mixing trades a second Set Effect for an extra strong Bonus Stat, which is often the higher-value choice for damage carries.

Is a 3+1 gear split better than a full 4-piece set?

Usually yes. A set’s conditional Set Effect unlocks at 3 pieces, and a 4th piece of the same set only adds another flat Bonus Stat, never a second Set Effect. Running 3 pieces of your main set plus 1 off-piece from a second set often gives a more useful Bonus Stat, unless the main set’s stat is exactly what the operator scales on (then a 4-piece set is fine).

What is the best all-round gear set in Endfield?

Eternal Xiranite is the most widely used set on this page, fitting more operators than any other because its team-wide damage buff suits supports and enablers. For physical damage carries, Bonekrusha and Æthertech are the go-to attacking sets.

How is the best gear for each operator decided here?

Each loadout is built from community-tested operator builds, then matched to the set bonus text and the operator role, element, and kit. Full sets and mixed builds are both shown, with the reason each set fits the operator.

Where can I see the full stats and sources for each gear piece?

The full sortable table of every gear piece, with stats and acquisition sources, is on the gear database. This page focuses on which sets to run and on whom.

Set bonuses are extracted from the game-data dump; loadouts are built from community-tested operator builds and matched to each operator's role, element, and kit. Updated 2026. Talos Hub is a fan-made resource, not affiliated with Hypergryph or Yostar.

NordVPN: secure, fast VPN for gaming. Lower ping, play from any region.

Sponsored. We may earn a commission at no extra cost to you.