
WULING 1.2.2 TEST AREA MAX PROFIT MEGA BASE BLUEPRINT
 Razer Kraken Kitty V2Wireless gaming headset with cat ear LED lighting, THX Spatial Audio, and a detachable mic.Shop on Razer.com
Sponsored. We may earn a commission at no extra cost to you.
Table of Contents
Patch 1.2.2 quietly raised the ceiling on what a Wuling endgame base can actually clear. The new Test Area sub-region adds four more Forge of the Sky slots — twelve total now, up from the eight you had to ration in 1.2.0 — and opens up the production lines for Hetonite and Heavy Xiranite that the previous mega base could only partially supply. That extra throughput is what makes this 1.2.2 build the highest-profit outpost setup currently possible: roughly 59,880 bills per hour at its lowest configuration, against an outpost demand of 59,688 bills per hour with all three gear lines running in parallel.
This guide is a direct successor to Part 5 — Wuling 1.2.1 Max Profit Mega Base, and it deliberately reuses Wuling 1 through 6 from that build. Only one new Core AIC blueprint, Wuling 7, is added here, plus four new Sub AIC blueprints (two for Marker Stone, two for Jingyu Valley) that replace the old 1.2.1 layouts. If you already have the Part 5 base running, the upgrade path is short — six existing blueprints stay in place, two AICs get redeployed, and the Wuling 7 piece snaps onto the Core. If you do not have Part 5 yet, read it first, then come back here.
The base produces SC Wuling Battery, Heavy Xiranite, Yazhen Syringe A, Hetonite Parts, and all three Gear Components — Xiranite Component, Cuprium Component, and Hetonite Component — on switchable lines. It is fully modular: each gear line can be toggled off or capped at a target count, so you can trade raw selling profit for finished gear pieces whenever you actually need them. The built-in reactor on the Marker Stone side also produces Liquid Heavy for exploration use during open-world runs, which is the same convenience the earlier Part 7 Palm-Top Savior Phase 2 layout introduced on the event side.
What this guide does not cover: the Valley IV upstream pipeline (covered in Endgame Blueprints Part 1), the 1.2.1 Wuling base itself (Part 5 handles that), or earlier 1.0/1.1-era megabases. If you want curated single-purpose factories outside the endgame series — Xiranite, Buck Capsule, Battery, Hetonite Parts — the Blueprint Curation hub indexes them all by purpose.
Quick Answer
The Wuling 1.2.2 Mega Base is a three-AIC outpost factory tuned for patch 1.2.2's Test Area unlock and the twelve-slot Forge of the Sky cap that came with it. With Jingyu Valley Outpost at level 3, Regional Development Level 14, Area Expansion 2 across all three AICs, Wuling Depot Bus unlocked, and the fourth bottom upgrade on the Core AIC (which raises the Depot Bus Section limit to 20), the base produces roughly 59,880 bills per hour at its lowest setting — comfortably above the 59,688 bills/hour outpost demand when every gear line is active.
Blueprint codes below are region-locked: Asia and NA/EU codes are not interchangeable, and the importer will not warn you politely if you mix them. The Core AIC reuses Wuling 1–6 from Part 5, so grab those codes from that guide first. Three temporary thermal banks loaded with three SC Wuling Batteries each are required during deployment to seed power until the Marker Stone is producing batteries on its own — delete them once the MS battery output is wired in.
Requirements & AIC Upgrades
The Wuling 1.2.2 Mega Base delivers the highest outpost-sell profits in the current patch, and it asks for matching account progress before it pays out. Skip any of the prerequisites below and the base will either refuse to deploy, sell at a reduced rate, or shut itself down within a week as a depot fills up. The good news is that if you already met Part 5's prerequisites, only one extra upgrade is genuinely new here.
On the outpost side you need Jingyu Valley Outpost at level 3 — that is what unlocks SC Wuling Battery sales and the patch 1.2.2 items the base produces in bulk. Regional Development Level 14 unlocks the highest Mineral Purity tier on the new Test Area map and is what pushes the per-machine output to the numbers this guide quotes. You also need all twelve Forge of the Sky deployed; use the AIC plan node added in 1.2.2 to place every one of them and connect every mining rig spot in the new map area. The Marker Stone Sub AIC's starting level does not matter, because the upgrade list below will bump it to Area Expansion 2 regardless.
Reaching Regional Development Level 14 is the slowest of those prerequisites for most players coming from 1.2.1. The shortest path is to level up existing facilities like the Depot Node and Environment Terminal, unlock the new node and purification node in the Test Area, unlock the AIC plan node that allows all twelve Forge of the Sky placements, and connect Mining Rigs to every mining spot in the new map area. None of those tracks individually moves the bar much; together they get you to level 14 without grinding any single objective.
The three AICs each need specific Area Expansion and Depot Bus upgrades before the imports will fit. The Core AIC needs Area Expansion 2 and the fourth upgrade on the bottom side, which raises the Depot Bus Section limit to 20. The Jingyu Valley Sub AIC needs Area Expansion 2 plus Wuling Depot Bus unlocked. The Marker Stone Sub AIC also needs Area Expansion 2 and Wuling Depot Bus unlocked — this is the one genuinely new requirement compared to Part 5, where MS only needed Area Expansion 1. None of these are optional; the blueprints are sized to those exact footprints, and a smaller AIC will simply truncate the deployment.
| AIC | Required Upgrades |
|---|---|
| Core AIC | Area Expansion 2 · 4th upgrade on bottom side (20 Depot Bus Section limit) |
| JV Sub AIC | Area Expansion 2 · Wuling Depot Bus unlocked |
| MS Sub AIC | Area Expansion 2 · Wuling Depot Bus unlocked |
If you are still working toward these prerequisites, the Part 4 CRS guide covers a transitional 1.2.0 layout that runs on lower Area Expansion tiers, and Part 5 is the recommended interim base while you grind out RD Level 14. There is no penalty for sitting on Part 5 for a few weeks before migrating; the upgrade path described later in this guide preserves Wuling 1–6 untouched.
Blueprint Import & Starting Materials
Before pasting a single code, clear all three bases out completely. Delete every existing facility on the Core, MS, and JV AICs, and walk the perimeter of each looking for stray Forge of the Sky units that may be sitting outside the AIC boundary. The importer will silently fail if any old facility overlaps the new footprint, and items left on the ground will block placement of the connected blueprints later in the chain.
Drop the starting materials you will need into the depot before deployment so the base does not stall in its first hour. The minimum bootstrap inventory is 500 SC Wuling Batteries (three per thermal bank, plus reserve for the first MS output cycle), 500 Sandleaf (one stack per Sandleaf seed machine), 500 Yazhen (one stack per Yazhen seed machine), and roughly 8,000 Cooling Parts. If you are short on Cooling Parts, run Part 5's Temp Cuprium Parts blueprint on a spare patch, let it spin up enough parts to cover the gap, then remove it before deploying Wuling 7.
The import flow itself is straightforward. Open Blueprints from the facility menu, switch to Shared Blueprints, click Import Blueprints at the bottom, and paste the code. The copy buttons on this page eliminate the most common typo: the letter O versus the digit 0. Watch for stray leading or trailing spaces if you are pasting from elsewhere, and remember to build any Hologram before placing connected pieces — otherwise the next blueprint will refuse to deploy on top of the unbuilt outline. Several Asia codes this patch share a long prefix, which makes manual retyping especially risky; use the copy buttons rather than typing them out.
Temporary Thermal Banks
The 1.2.2 base has no sustainable power source until the Marker Stone Sub AIC is producing SC Wuling Batteries on its own, which means you need temporary power during deployment. Before importing any of the new blueprints, place three thermal banks in Marker Stone and load each one with three SC Wuling Batteries from your depot. That gives the base nine batteries' worth of runtime, which is enough to keep every facility lit while you wire the MS layout and confirm the first battery output lands in the depot.
The exact number of banks you need depends on what your turrets are running on. If your turrets are battery-powered, two thermal banks (6.6k power) is enough to clear the deployment window without a brownout. If you have higher draw — extra turrets, more aggressive defence loadout, or a heavier exploration grid — keep all three thermal banks (7.7k power), or substitute the min-max battery blueprint from the curation hub if you have it on hand. Either way, the goal is to bridge the gap between import and steady-state production.
Once the Marker Stone outputs are wired and the depot shows SC Wuling Battery climbing, delete the thermal banks. The base is fully self-sustaining at this point, and the emergency power reserve will not deplete during normal operation. Leaving the banks in place is harmless but wastes the construction slots; the cleanest version of the base has zero thermal banks once it stabilises.
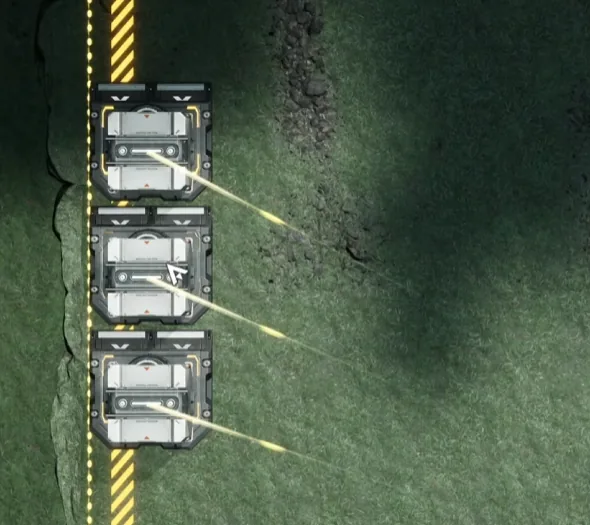
Three thermal banks in Marker Stone — temporary power source during deployment
With the thermal banks live and the starting materials in the depot, you are ready to begin the actual import. Start with the Core AIC below.
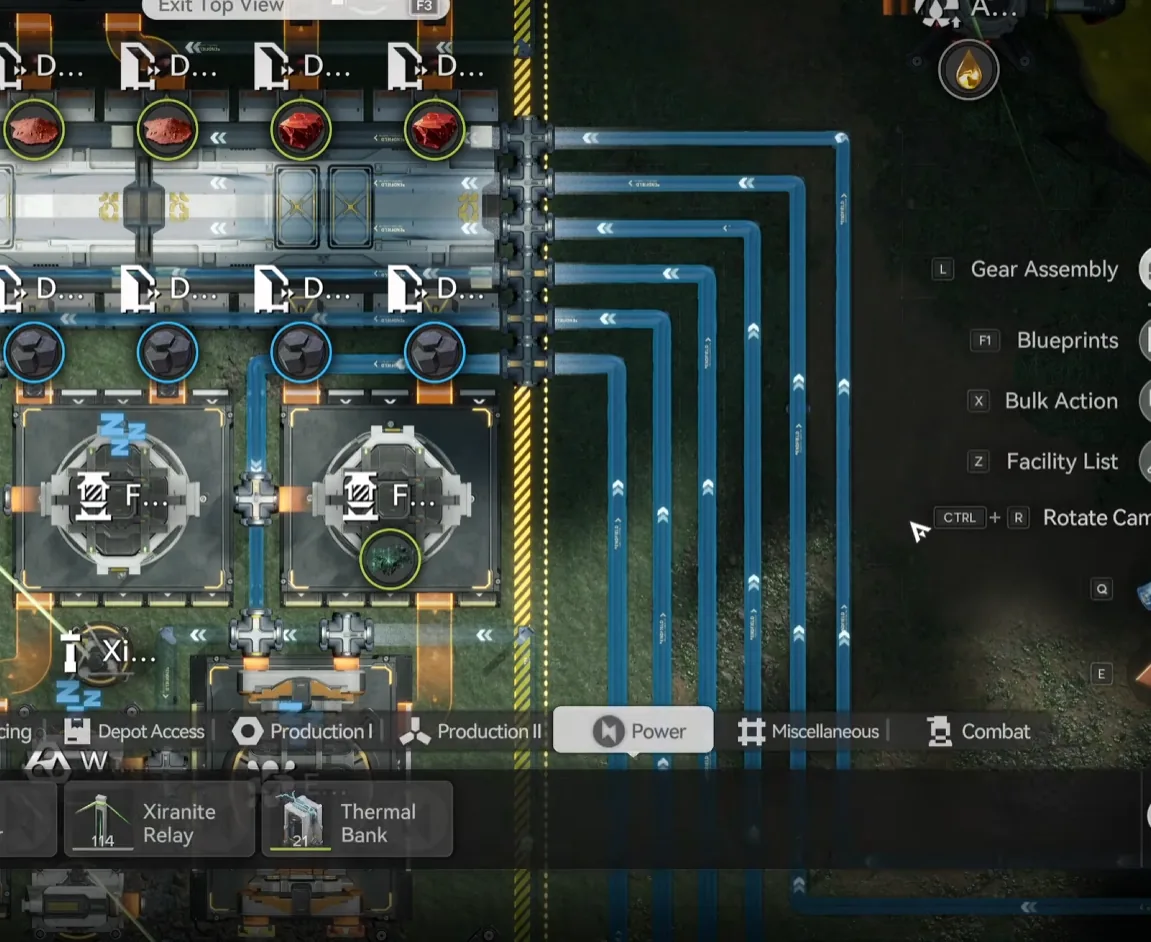
Core AIC Setup — Wuling 7
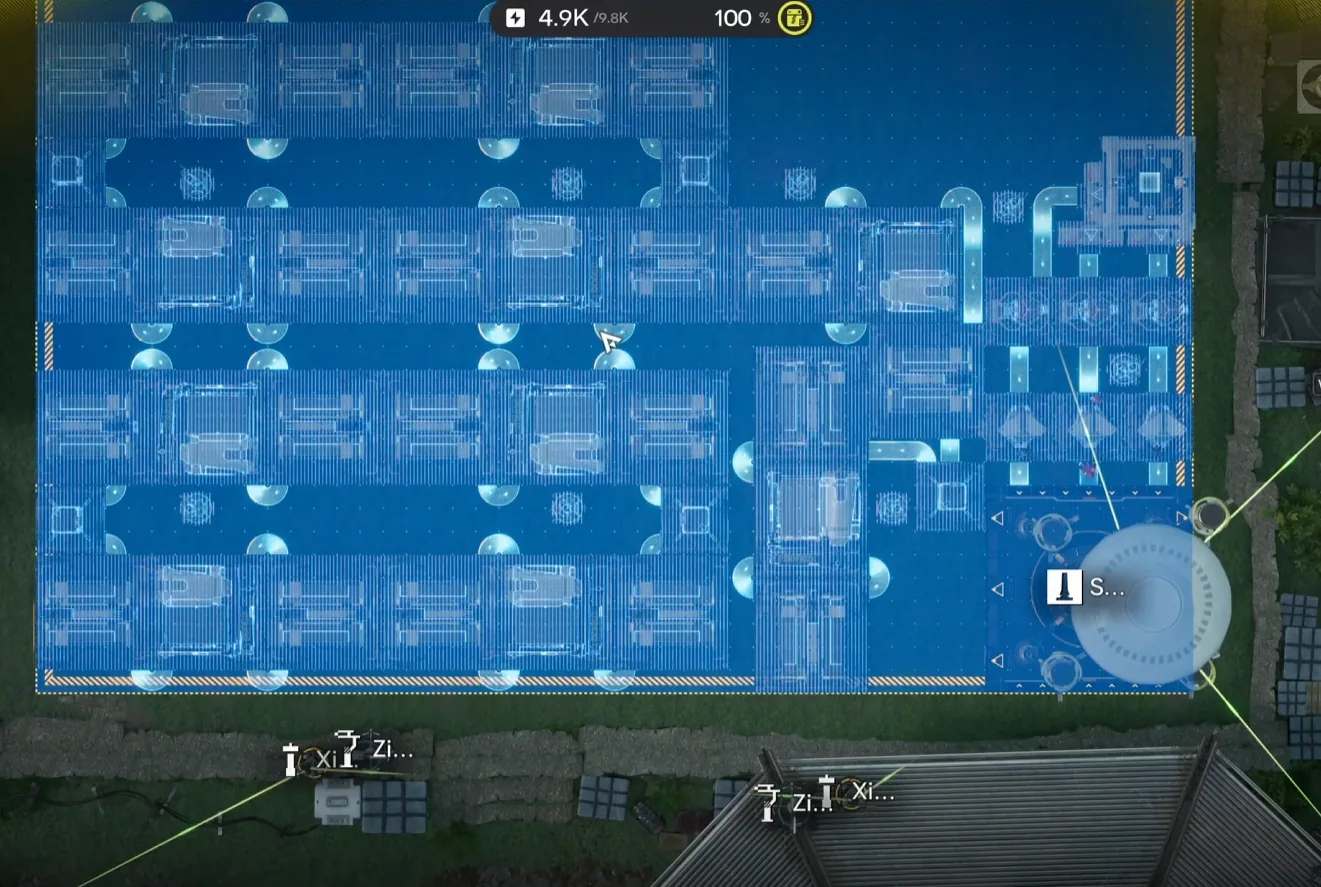
The Core AIC is the heaviest of the three bases and the one that produces the SC Wuling Batteries the outpost actually pays for. Orient yourself first: face the map so the river is on your left side, then drag the Core itself to the top right corner so the placement zone clears the river bank. The Core in 1.2.2 reuses Wuling 1 through 6 from Part 5's Core AIC section — deploy those first, in order, then add the new Wuling 7 blueprint on top of the chain.
Once Wuling 1 through 7 are all down, move the Core back to the middle of the AIC so it can collect every transport belt that runs through the layout, then set the bottom-right depot output to Ferrium Powder. That single output assignment is what routes the byproducts cleanly and prevents the depot from clogging during long offline stretches. Only Wuling 7 is genuinely new in 1.2.2; Wuling 1–6 are identical to the Part 5 codes, so you can skip ahead to the table below if you already have the older Wuling pieces deployed.
| Blueprint | Asia Server Code | NA/EU Server Code |
|---|---|---|
| Wuling 7 | EFO017i89o8o6E583O2Ai | EFO01U4Aiu355eO5o7ua8 |
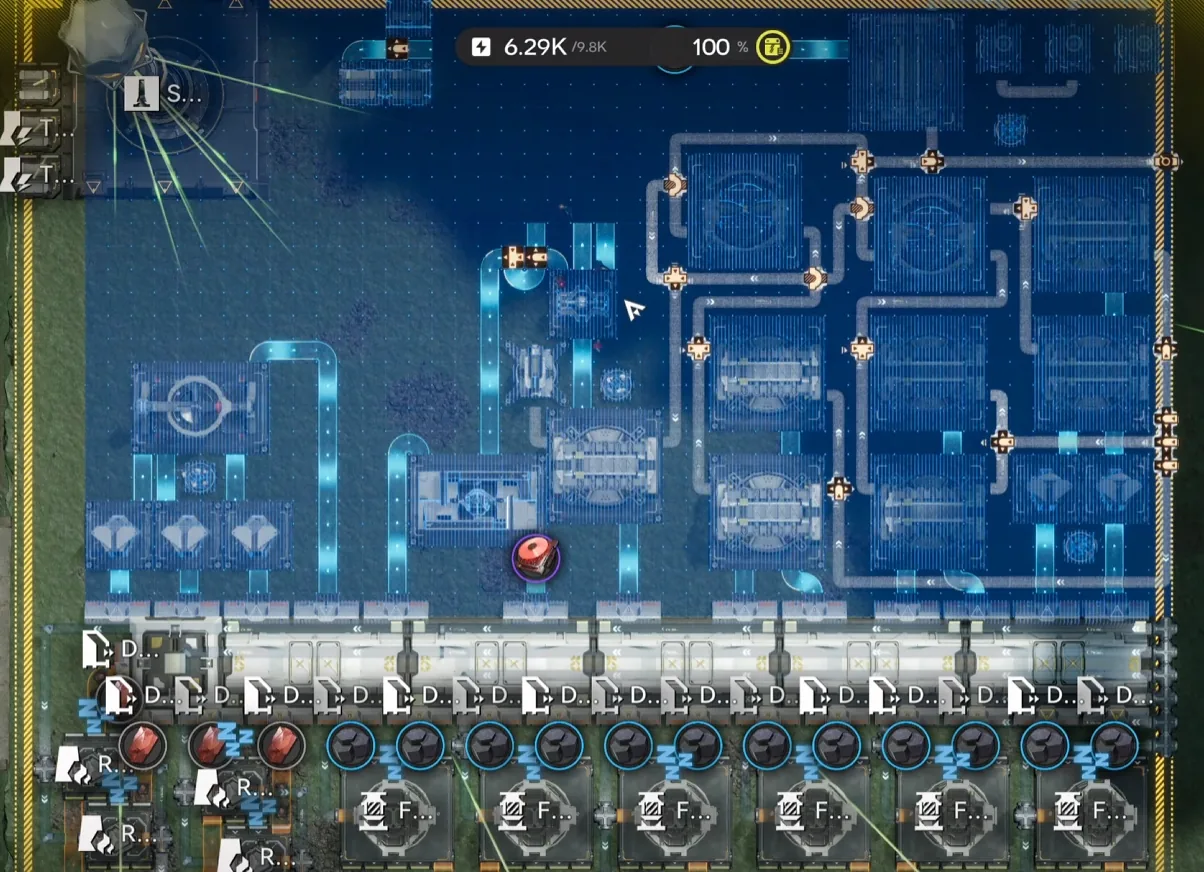
Wuling 7 — placement in the Core AIC top-right corner
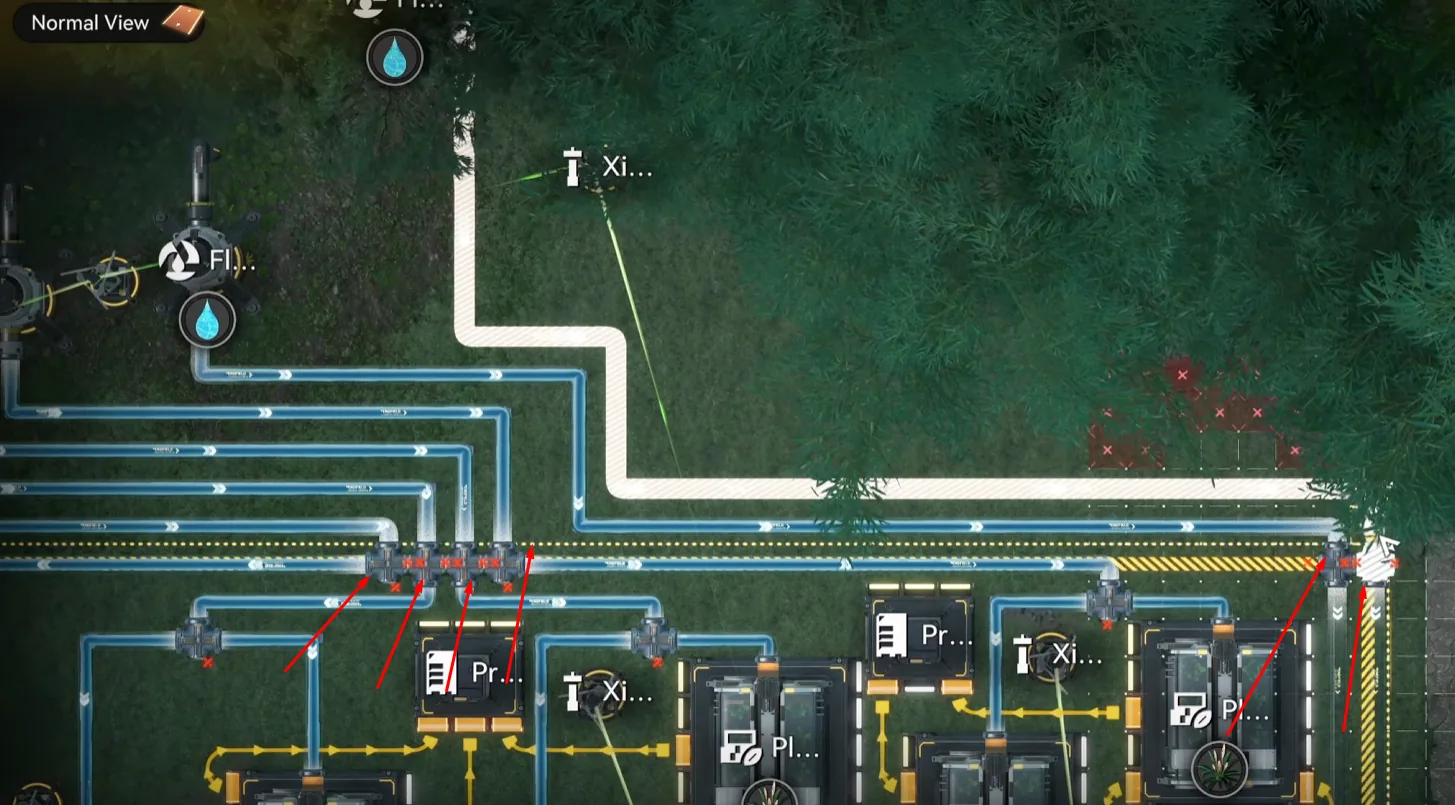
The Core AIC fluid setup totals seven fluid pumps plus one fluid supply unit, split three on the top side and four on the bottom. The Core is a long way from the power source in this layout, so drop a relay tower near the bridge to keep the signal alive across the gap — without it, the bottom-side pumps will brown out under load and the depot graph will look correct for the first half-hour before collapsing. After the pumps and relay are placed, double-check that the bottom-right output is set to Ferrium Powder before moving on.
One last item from the Part 5 base that carries forward unchanged: the unpowered Protocol Stashes in the middle and Scorpion areas are deliberately positioned to split items equally into different machines, and they must stay off. Manually toggle each of them off and set them to storage mode for belt-and-suspenders safety — that way if you ever accidentally drop a Pylon nearby, nothing gets force-powered and the production split stays intact. Accidentally powering these stashes is one of the most common causes of "the base looks right but the numbers are wrong" failures.
Marker Stone Sub AIC
The Marker Stone Sub AIC produces SC Wuling Battery and Heavy Xiranite — the two outputs that close the power loop and feed the bulk of the outpost profit. Orient yourself so the acid lake is on your right and move the Core to the top left before importing. Deploy MS Bottom first, then MS Top on top of it. After both blueprints are placed, set the top-left depot output to SC Wuling Battery and the top-right to Heavy Xiranite, then delete the temporary thermal banks once the battery output starts climbing.
Both Marker Stone blueprints are new in 1.2.2 — the layout was redesigned to take advantage of the Test Area's extra Forge of the Sky slots and the Area Expansion 2 footprint. If you are migrating from Part 5, the old MS SubAIC blueprint is no longer usable; delete it cleanly before importing the new pair so the new bottom blueprint snaps to the AIC boundary rather than to old facility tiles.
| Blueprint | Asia Server Code | NA/EU Server Code |
|---|---|---|
| MS Top | EFO017i89o8o6E58AO2Ai | EFO0172UA3844i51iO2Ai |
| MS Bottom | EFO01a6584543eA4uou5e | EFO01eE7U8o22A45ioAi8 |
MS Top
MS Bottom
The fluid setup at Marker Stone is where most first-time 1.2.2 deployments stumble, because the water and acid lines are routed differently than in the 1.2.1 layout. The bottom side takes six clean water pumps and three acid pumps. The pipe coming out of the base must end at a Fluid Supply Unit positioned in the acid lake itself — that is the most common reversal mistake, and getting it backwards will make the production graph look correct for the first half-hour before everything stalls. Cross-check the pipe routing against the connection screenshots below before powering on.
6× Clean Water Pumps
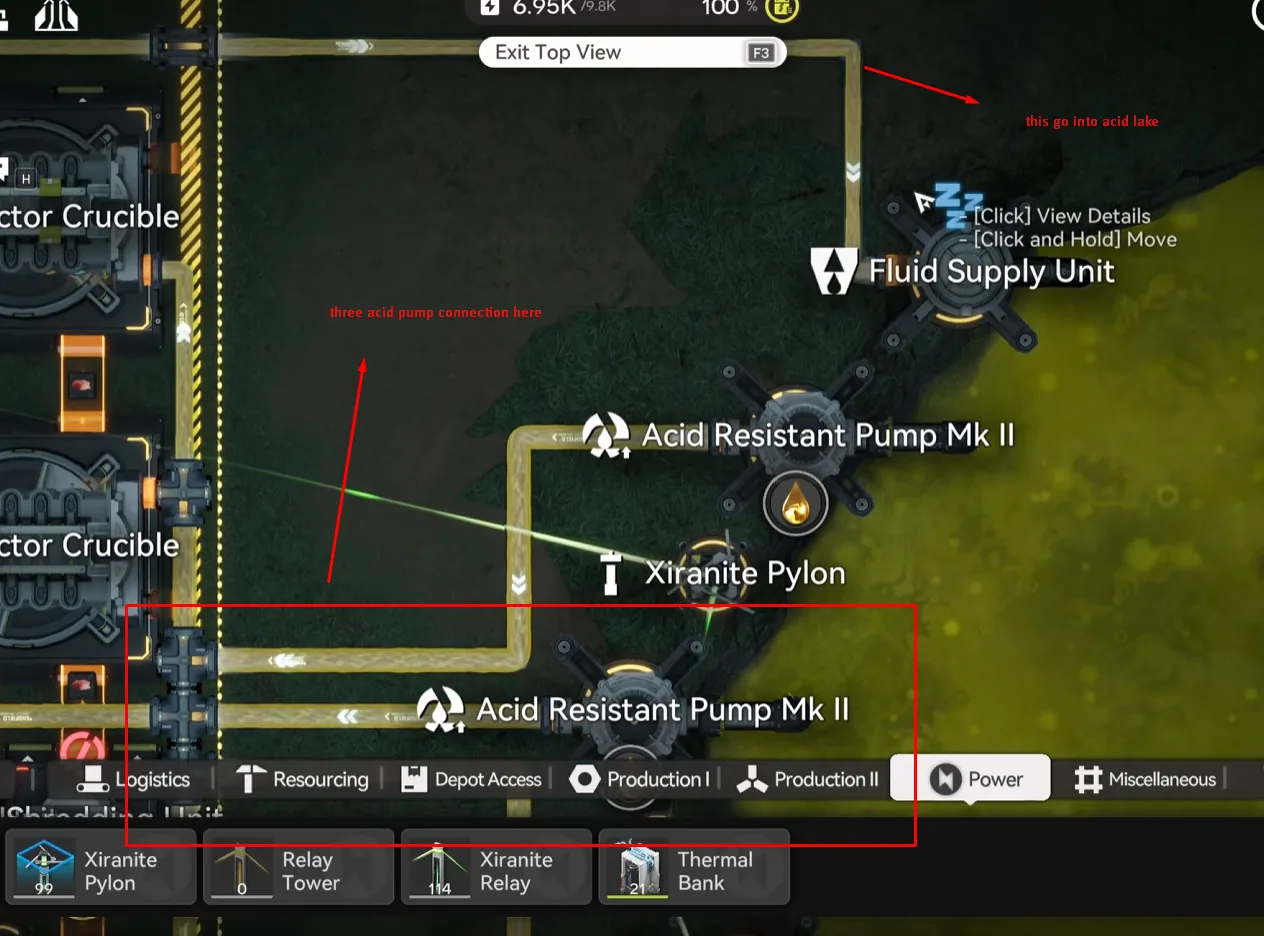
3× Acid Pumps + Fluid Supply Unit in acid lake
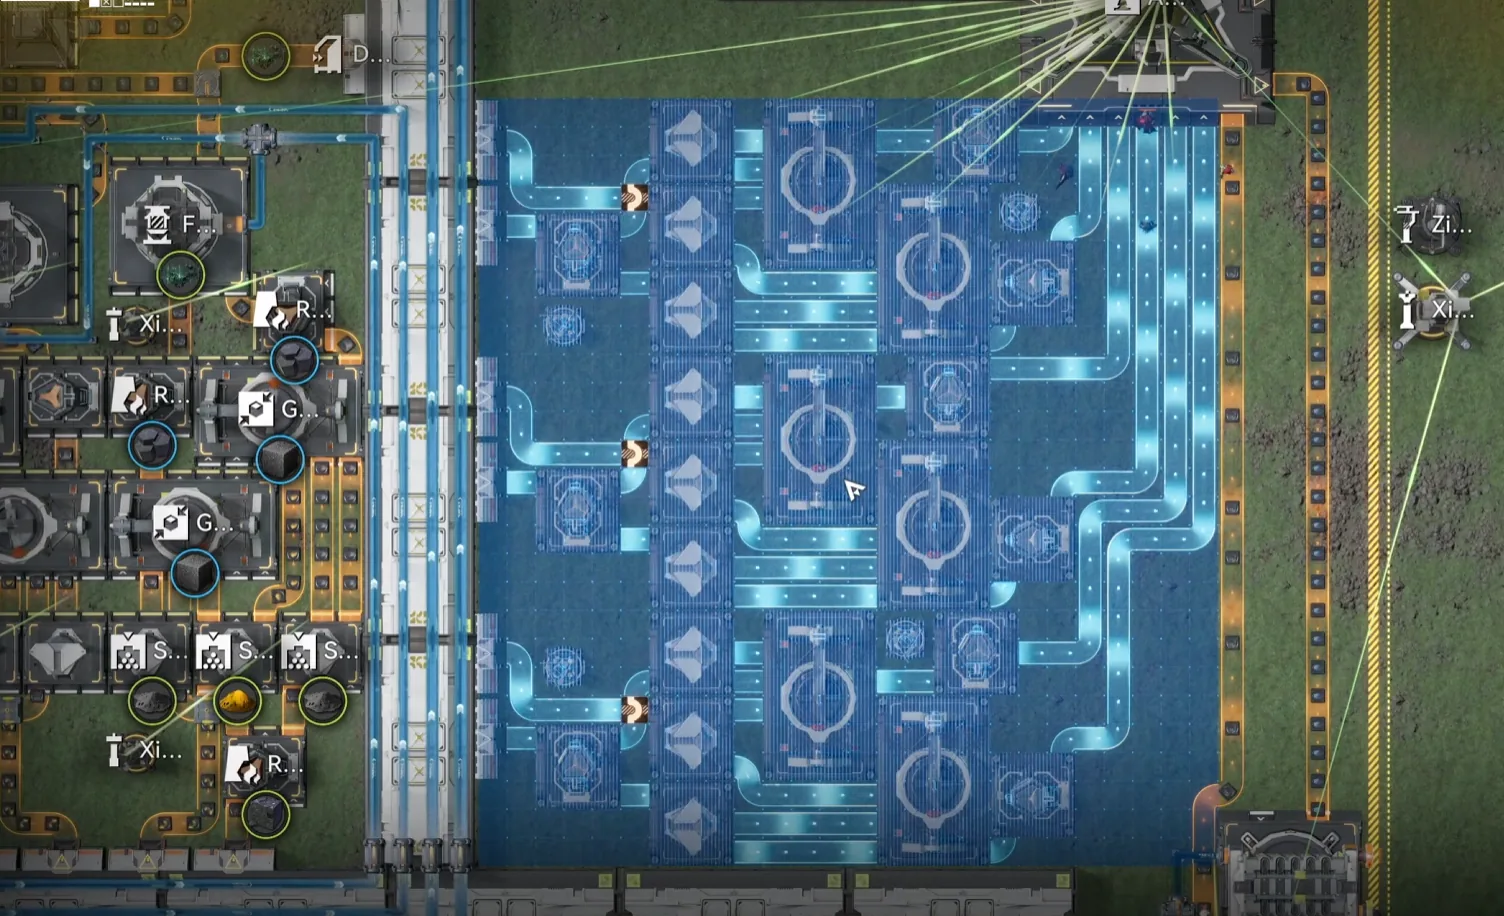
SC Wuling Battery (left), Heavy Xiranite (right) of Core AIC
Once the pumps are wired and the depot outputs are set, the Marker Stone Sub AIC will start producing SC Wuling Batteries within a few minutes. As soon as the battery line is climbing in the depot, delete the three temporary thermal banks from earlier — the base is now self-powering, and leaving the banks in place just wastes construction slots. The pipe link to the Core AIC carries Heavy Xiranite over for use in the gear lines on the Core side.
Jingyu Valley Sub AIC
The Jingyu Valley Sub AIC handles crops and Yazhen Syringe A — the second-largest single revenue line on the base. Orient yourself so the lake is at the top and move the Core to the bottom right before importing. Deploy JV Bottom first, then JV Top on top of it. After both blueprints are placed, rotate the Core so the Ferrium Powder output flows into the depot, and confirm the seed machine and fluid pump counts before powering on.
The 1.2.2 JV layout uses a denser seed machine cluster than the Part 5 version did, made possible by Area Expansion 2 on the JV Sub AIC. The setup needs 10 Sandleaf seed machines (one stack of Sandleaf each) and 11 Yazhen seed machines (one stack of Yazhen each), plus 6 fluid pumps in the lake — up from four in 1.2.1. If you are migrating from Part 5, the old JV SubAIC (both Normal and AFK variants) is fully replaced by this new pair, so delete the old layout cleanly before importing.
| Blueprint | Asia Server Code | NA/EU Server Code |
|---|---|---|
| JV Top | EFO0101O35O5u7i29E179 | EFO016i1a42ee07oUO83e |
| JV Bottom | EFO01a6584543eA47oe5e | EFO014o5O1688E3aiE81A |
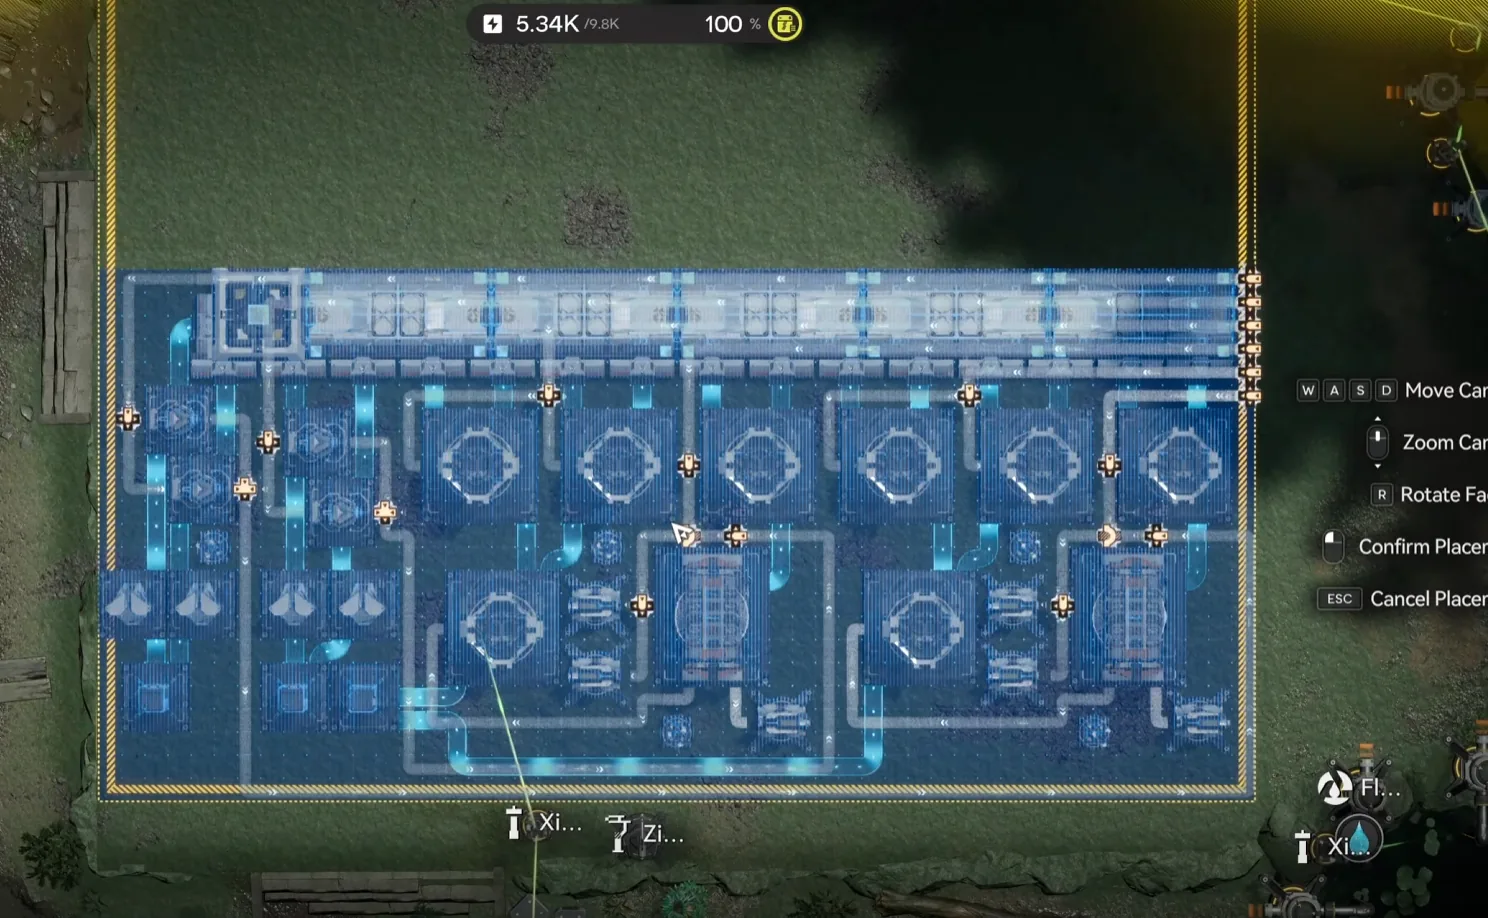
JV Top — seed machine cluster
JV Bottom — depot bus and fluid intake
The seed machine fill is the slowest part of the JV deployment. Walk to each Sandleaf seed machine and drop one stack of Sandleaf in; do the same with one stack of Yazhen in each of the eleven Yazhen seed machines. The depot bus will not auto-fill these initial stacks the way the old Part 5 AFK variant did, but you only need to do it once — after that the seed machines self-cycle indefinitely on the crops they re-grow. Connect the six fluid pumps in the lake before powering up, then rotate the Core for the Ferrium Powder routing.
6× Fluid Pumps in the Jingyu Valley lake
Once JV is producing crops and the Core is routing Ferrium Powder cleanly, all three AICs are live and the production loop is closed. Give the depots roughly thirty to sixty minutes to stabilise before reading the production graphs — the first few cycles will look uneven while the seed machines and gear lines fill their internal buffers.
Upgrading from 1.2.1
If you already have the Part 5 (1.2.1) base running, you do not need to rebuild from scratch. Wuling 1 through 6 on the Core AIC stay exactly where they are, and the upgrade path is mostly a redeployment of the two Sub AICs plus the addition of Wuling 7 on the Core. The full migration usually takes about an hour of in-game work, most of which is the seed machine refill at Jingyu Valley.
On the Core AIC, keep Wuling 1 through 6 untouched. Deploy only the new Wuling 7 blueprint in the top-right corner where the original layout left empty space, match its belts into the existing Core, and add one extra fluid pump so the total reaches seven fluid pumps plus the fluid supply unit. Place a relay tower near the bridge if you do not already have one, since the longer belt runs in 1.2.2 will brown out without it.
On the Jingyu Valley side, delete the old Part 5 layout entirely — both the Normal and AFK variants. Deploy the 1.2.2 JV Bottom first, then JV Top, refill the ten Sandleaf and eleven Yazhen seed machines manually, and connect six fluid pumps in the lake instead of the old four-pump setup. On the Marker Stone side, bump the Sub AIC up to Area Expansion 2, add the depot bus section, then delete the old MS SubAIC blueprint and deploy the new MS Bottom and MS Top pair. Reset the outputs (SC Wuling Battery on the top-left, Heavy Xiranite on the top-right), connect six water pumps and three acid pumps with the fluid supply unit in the acid lake, and you are done.
Production & Profit Stats
After all three bases are running, give the production graphs roughly thirty to sixty minutes to stabilise before reading them. The Jingyu Valley seed machines need time to cycle through their first crop batches, and the Core's gear lines depend on outputs from MS and JV that take a few minutes to land. The headline number is that at the lowest profit configuration — with all three gear crafting lines active — the base produces approximately 59,880 bills per hour, comfortably clearing the 59,688 bills/hour outpost demand for that mode.
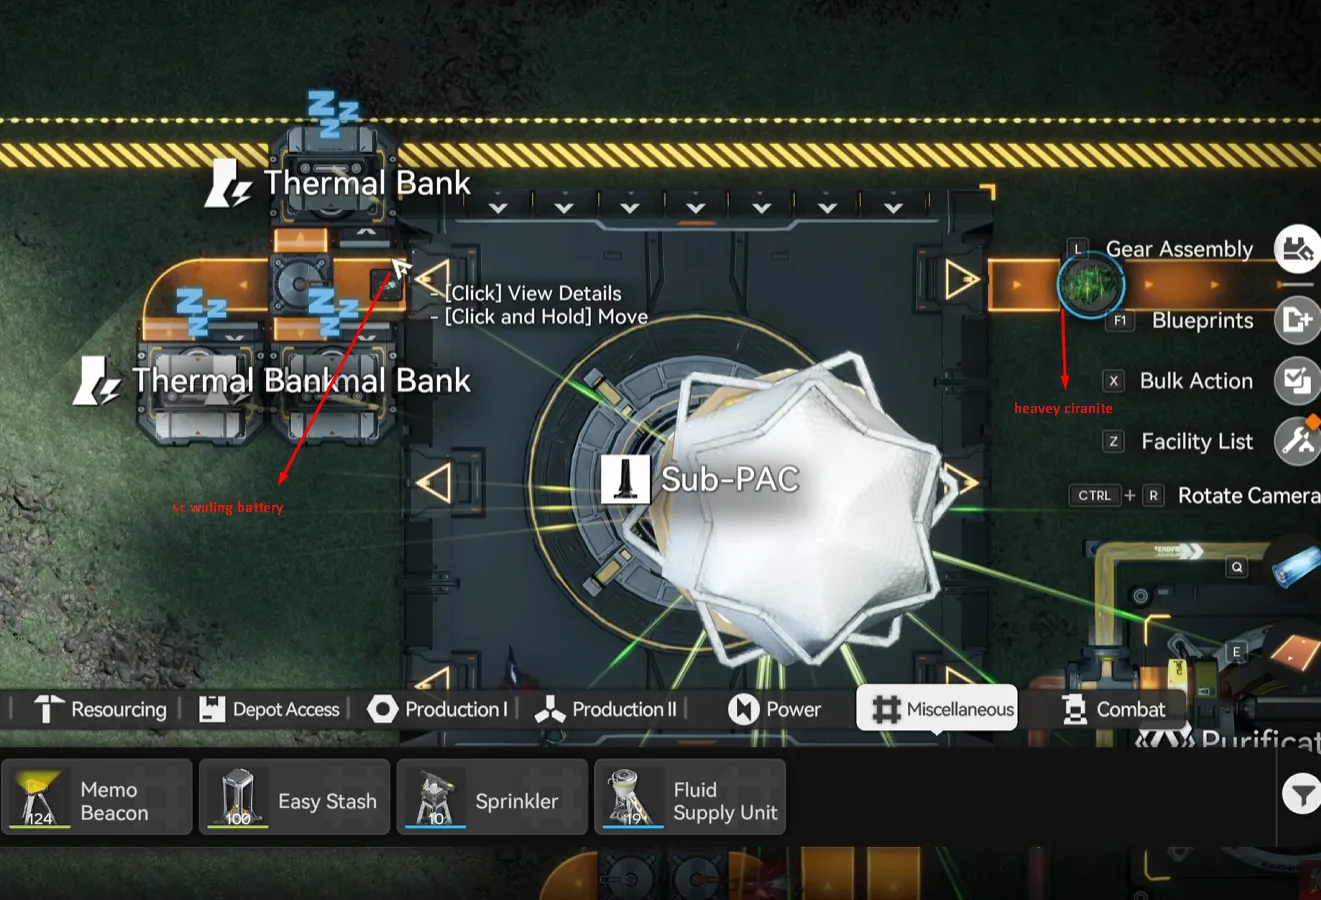
The four main revenue lines that drive that figure are SC Wuling Battery, Heavy Xiranite, Yazhen Syringe A, and Hetonite Parts. SC Wuling Battery comes out of both the Core AIC (Wuling 1–7 stack) and the Marker Stone Sub AIC, which is why the temporary thermal banks are only needed during deployment — once both production sources are online, the base supplies its own power indefinitely. Heavy Xiranite is the Marker Stone's other primary output and feeds into the gear crafting lines on the Core's left side.
All three Gear Components — Xiranite Component, Cuprium Component, and Hetonite Component — are produced on switchable lines so you can toggle each off or set a target count. Hetonite Component is the most expensive of the three to run, and the recommended pattern is not to leave it producing 24/7; cap it at a low quantity and reset the cap whenever you need fresh gear for a specific operator. The built-in reactor on the Marker Stone side also produces Liquid Heavy that can fill a Fluid Tank for exploration use, which is handy for clearing blight zones during open-world runs.
| Metric | Value |
|---|---|
| Outpost demand (all gear lines active) | 59,688 bills/hr |
| Base production (lowest setting) | ~59,880 bills/hr |
| Surplus | ~192 bills/hr |
If you want to widen the surplus, turn off one or more of the gear lines — every gear line you stop converts the underlying materials into raw selling profit instead of finished gear pieces. The right call depends on whether you currently need gear sets or pure bills; for most weekly patterns, leaving Xiranite and Cuprium Components running while toggling Hetonite Component off until you need it is the cleanest balance.
Use Metastorage Transfer to feed the base from Valley IV. Metastorage pulls from production rather than from the vault, so your stockpile is preserved — the base never drains items you have already deposited. If you have not set up Metastorage yet, the procedure is documented in Part 5's Metastorage section and applies identically to the 1.2.2 base.
Maintenance & Tips
The 1.2.2 base is designed to handle most routine clogging scenarios without intervention, but the depot sell order still matters. Sell Yazhen Syringe A first — it feeds the rest of the production chain and bottlenecks every downstream output if it stays clogged. Sell Heavy Xiranite parts second, because they clog the depot faster than the other goods at this base's throughput. Following that order keeps the entire production graph moving; selling SC Wuling Batteries first feels intuitive but tends to back up the upstream lines instead.
The base is self-regulating at its default settings, which means it intentionally pauses certain machines when downstream depots fill up. Do not heavily modify the layout unless you understand the flow. The most common breakage from "improvements" is removing one of the self-throttling stashes or rewiring a splitter, which then causes the entire chain to either back up or starve. If you want to add side production, the cleanest pattern is to leave the main layout intact and use the spare AIC space for a small standalone factory from the Blueprint Curation hub.
A couple of recurring gotchas worth keeping in mind. Server compatibility: blueprint codes are region-locked, period. NA/EU codes will not work on Asia servers and vice versa, so verify your region before pasting. Power sizing: keep two thermal banks (6.6k power) if your turrets are battery-powered, or three banks (7.7k power) if you have higher draw — but remember these are temporary scaffolding during deployment, not a permanent fixture. Code typos: if you are typing codes by hand, the most common error is confusing capital O with the digit 0; use the copy buttons on every code in this guide to eliminate that error class entirely.
Frequently Asked Questions
That is the full Wuling 1.2.2 Test Area Mega Base deployment — three AICs, five new blueprints, six reused Wuling pieces from Part 5, three temporary thermal banks for the deployment window, and roughly 59,880 bills per hour even with every gear line active. If you have not built the upstream Valley IV pipeline yet, work through Endgame Blueprints Part 1 first; for the 1.2.1 base this guide builds on, see Part 5. The event-only factories from Part 6 and Part 7 still slot in cleanly alongside this base, and the Blueprint Curation hub indexes every working factory by purpose for anything else.

Sponsored. We may earn a commission at no extra cost to you.
