
EXTERNAL DETONATION GUIDE
External Detonation is the Delver of the Cryptic Protocol Space that catches most players completely off-guard on their first run — not because the puzzle is hard, but because the solution leans on a movement-kit mechanic that the rest of Talos-II almost never asks you to use. The whole challenge boils down to a single throw: find the gap between a row of bars, lob a grenade through it, and let the explosion on the other side trip a switch you cannot otherwise reach. Players who do not think to use the grenade end up walking the same room three or four times looking for a path that does not exist.
This guide walks the full Protocol Space in order, from the starting-area pickups to the grenade-throw setup and the final reward chests behind the bars. Every detail is tuned for the live Delver of the Cryptic build, where External Detonation is a permanent Protocol Space rather than an event-only room. The total clear time once you understand the mechanic is roughly five minutes, and the entire puzzle is solvable on the first attempt as long as the throw arc lands clean.
If you are still working through the Delver of the Cryptic update, the Delver of the Cryptic hub indexes every puzzle room and explains how External Detonation sits inside the broader Protocol Spaces economy. The other puzzle Protocol Spaces in the same update — the rabbit-herding Long Ear Invitation and the code-input Industrial Labyrinth — each have their own dedicated walkthroughs.
What this guide does not cover: the combat Protocol Spaces in Delver of the Cryptic, the wider Protocol Pass progression, or general Talos-II open-world routing. External Detonation is short enough that the sections below focus tightly on the room itself: what you collect before the puzzle, how to throw the grenade, where the rewards land afterwards, and the small handful of mistakes that lead to a wasted attempt.
Quick Answer
To clear External Detonation, collect the chest in the starting area, then walk to the barred section of the room and look for the gap between the bars. Position yourself in front of that gap, lob a grenade through the opening, and let the explosion trip the switch on the far side. The bars open, the back area becomes accessible, and you collect the reward chests sitting behind them to finish the Protocol Space.
No combat is required, the run takes roughly five minutes once you have the throw angle, and the first-clear stack pays out Oroberyls, Credits, and upgrade materials through the standard Delver of the Cryptic reward channel. The whole puzzle is a single grenade throw — once it lands, the rest of the room opens up on its own.
What Is External Detonation?
External Detonation is a Protocol Space challenge introduced with Arknights Endfield's Delver of the Cryptic update and rolled into the permanent rotation rather than left as an event-only encounter. The room is divided into two zones: a small open starting area where you pick up an initial chest, and a closed-off back area sealed behind a row of metal bars. The switch that opens the bars sits on the far side, in plain sight but completely unreachable on foot.
The mechanic at the centre of the room is the grenade throw. Talos-II's grenades follow an arc, which means a well-aimed lob will pass through the gap between the bars and detonate on the far side. The explosion is what trips the switch — you are not shooting it, you are not hacking it, you are detonating a grenade in close enough proximity to set it off. The room is built specifically to teach this mechanic, which is why External Detonation reads as easy once you spot the gap but frustrating until you do.
Because the puzzle is single-throw, the difficulty does not scale and there is no skill ceiling worth talking about — the only meaningful question is whether the gap is obvious to you. The sections below walk the throw setup in detail, including the gotchas around stand position and arc angle that account for almost every failed first attempt.
Step 1 — Starting Area
Begin every run by clearing the starting area before you move toward the bars. The entrance to External Detonation drops you into a small open room with one chest sitting in plain view; collecting it now means you do not have to backtrack later, and it lets you confirm your inventory of grenades before committing to the throw. The chest contents are part of the run's first-clear stack, so leaving it unopened costs you reward currency on the way out.
Take a moment to verify you actually have grenades equipped. Talos-II uses a shared throwable inventory, and a few seconds spent confirming the grenade is available now will save you a longer walk back to a resupply later. If you ran the previous Protocol Space without restocking, this is the moment to fix that before you reach the bars.
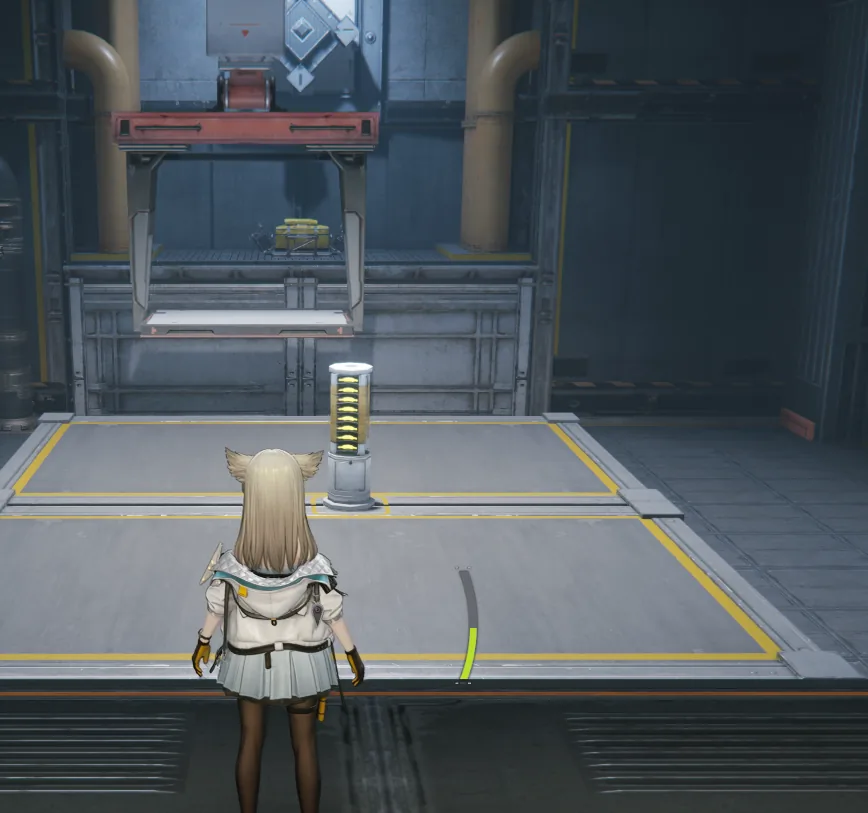
The starting area with initial rewards
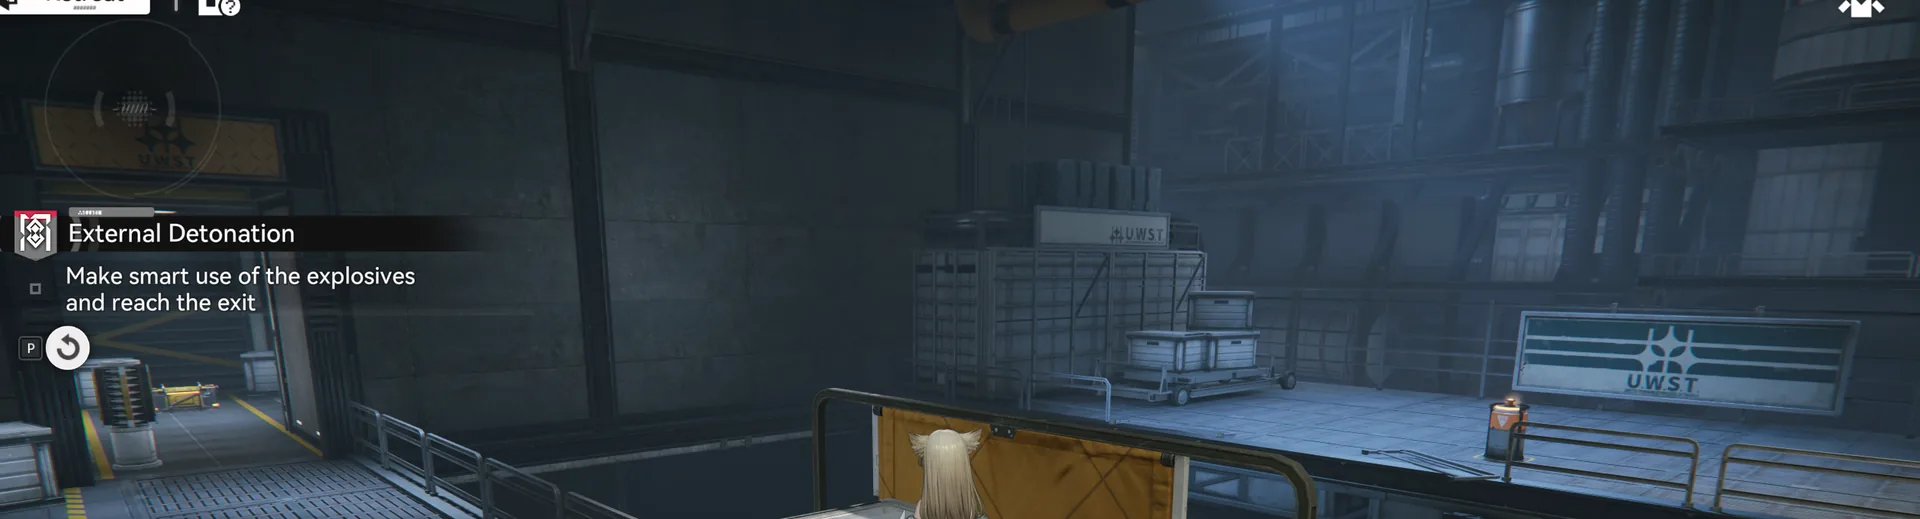
Once you have looted the starting chest, walk forward and follow the corridor until you reach the section of the room blocked off by metal bars. The transition from open starting area to barred chamber is the room's signal that the puzzle phase has begun. Do not try to find a route around the bars — there isn't one, and the time spent walking the walls is time that the grenade throw will solve in seconds.
Step 2 — Grenade Solution: Lob Through The Bars
The barred chamber is the heart of External Detonation. The switch that opens the bars is mounted on the far wall, visible from your side of the bars but completely out of reach. The bars themselves run floor to ceiling, with one deliberate gap between them — that gap is the entire puzzle. Spotting it is the only intellectual lift the room asks of you; once you have, the throw is mechanical.
Stand directly in front of the gap, not off to the side. The grenade throw arc is forgiving in distance but unforgiving in lateral angle: a throw from an off-centre position will clip the bars and bounce back at your feet, which both wastes the grenade and resets the position you need to set up from. Square yourself up to the gap before pulling the throw input.
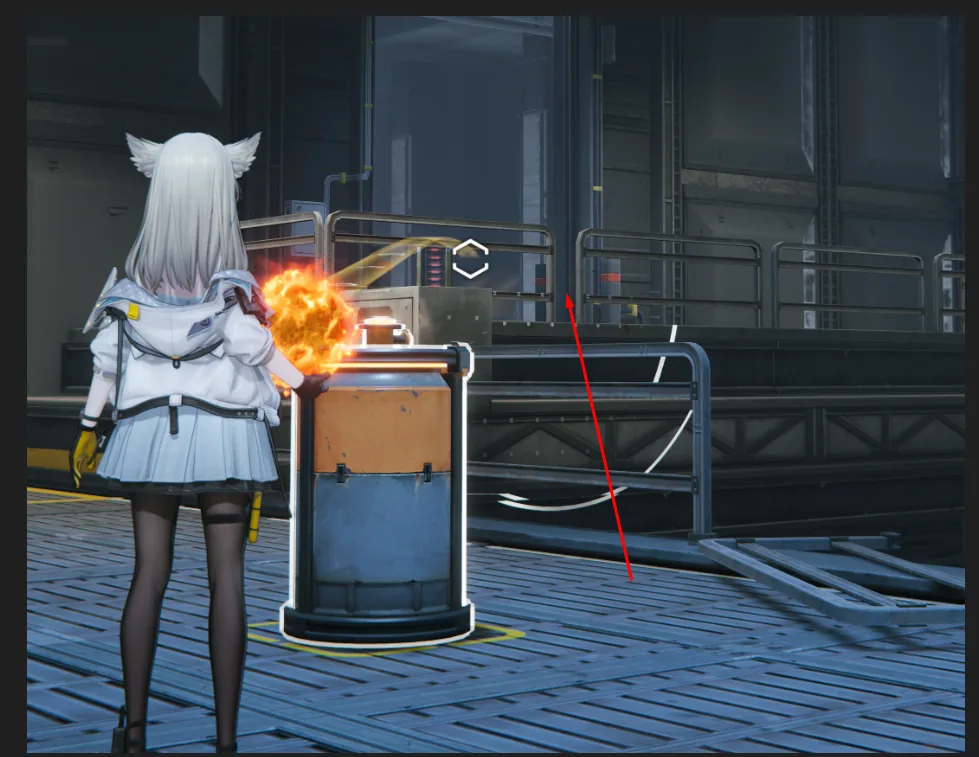
Find the gap between the bars and lob a grenade through to trigger the switch
Lob the grenade through the gap. The grenade should clear the opening, land on the far side near the switch, and detonate within range to trip it. You do not need a perfect placement — the explosion radius is generous, so any landing within roughly switch-arm distance will do the job. Once the grenade goes off, the bars retract and the back area opens up.
If the first throw misses, the room does not punish you. Reposition, recheck the arc relative to the gap, and try again. The most common reason a throw fails is standing too close to the bars: when you are pressed right against them, the grenade arc clips the top of the bar frame instead of passing through the gap. A short step backward usually fixes that without any change to your throw aim.
Step 3 — Collect The Rewards
With the switch tripped and the bars open, the back area of External Detonation becomes accessible. Walk through and head for the visible reward chest on the far side first — that is the main payout, sitting where the puzzle deliberately gates it. The reward inside is part of the Protocol Space's first-clear stack, so opening it is the action that registers your completion.
Collect your rewards from the activated area
Before you head back to the exit, sweep the rest of the back area. External Detonation hides additional pickups scattered around the chamber the bars were guarding, and skipping the sweep means leaving small reward stacks on the floor. The pickups are not gated — once the bars are open you can collect everything in one pass — but they are easy to miss if you make a beeline for the main chest and turn around.
Rewards For First Clear
External Detonation pays out the standard Delver of the Cryptic Protocol Space stack on its first clear, which is the only run that returns the meaningful one-time payout. Repeat runs do not re-issue the first-clear chest, so the goal on your initial visit is to leave with everything the room is willing to give you. That means clearing the starting chest, the main chest behind the bars, and every secondary pickup in the back area before you leave.
The reward stack covers three categories: Oroberyls as the premium gacha currency used to recruit operators, Credits as the universal in-game currency for upgrades and outpost purchases, and an upgrade-material bundle containing items used for character and weapon progression. The exact counts match the Delver of the Cryptic Protocol Space tier, which is consistent across the puzzle rooms in this update.
Because the rewards are gated to the first clear, there is no farming loop attached to External Detonation specifically. If you are looking for a sustainable resource cycle, the Protocol Spaces overview covers the wider farm, and the Delver of the Cryptic hub lists every other first-clear puzzle in the update so you can knock the whole reward set out in a single session.
Common Mistakes and Tips
The most common first-attempt failure is failing to spot the gap between the bars at all. Players who are used to combat-Protocol-Space rooms scan for enemies and exits rather than for level geometry, and the gap reads as part of the bar pattern unless you are looking for it. The fix is to stop and study the bar line directly: the gap is deliberate, it is visible from your side, and once you have seen it you will not unsee it. Spending a few seconds in observation mode is the single best change you can make on a stuck run.
The second recurring mistake is standing too close to the bars when throwing. The grenade arc rises before it falls, which means a throw from point-blank range often clips the bar frame before the arc gets high enough to clear it. Step back a short distance — far enough that you can see both your character and the gap in the same shot — and the arc has room to crest cleanly through the opening. Throwing from too far away is rarely the failure case; throwing from too close is.
The third gotcha is assuming the puzzle requires a direct hit on the switch. It does not. The grenade triggers the switch through its explosion radius, so landing the grenade near the switch is sufficient — there is no precision-aim requirement on the throw itself. Players who overthink the aim and try to thread a perfect line frequently overshoot or short the throw, when a generous toss into the same general area would have worked the first time.
Frequently Asked Questions
Complete walkthrough for Arknights Endfield's External Detonation Protocol Space puzzle from Delver of the Cryptic. Learn how to use grenades to reach enclosed areas by lobbing them through gaps between bars. Includes detailed screenshots, step-by-step instructions, FAQ, and interactive checklist for this permanent Protocol Space challenge.
That is the full External Detonation walkthrough — one chest in the starting area, one grenade through the gap, and a back chamber's worth of pickups behind the bars. If you are still working through the rest of the update, the Delver of the Cryptic hub lists every sibling puzzle, and the Long Ear Invitation rabbit-herding room and Industrial Labyrinth code-input puzzle each have their own dedicated guides. For the broader resource loop these Protocol Spaces feed into, the Protocol Spaces overview is the next page to read.
